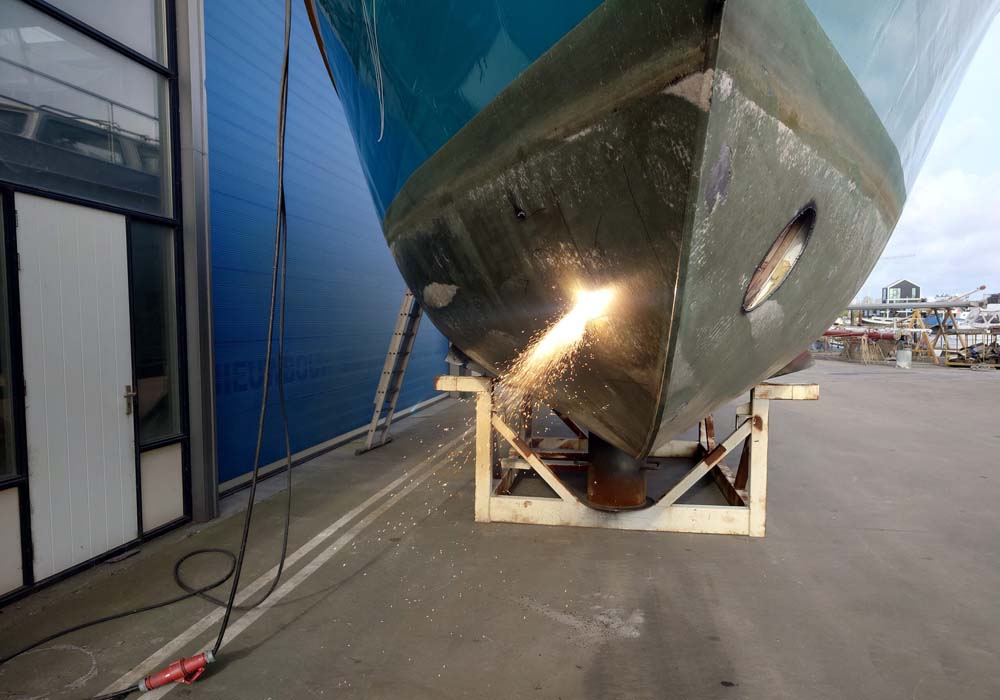
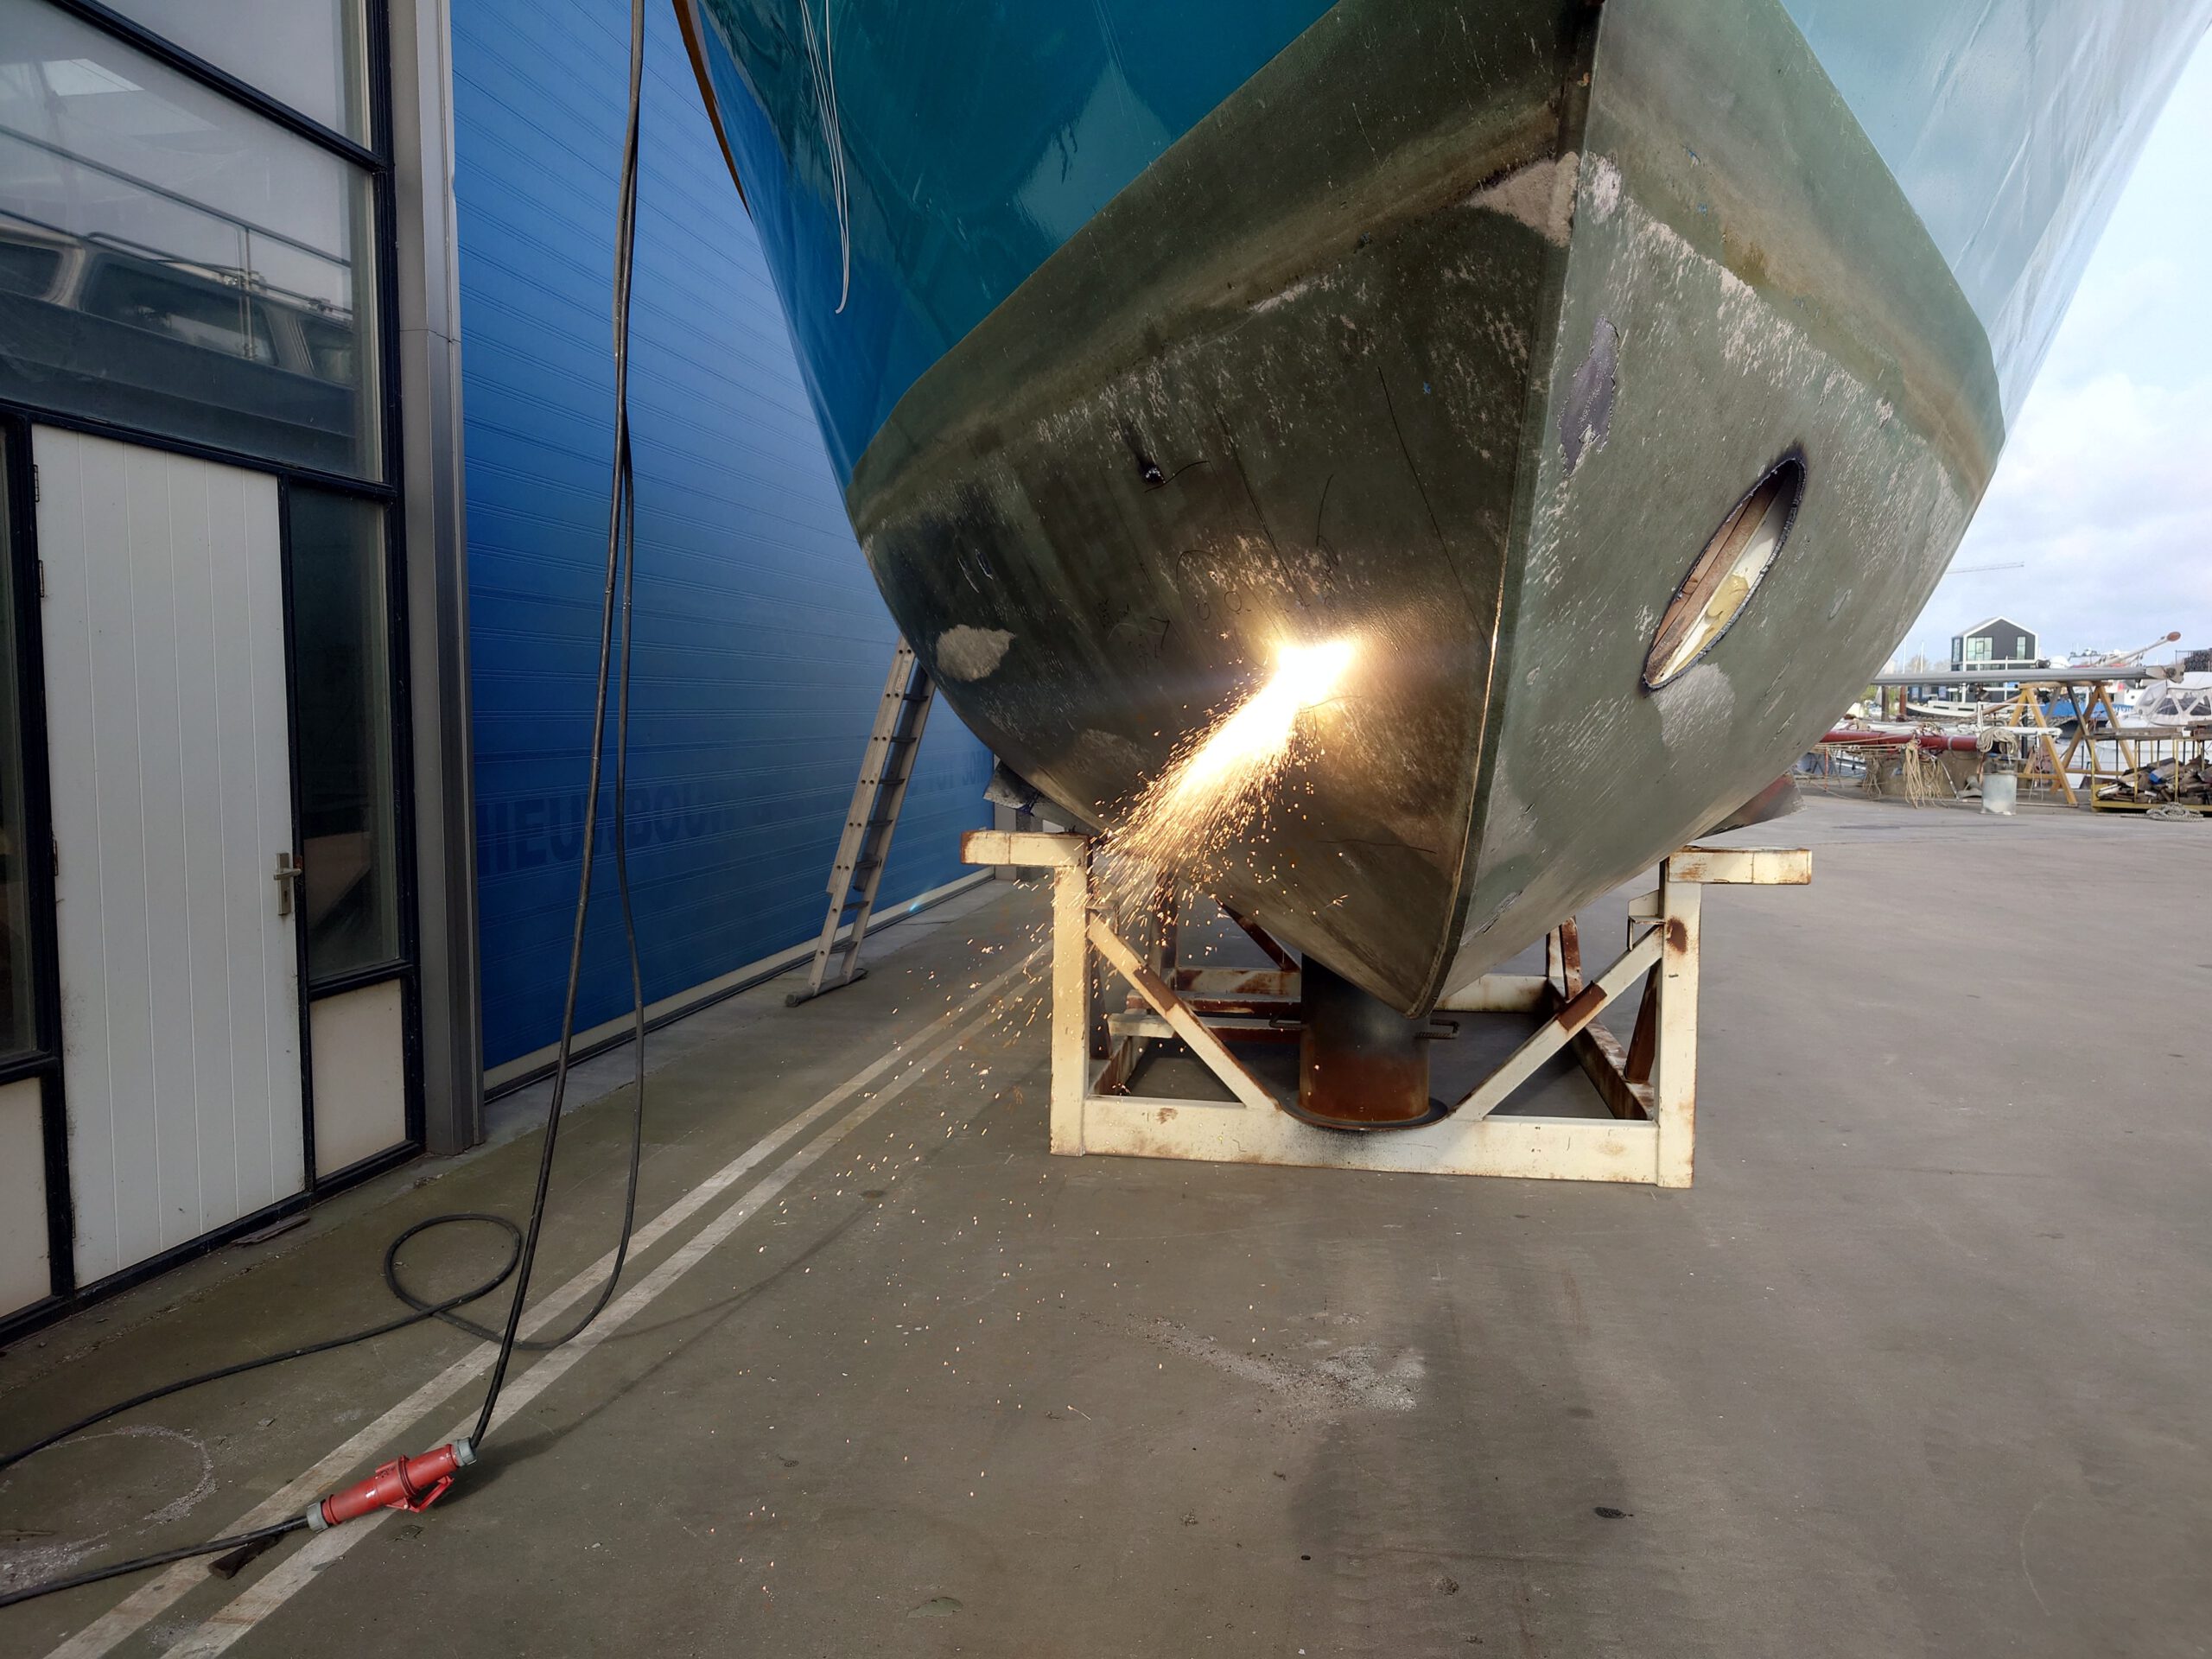
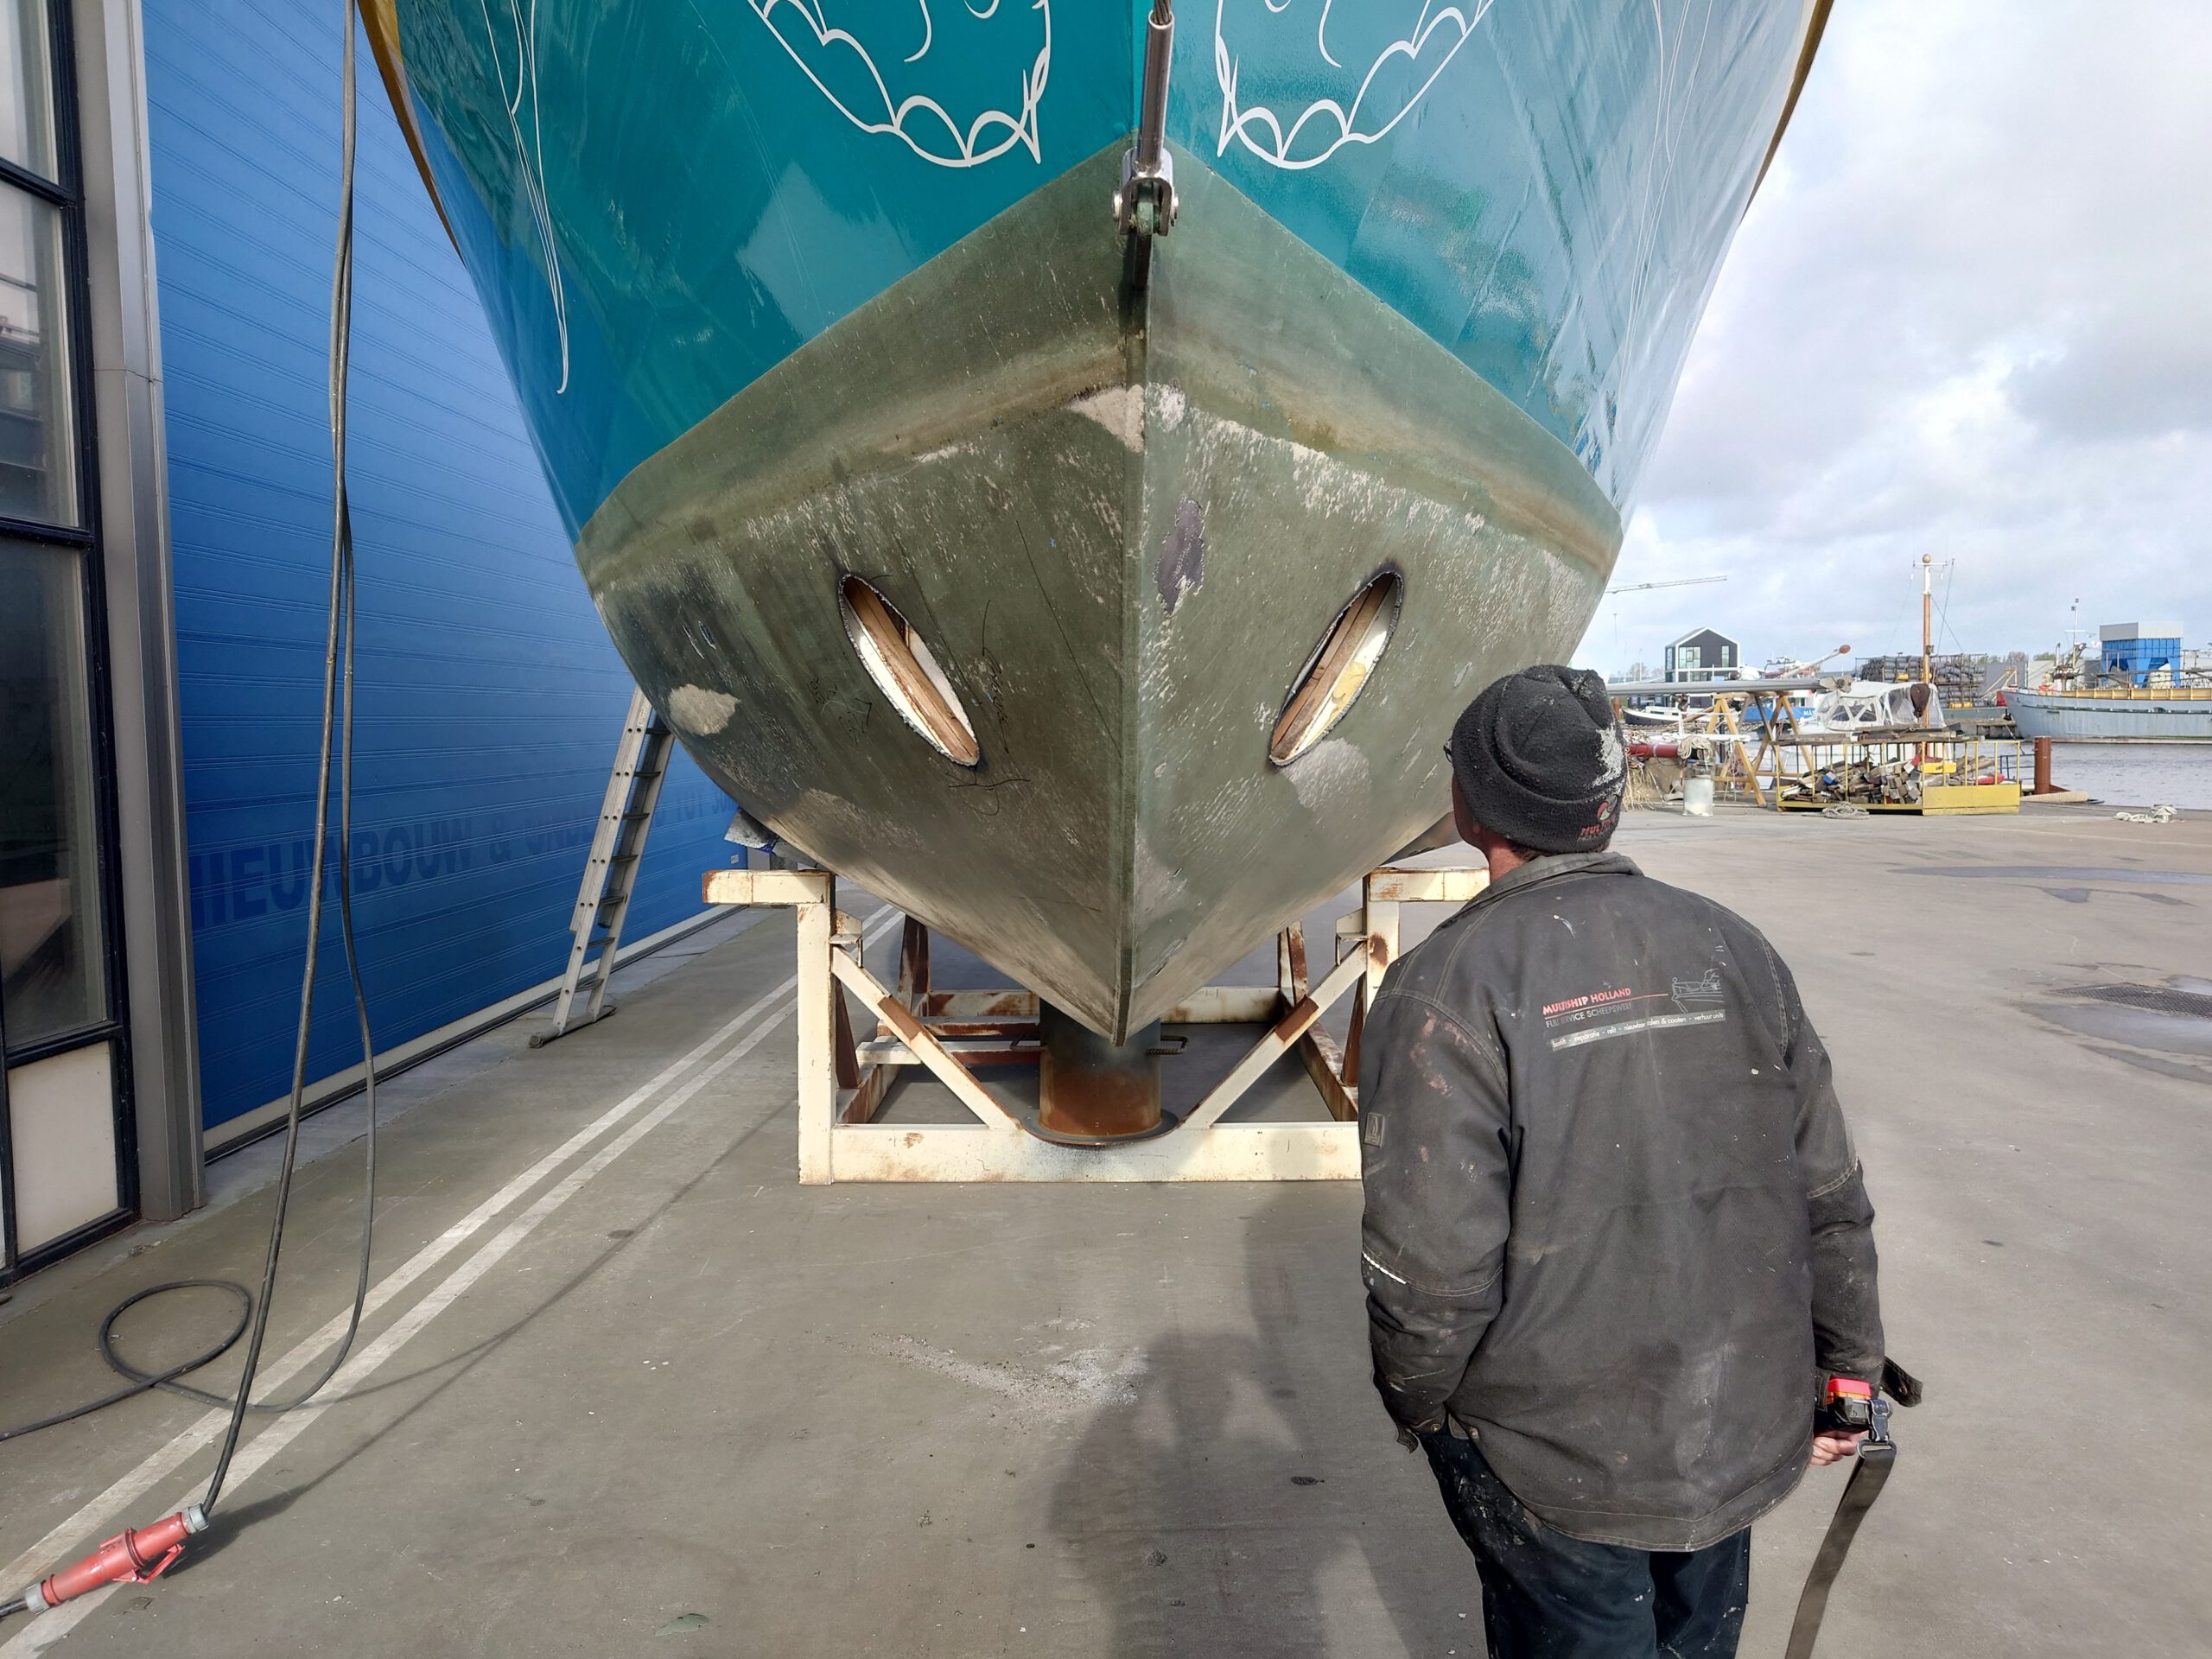
We prepare for the installation of the bow thruster, which involves cutting 2 HUGE holes in the bow of Dione’s hull, positioned below the waterline. What?!!! Really?
Highlights – the overview
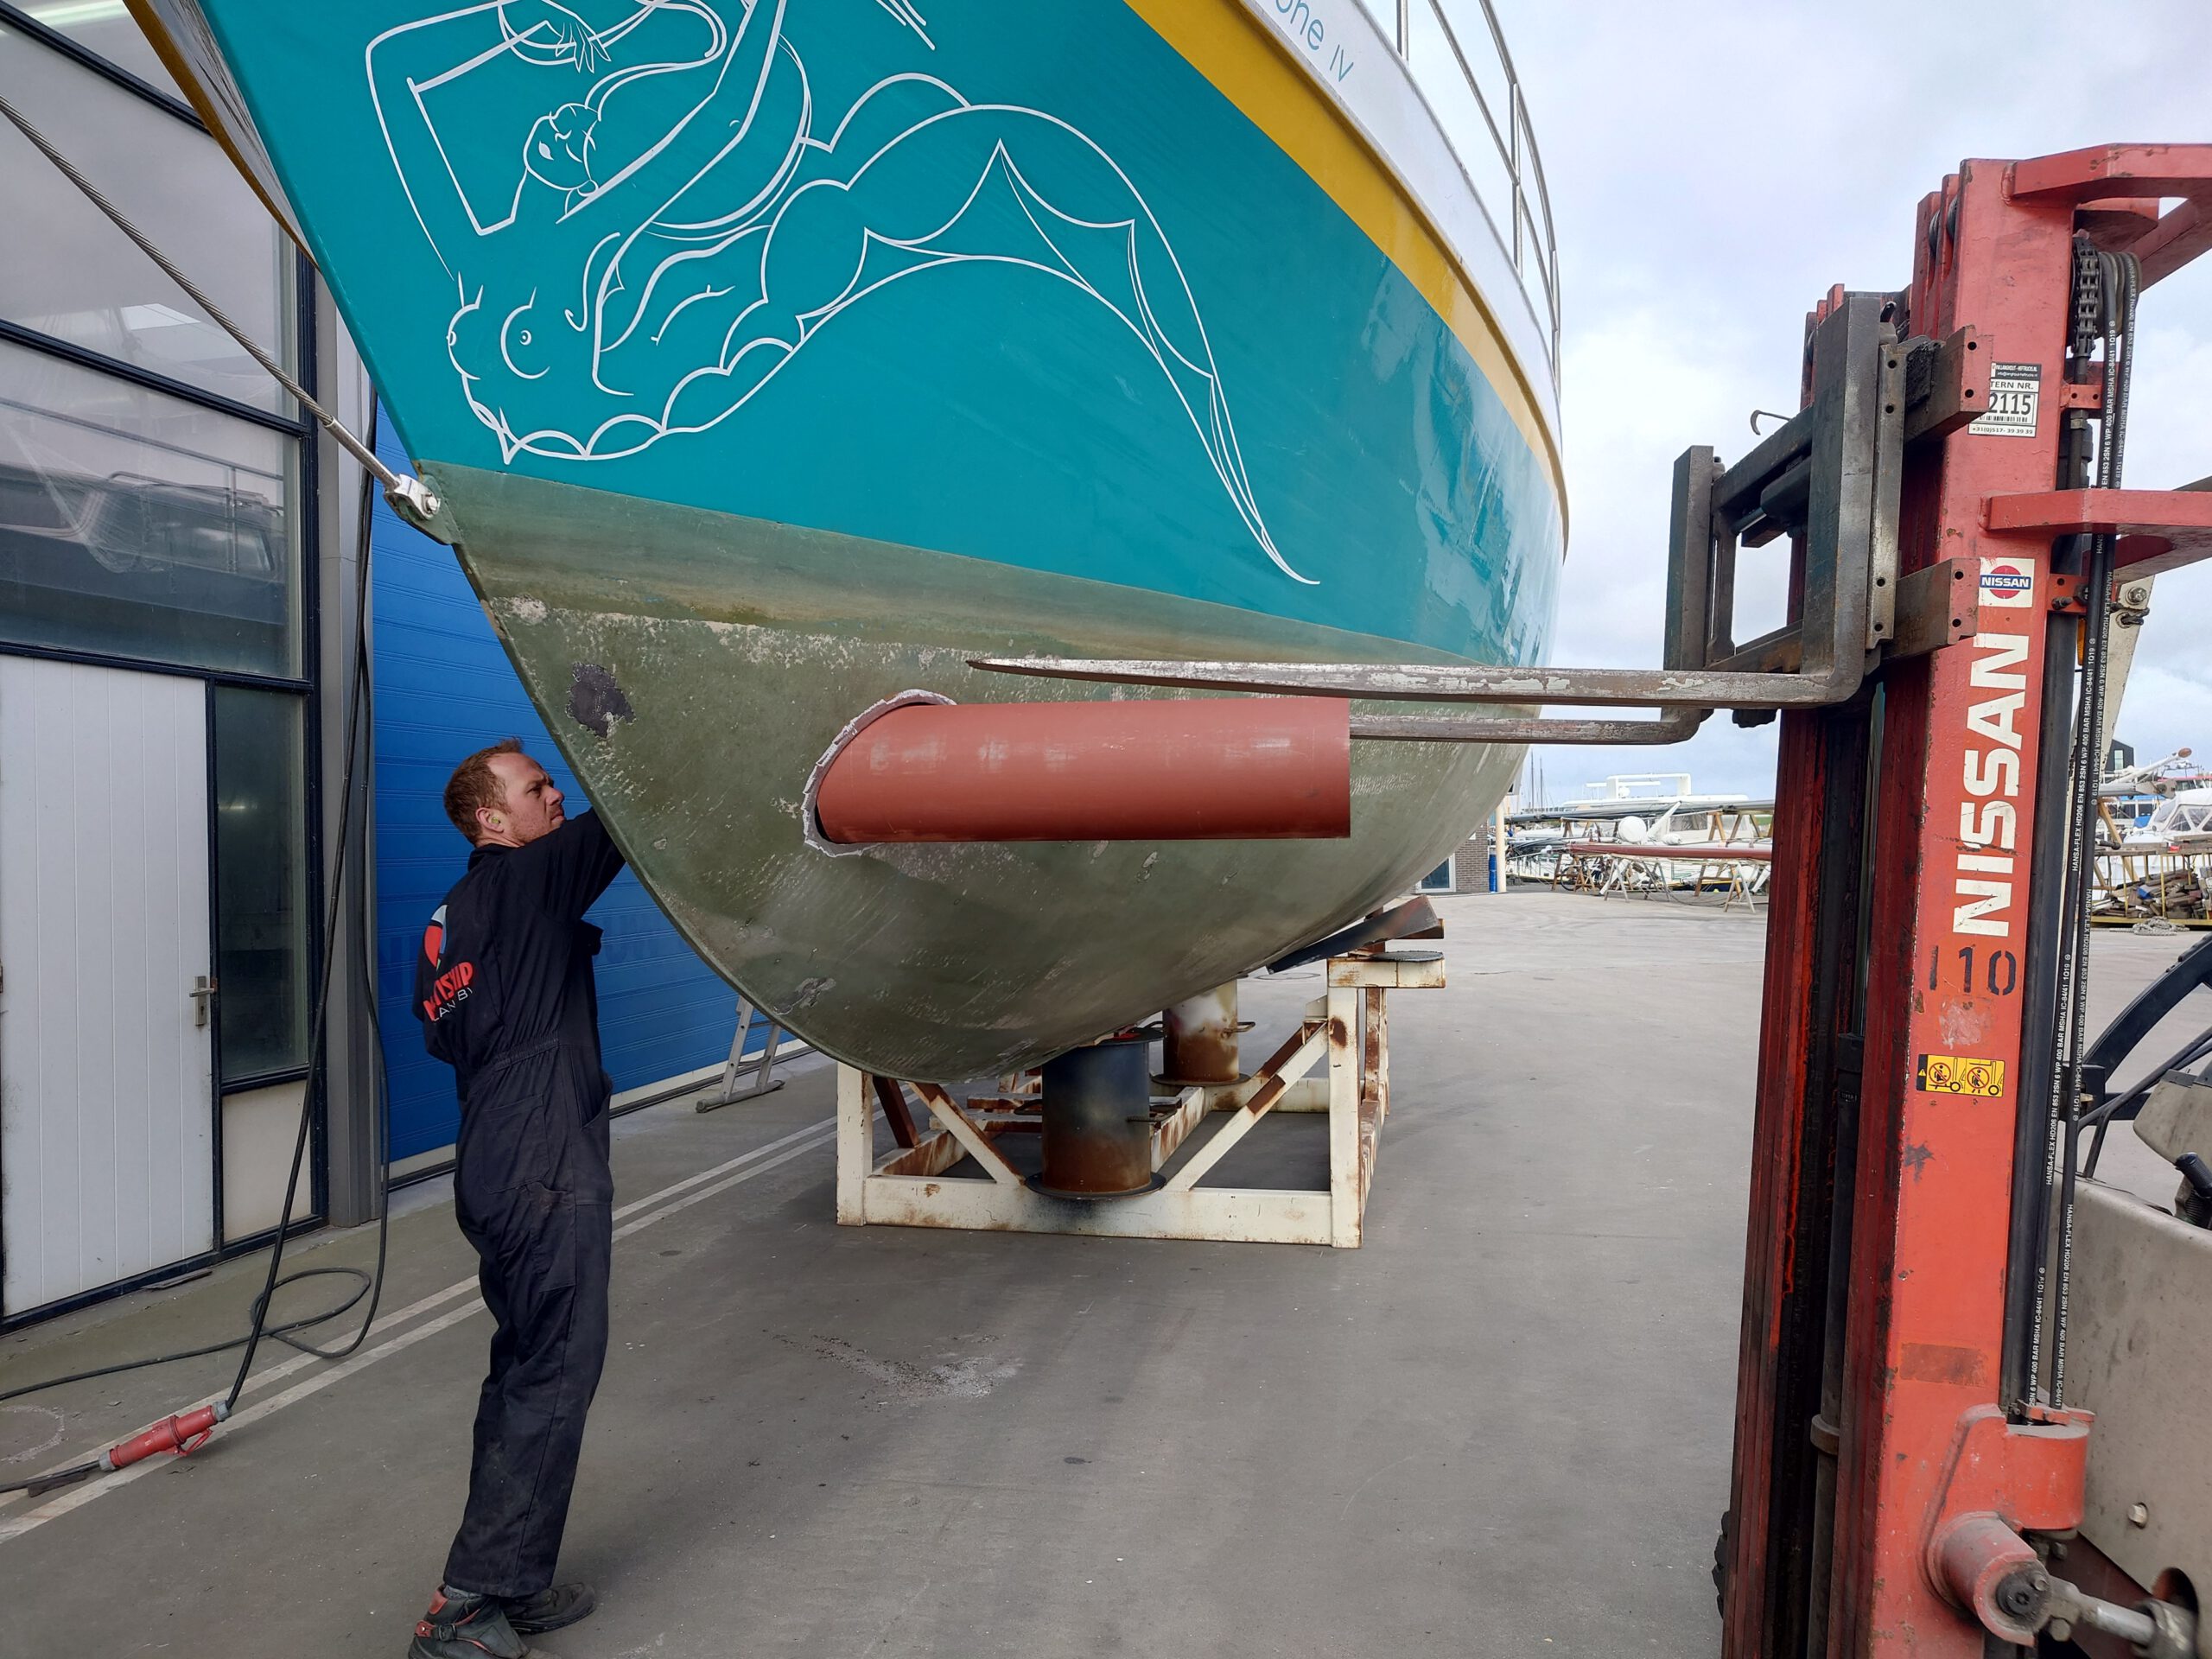
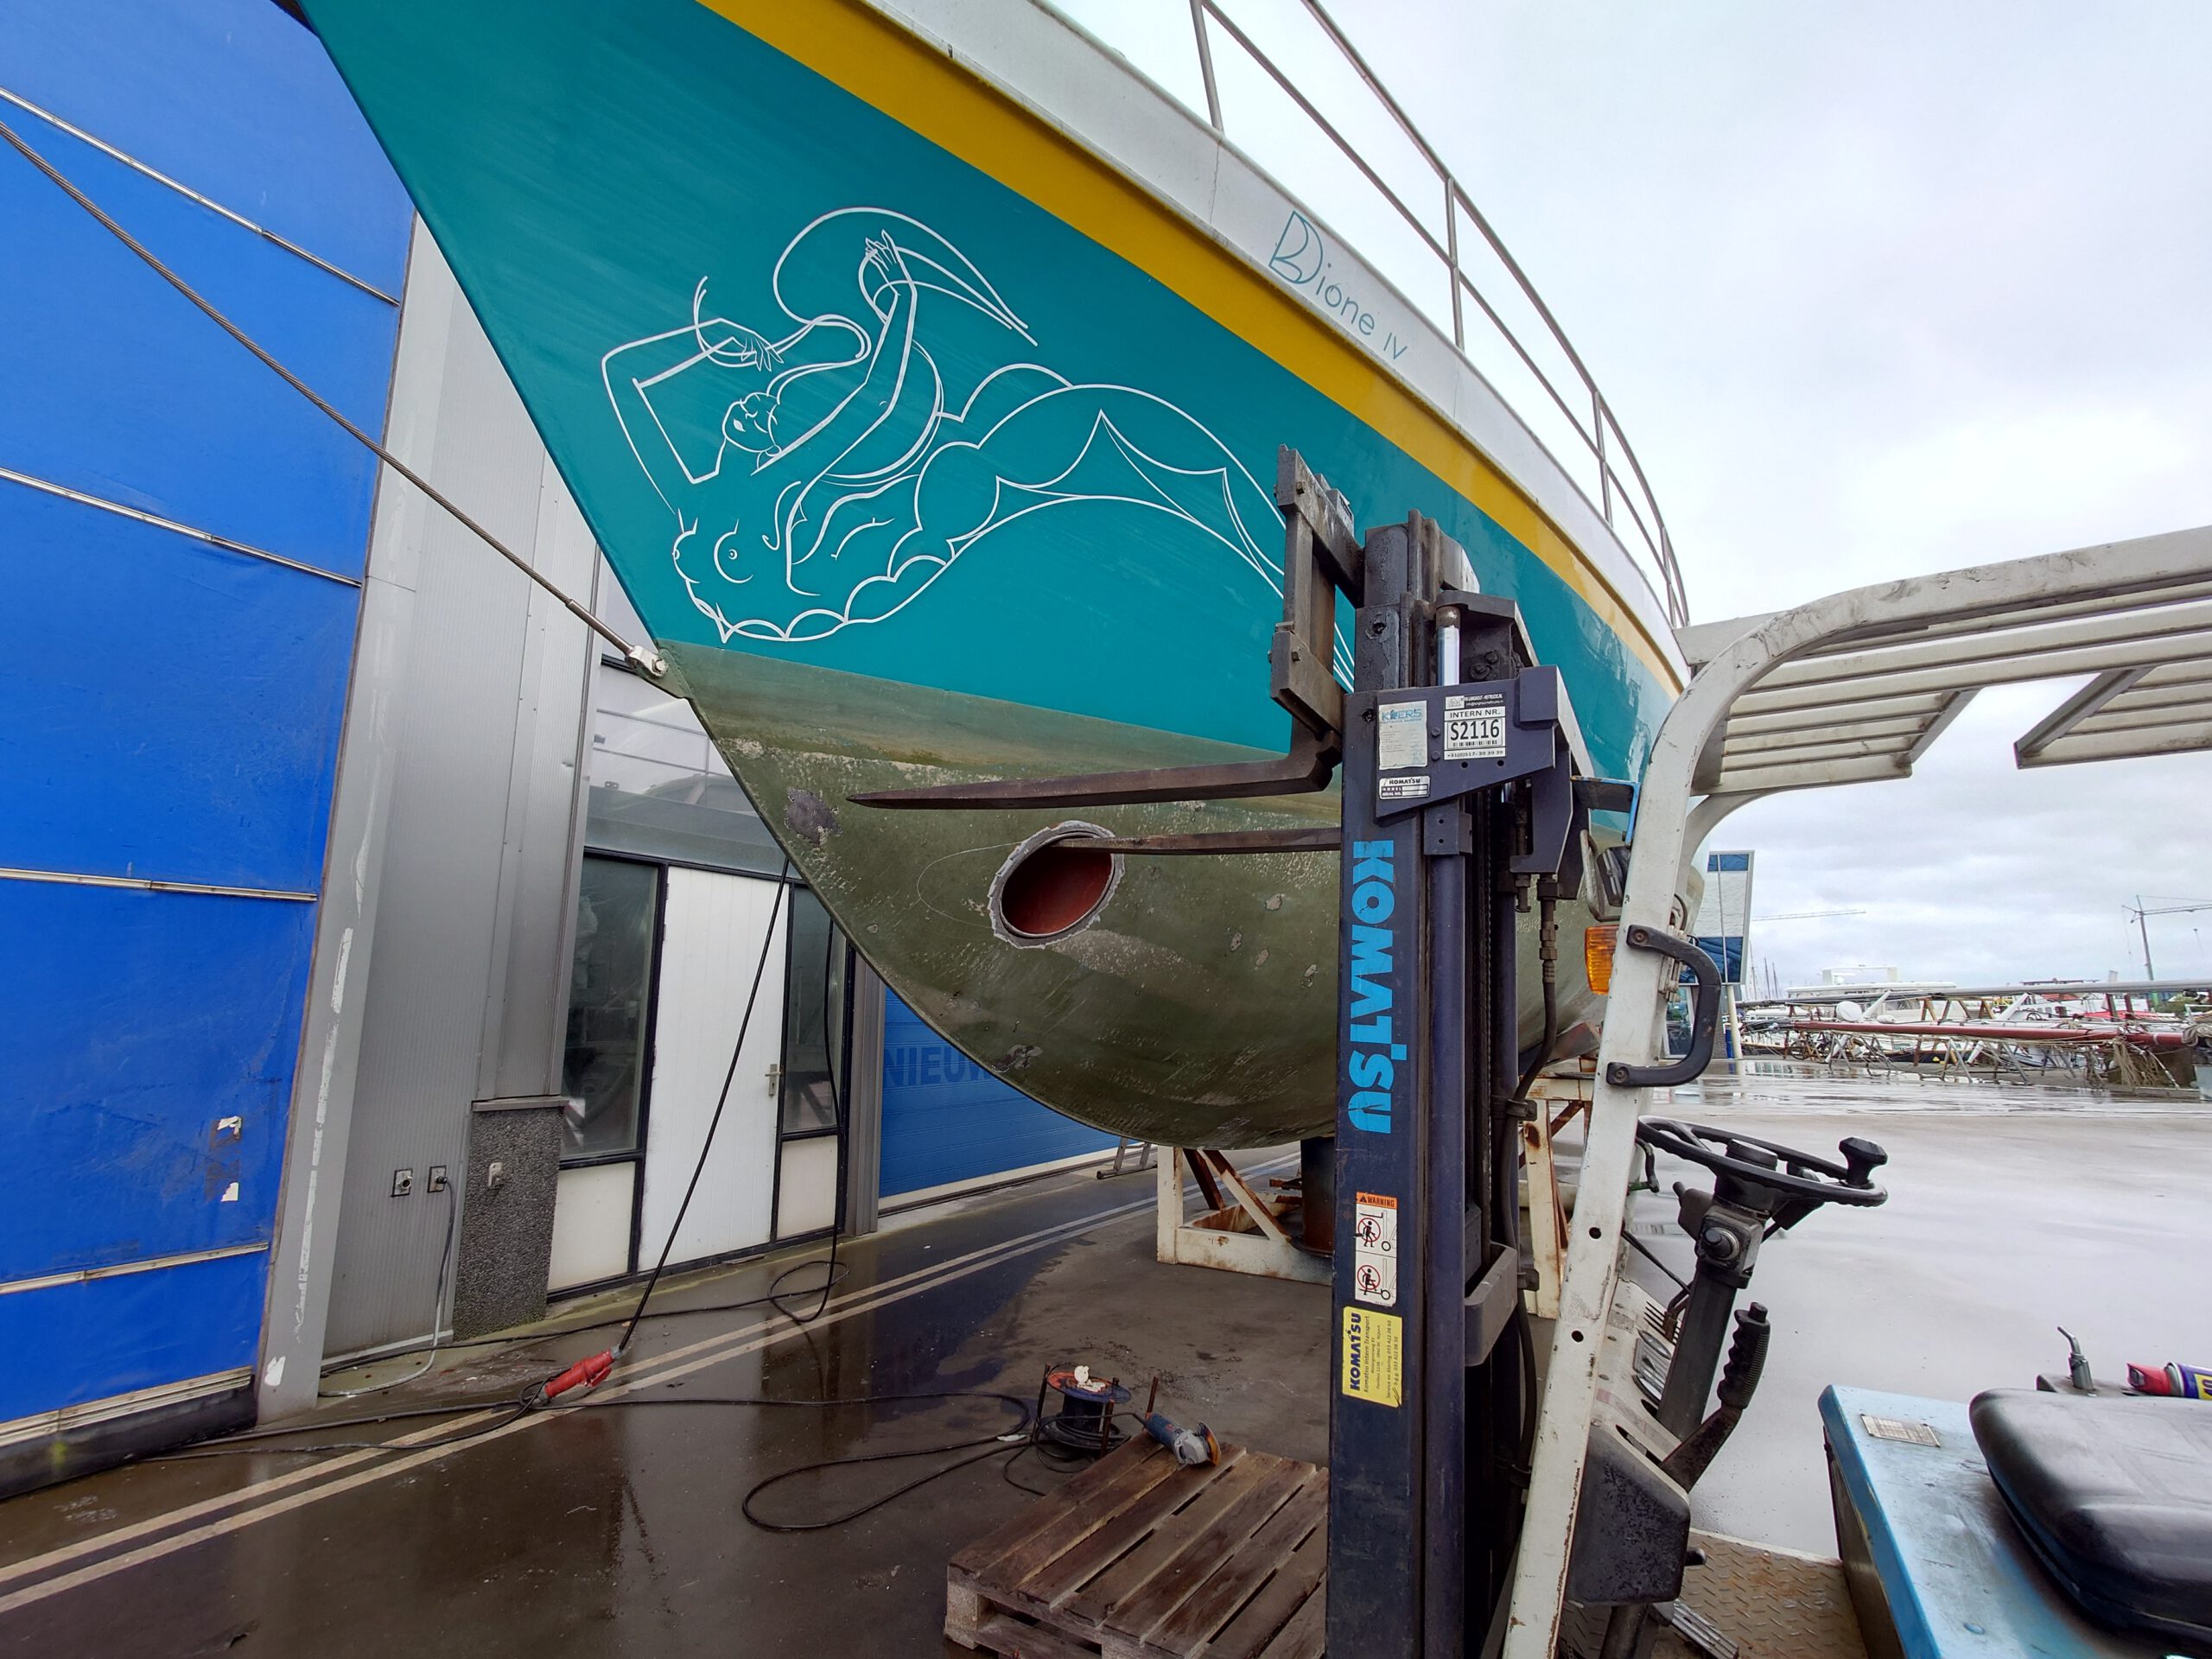
Installing a bow thruster where there previously was none involves, as mentioned, cutting large holes in the hull under the waterline, then inserting and welding an equally large tube through those holes. This creates a tunnel where water can flow and a small propeller can push the front of the boat to one side or the other. This helps to steer the boat when we move backwards, helps to steer more easily in tight spaces and is of great assistance in getting onto a dock or maneuvering in a small harbor.

see more photos of the process below…
Captain’s Log (T-77) – the complete story
While waiting for calm weather to weld outside or a place in the steel hall, we prepare for the installation of the bow thruster tunnel.
After sailing for 18 years with the Dione IV without bow thruster, we’ve decided to install one. During construction of the hull in 2005, we kept space for a bow thruster tunnel by moving the anchor chain locker one frame (= 40cm) more backwards than Dick Koopmans drawing showed. Dick wasn’t a supporter of bow thrusters… He said: I’m designing a beautiful streamlined hull and then they cut big holes in it! Well, in these 18 years I learned how to maneuver without the help of a bow thruster and I learned a number of tricks for mooring and sailing backward. But, there have been situations in which I really couldn’t manage and needed the help from people ashore, people on on other boats or the marina service dinghy to prevent damage…
The Dione IV is very wind-sensitive at her bow because of the double forestays that are placed far forward (on the bowsprit). So, already even a little bit of wind has a big effect during maneuvering. Not to speak of manoeuvres in strong winds!
Another issue is the fact that she hasn’t a fin keel. That make sailing backwards totally unpredictable. She responds hardly to the rudder during sailing backwards. A bow thruster is going to “steer” the bow and thus, pushing her stern in the direction we want.
Anyway, being more self-reliant is the main reason for installing a powerful bow thruster. And of course, it is a luxury!
So, let’s get to work:
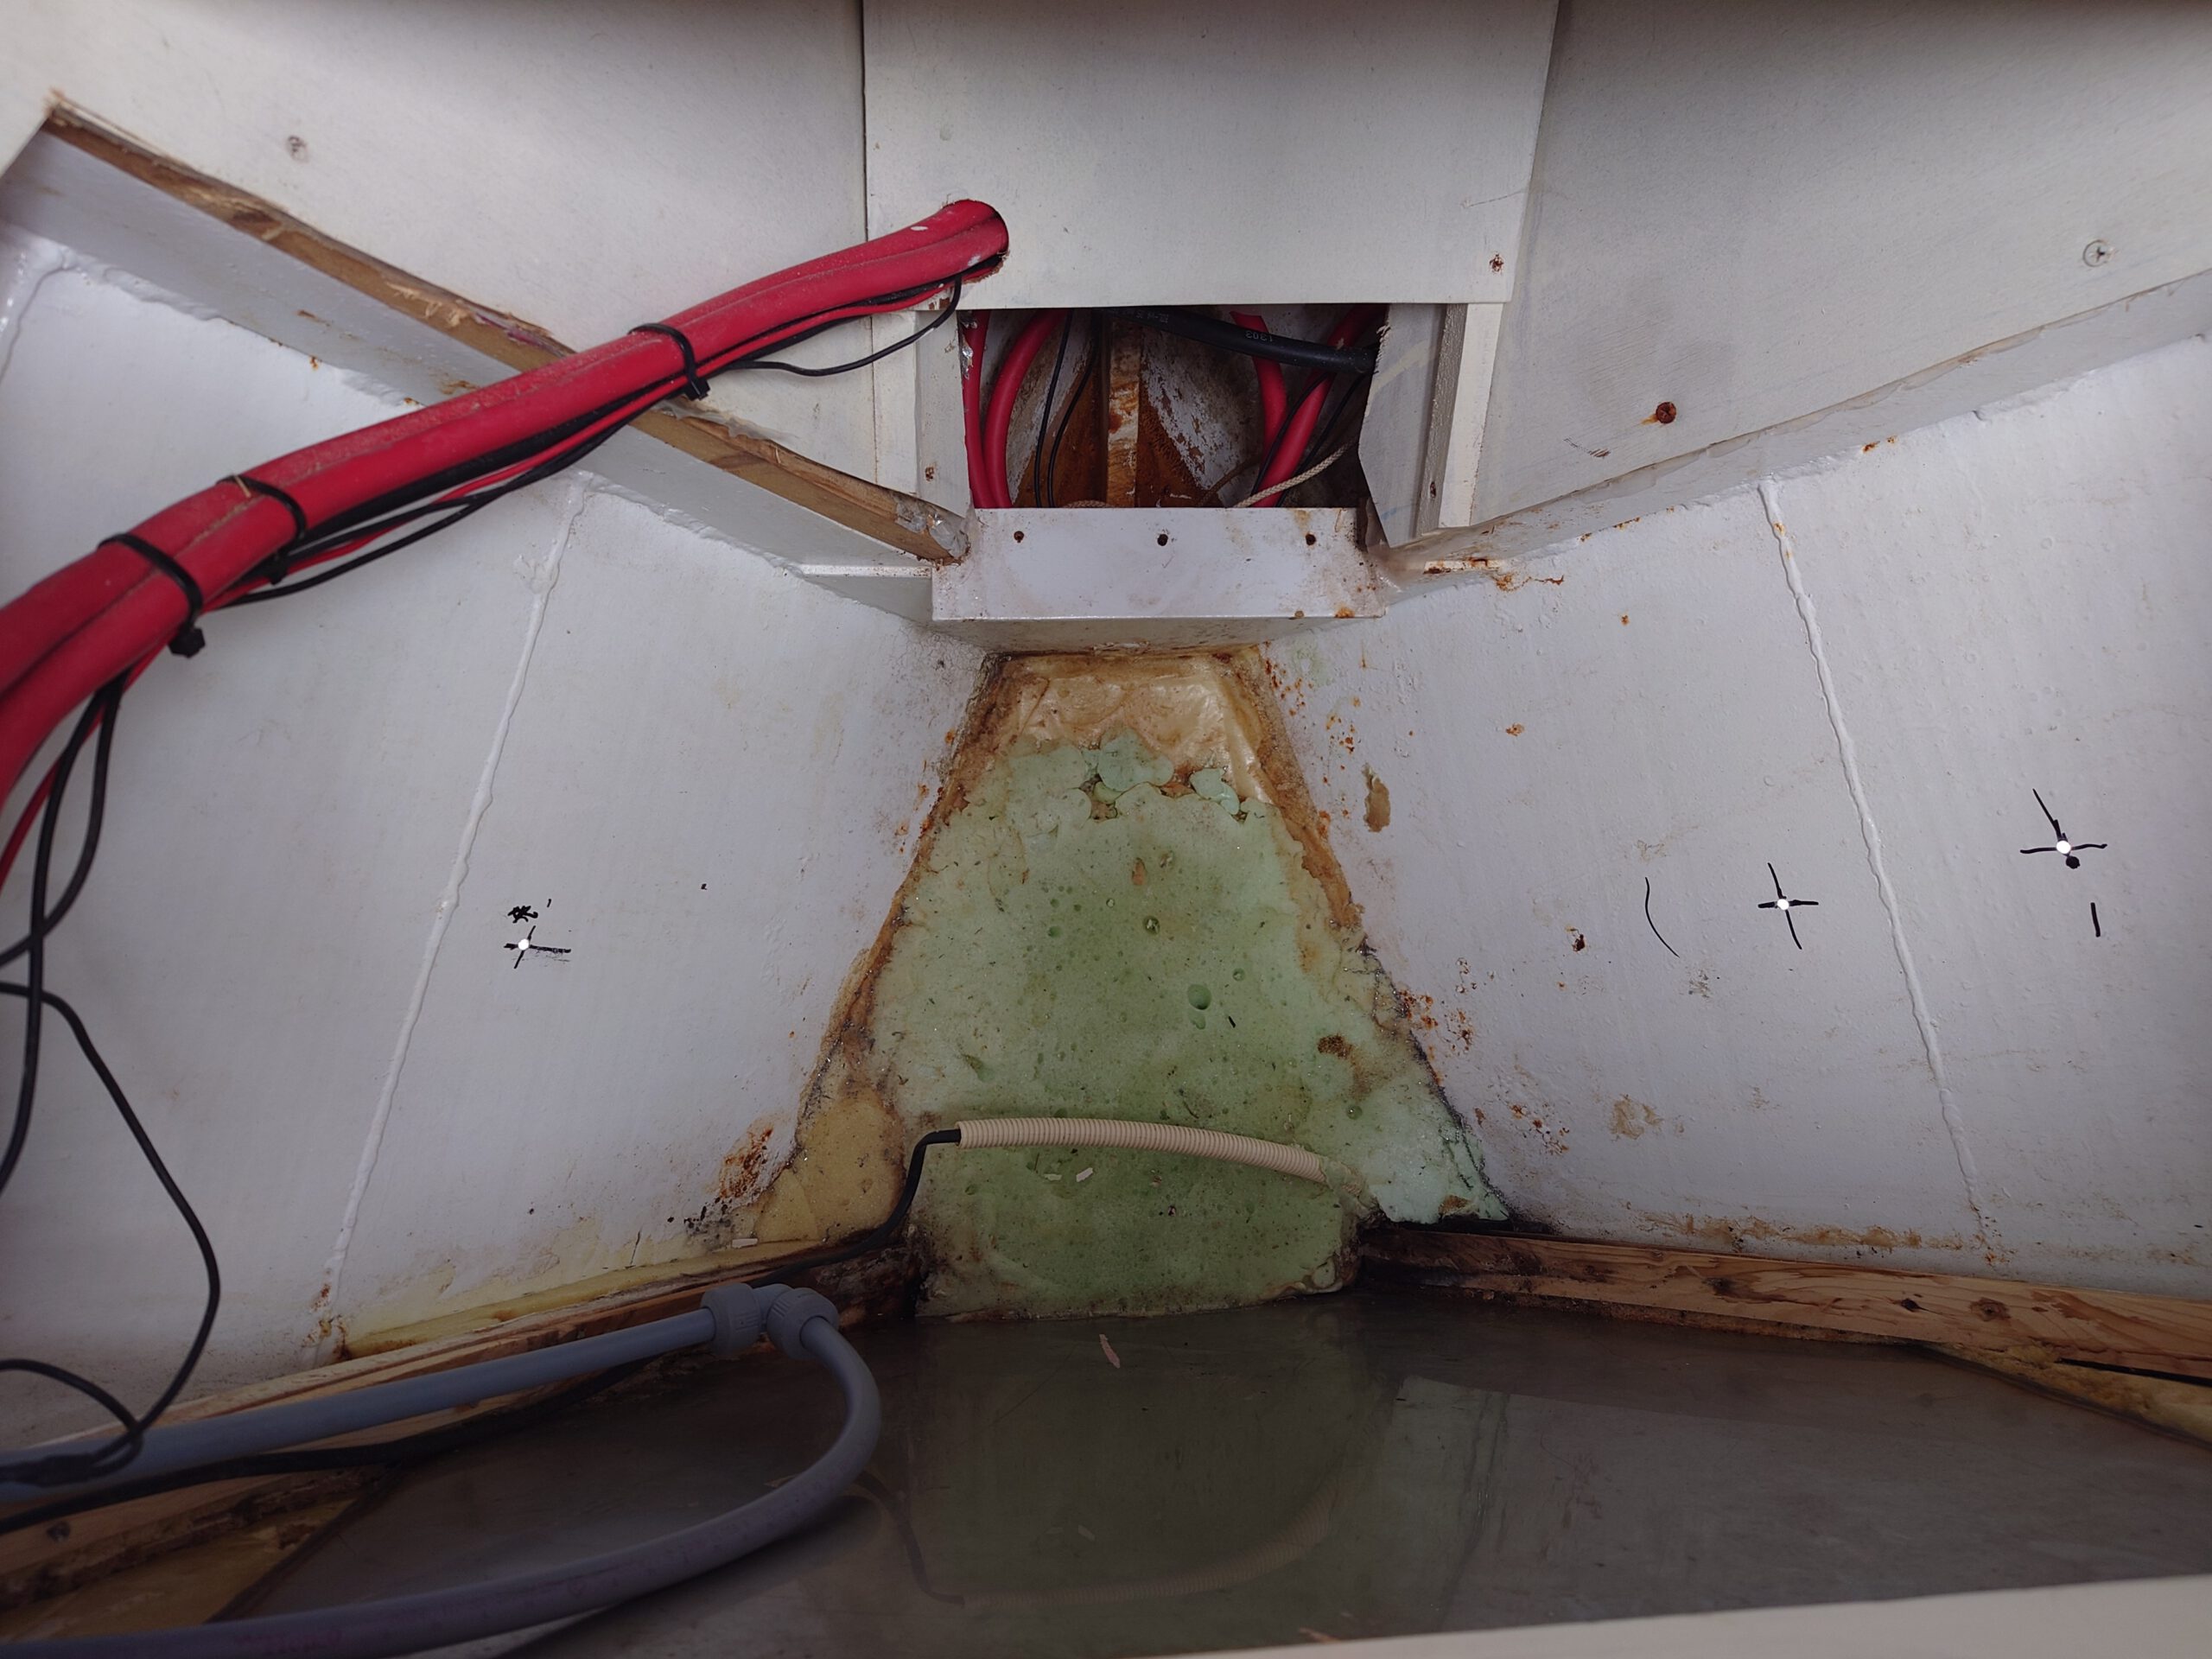
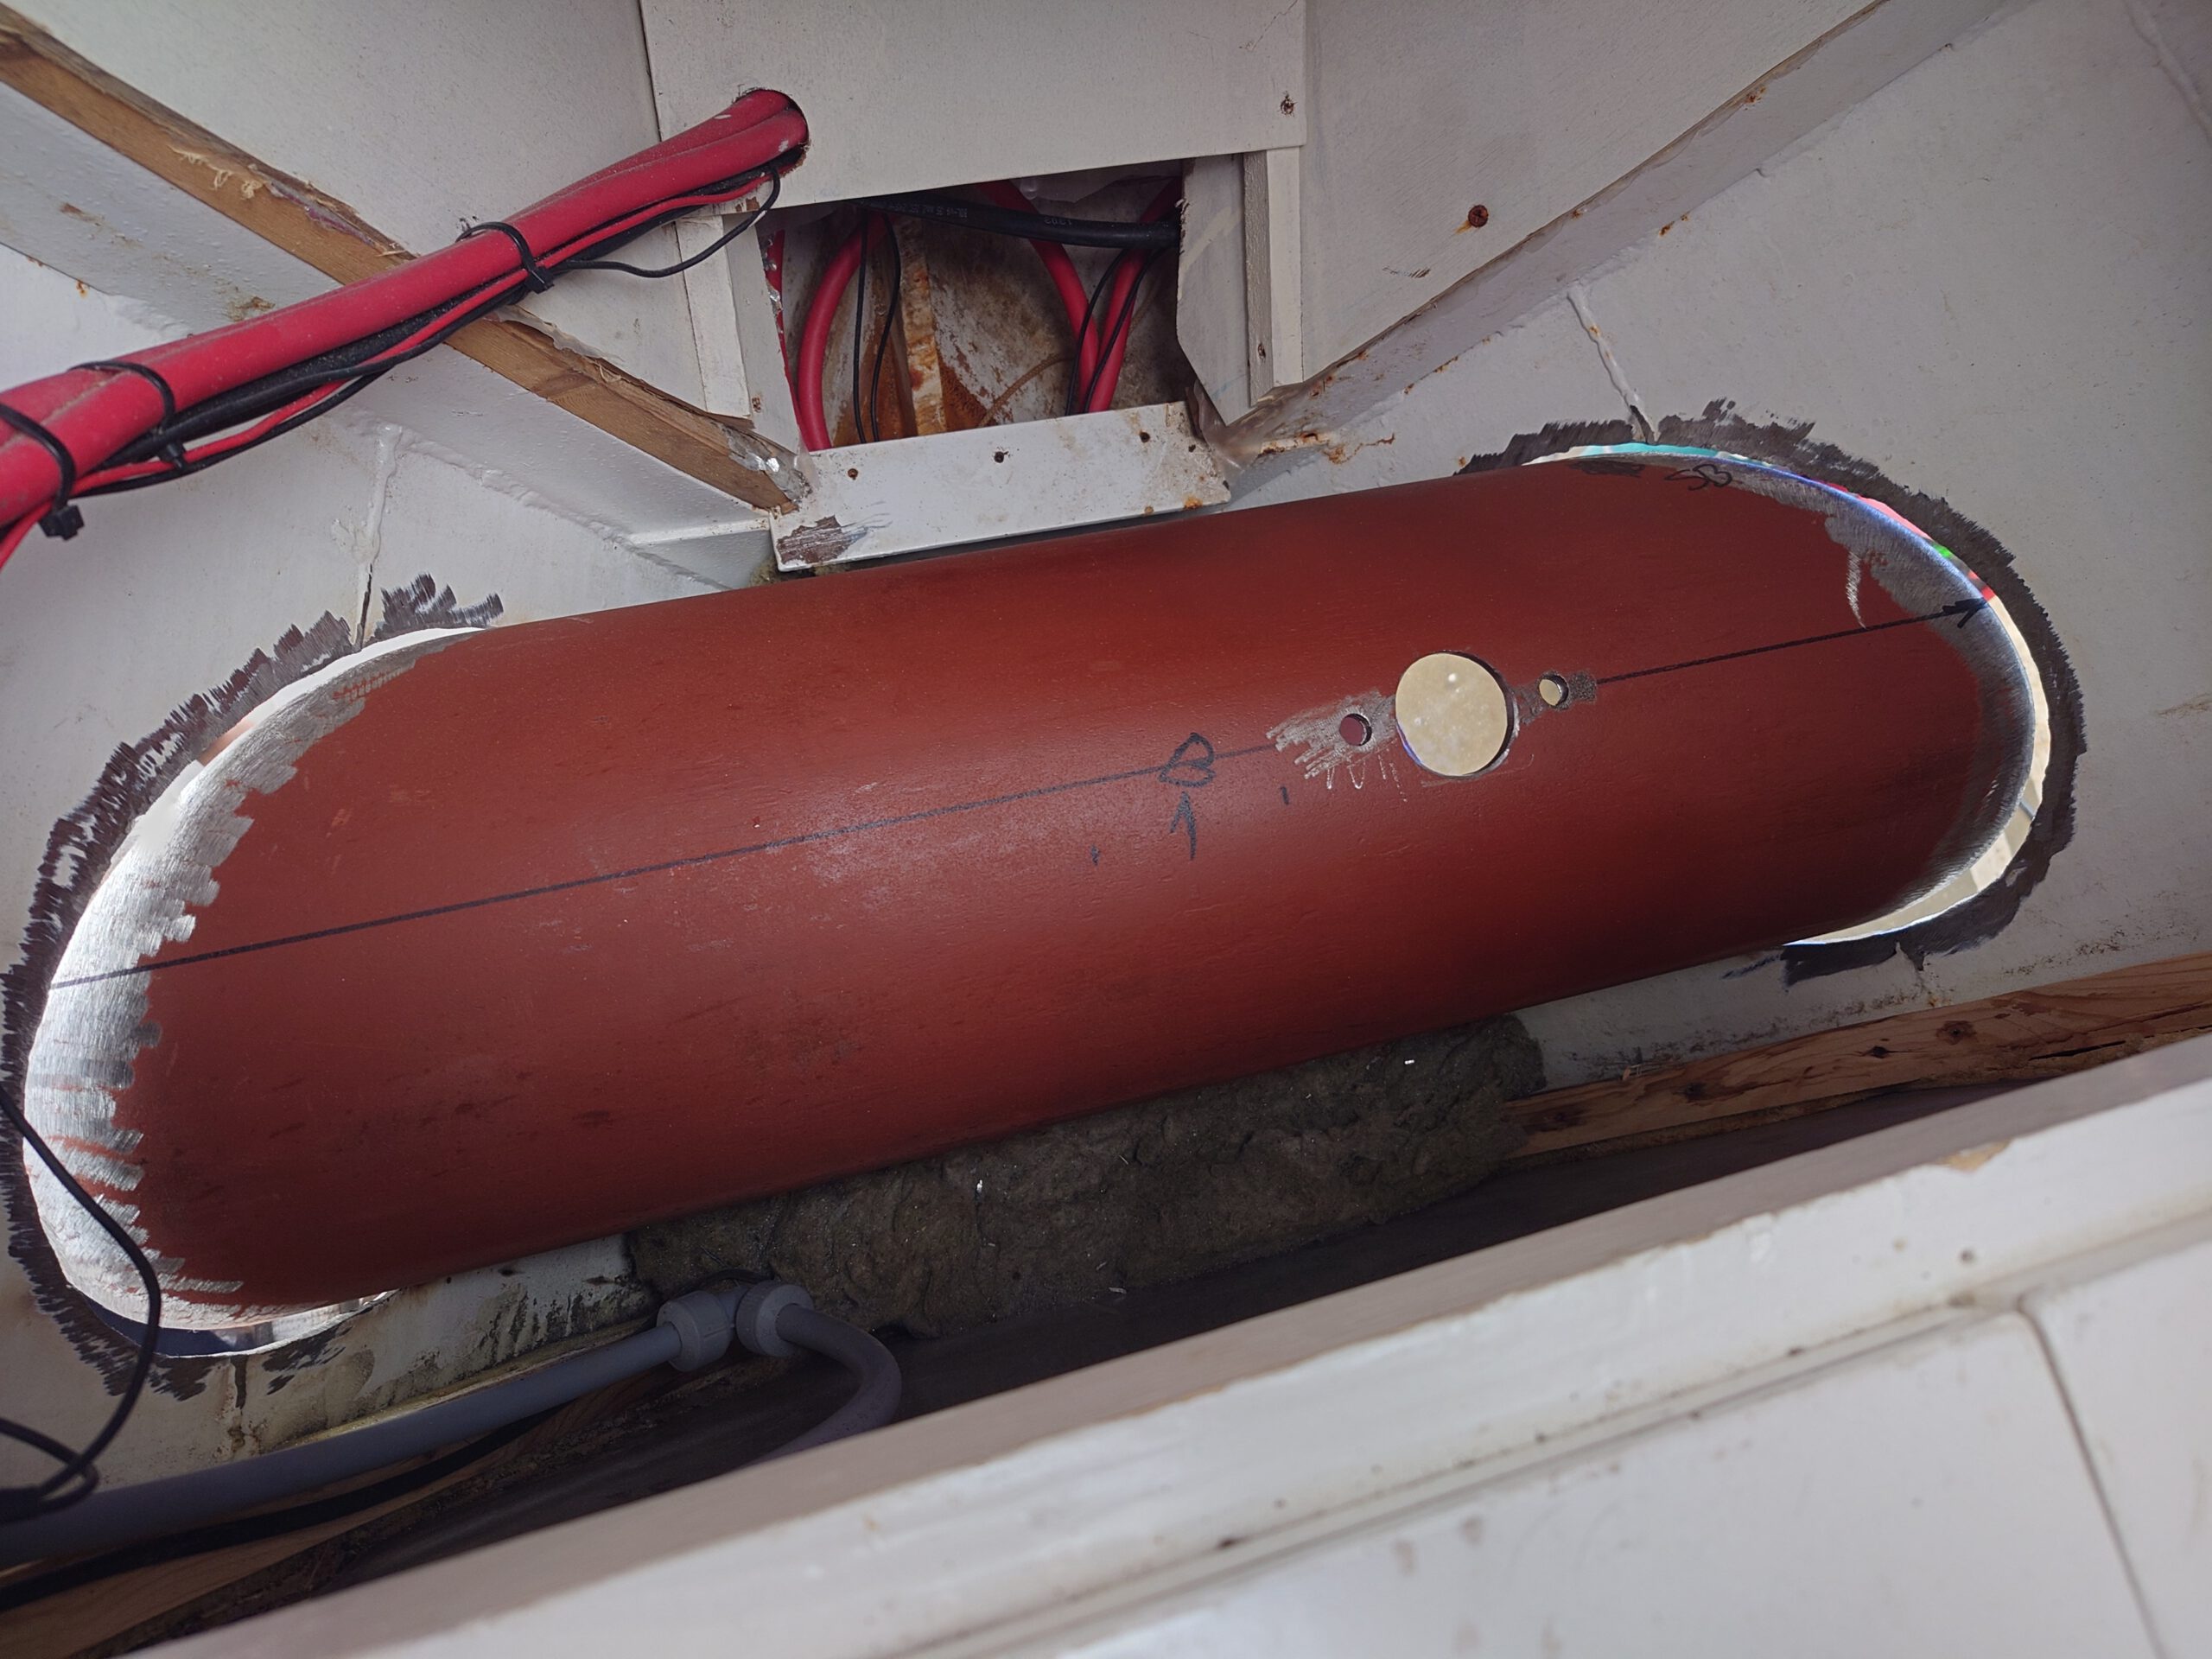
First, we remove the carpentry in the bow under the bed and drill holes to mark the desired position of the tube.
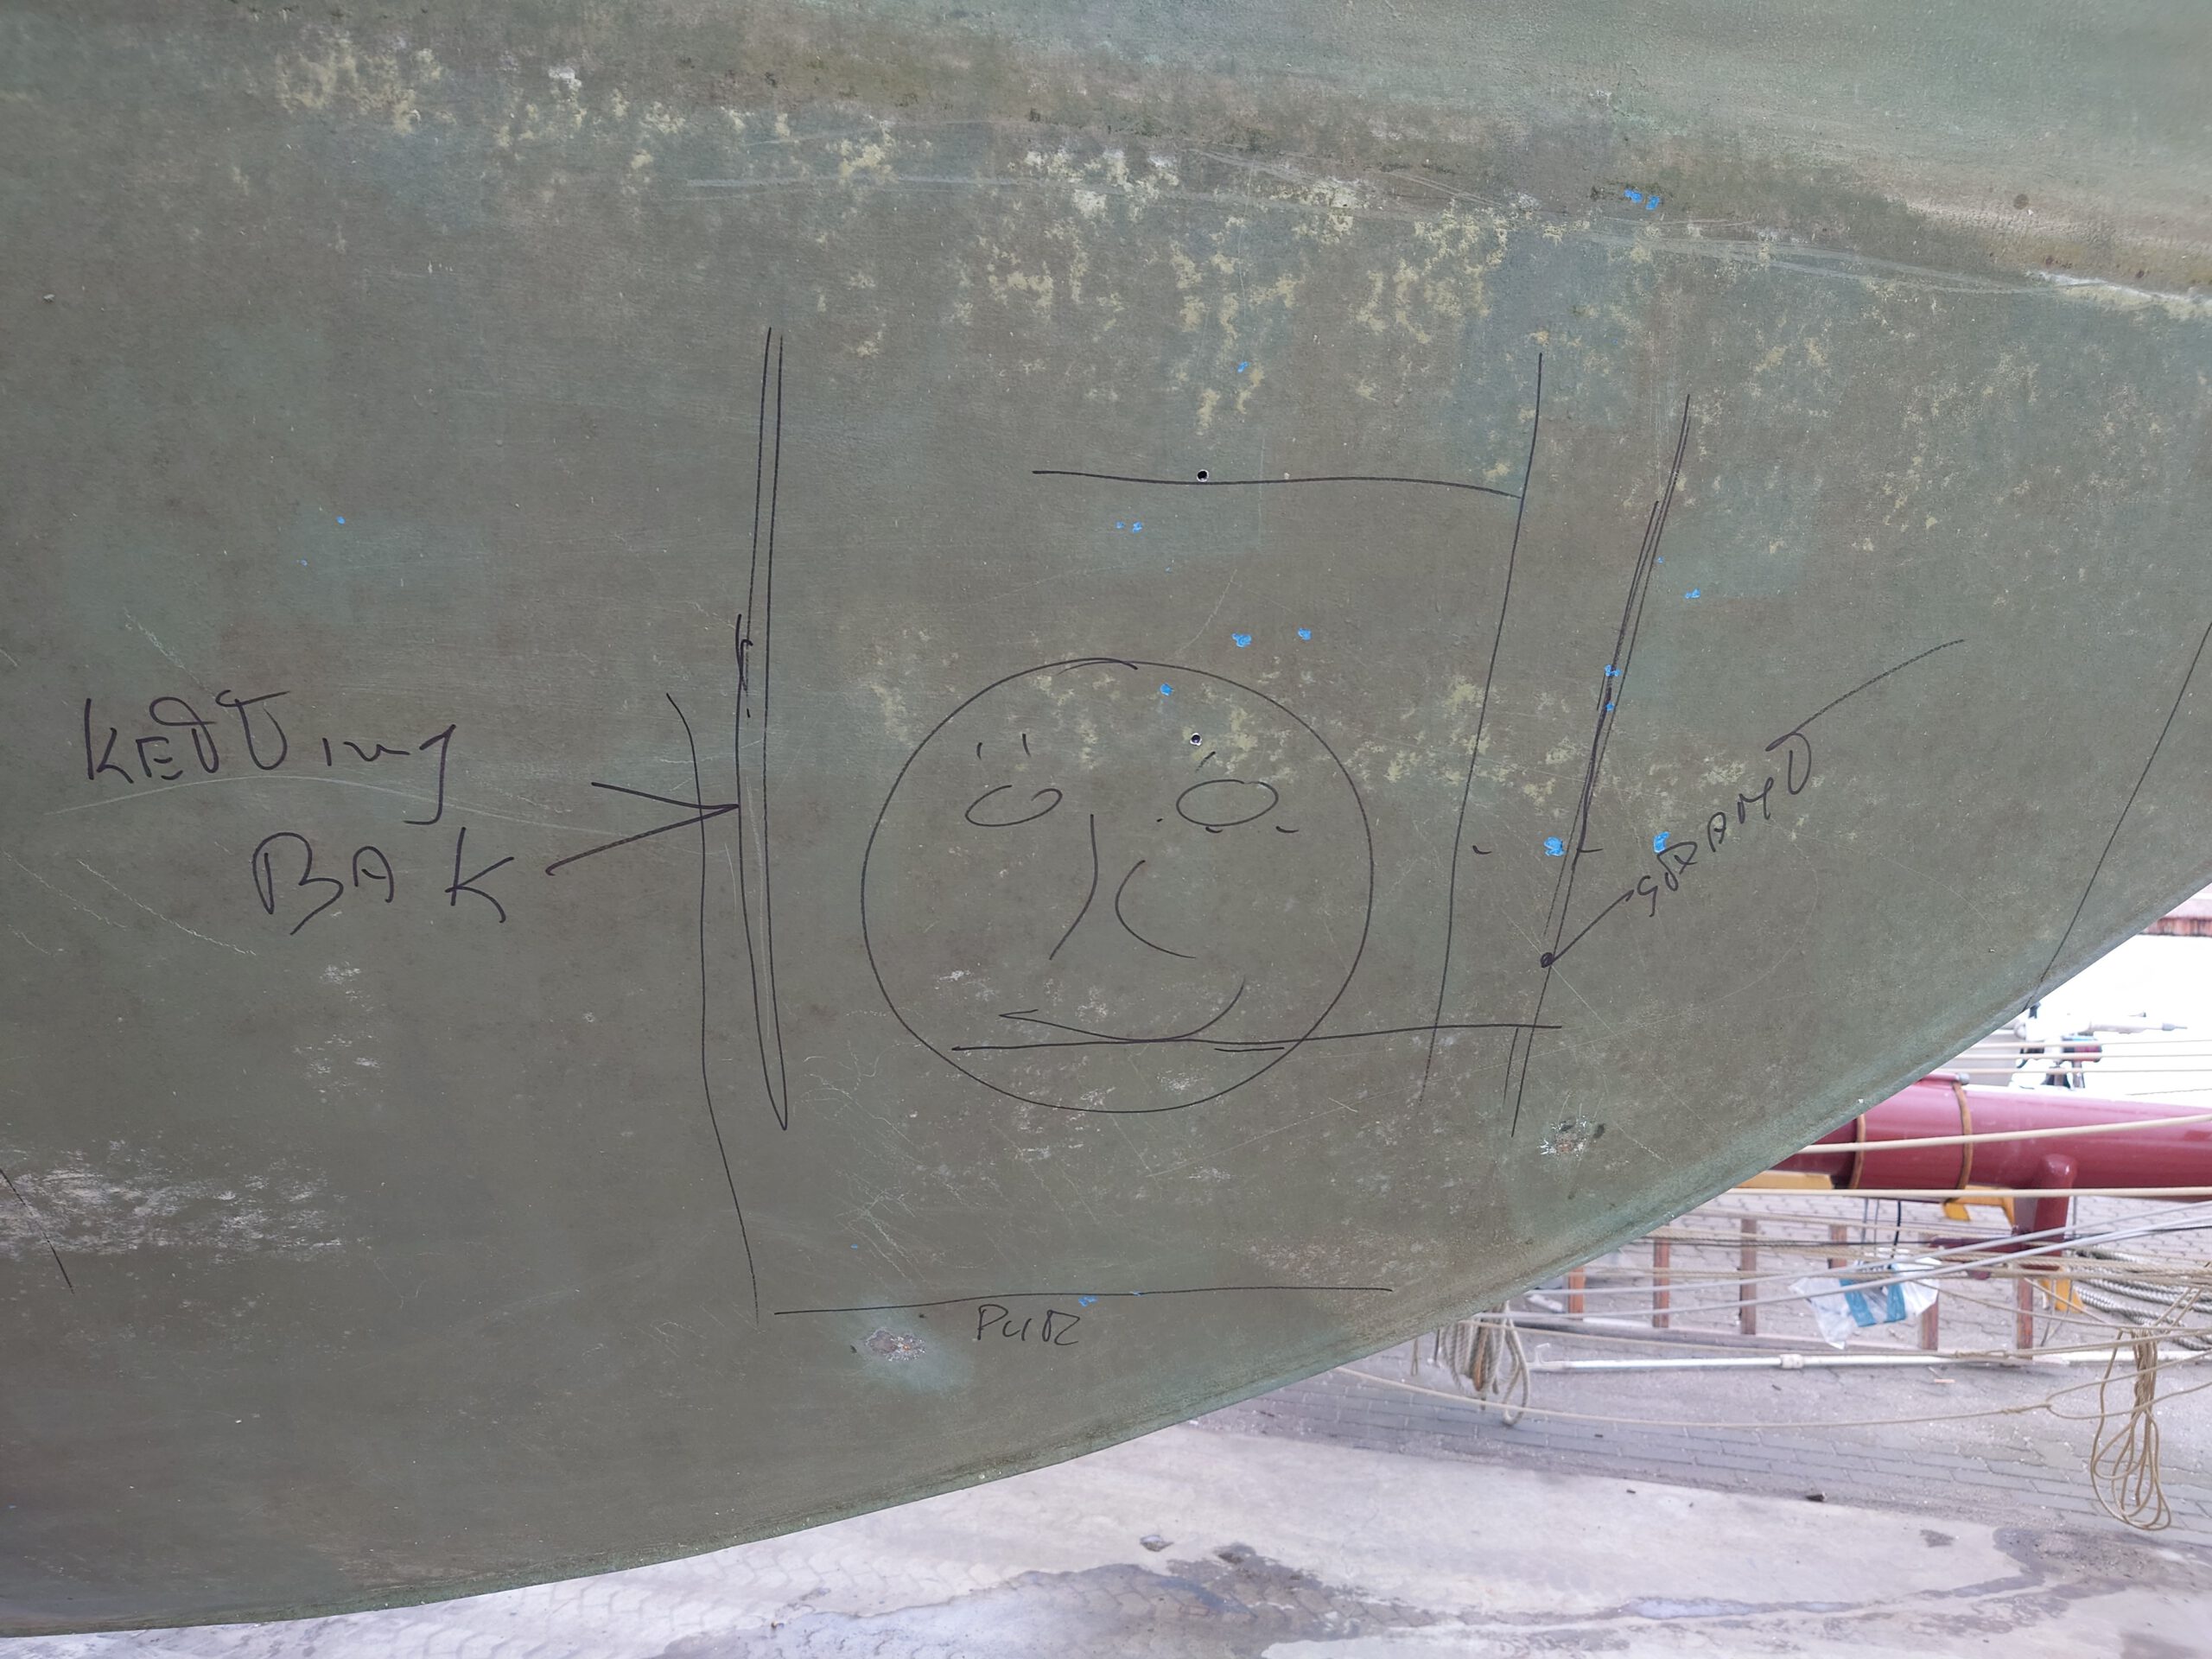
Yts does a sketch on the outside 🙂
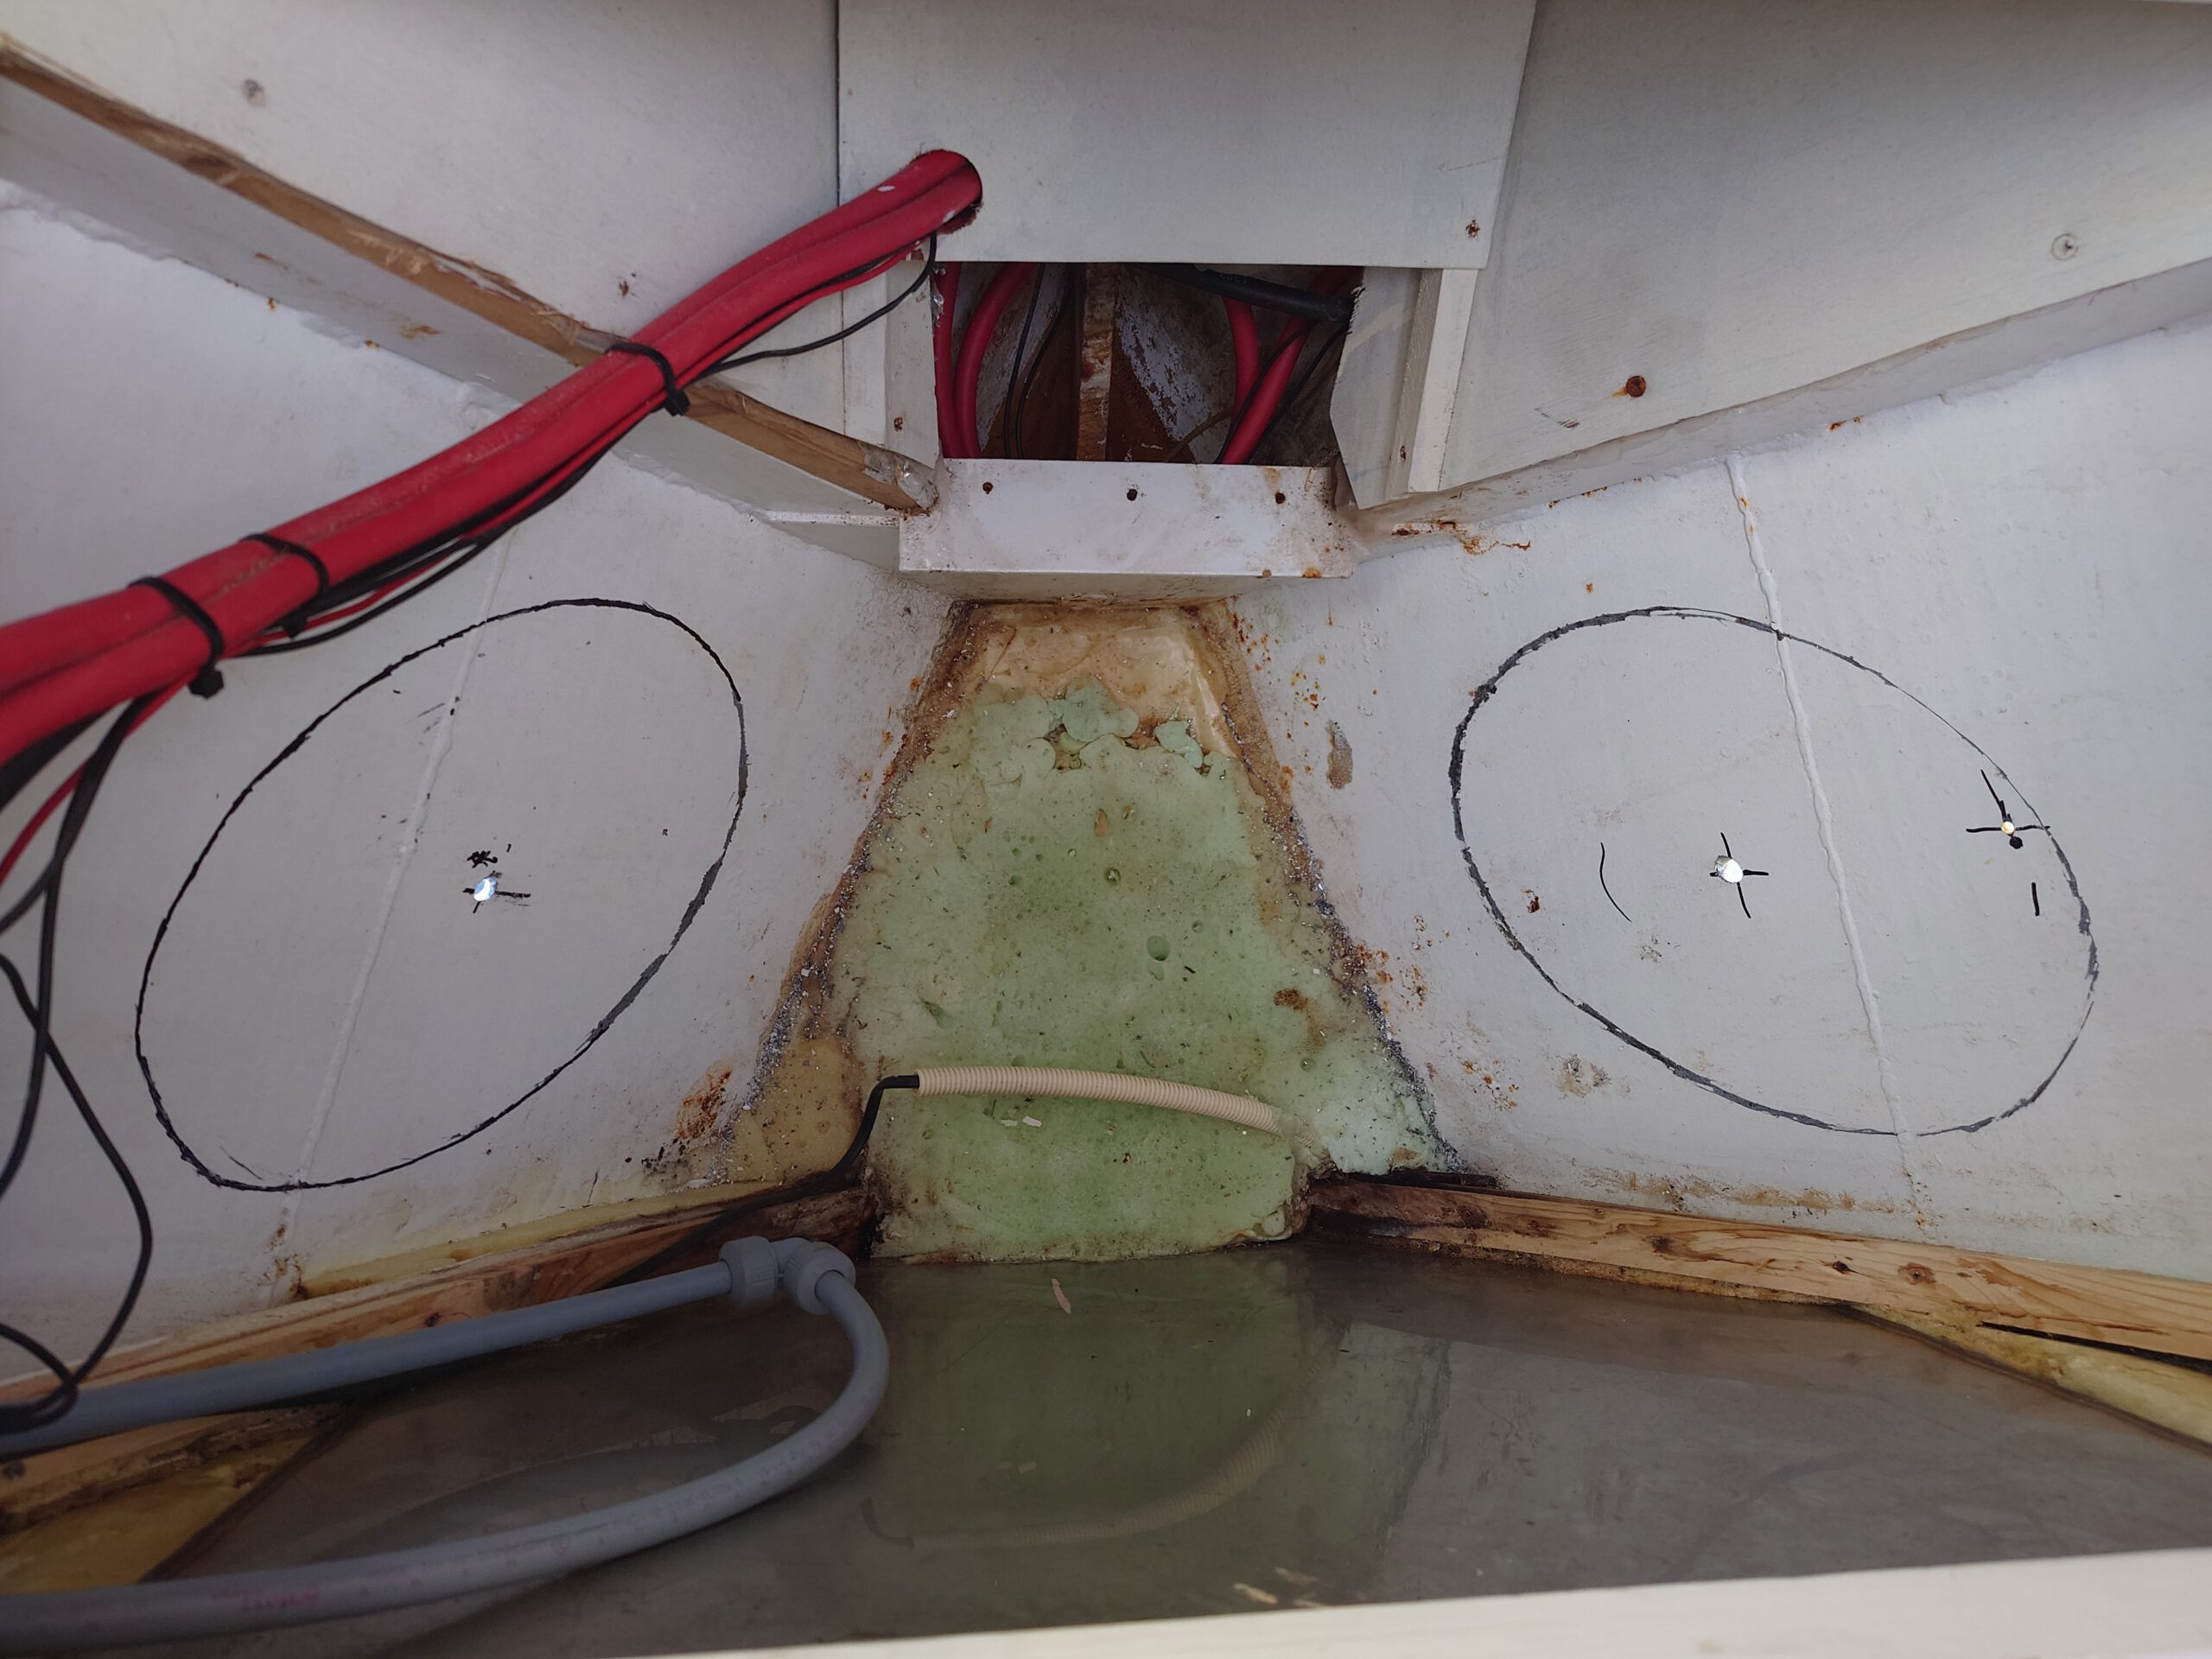
Then, he draws the cutting lines on the inside.
After waiting 4 days, and with the hall still occupied, the weather is calm enough to do the welding outside. This will save time because we don’t have to wait for a place inside.
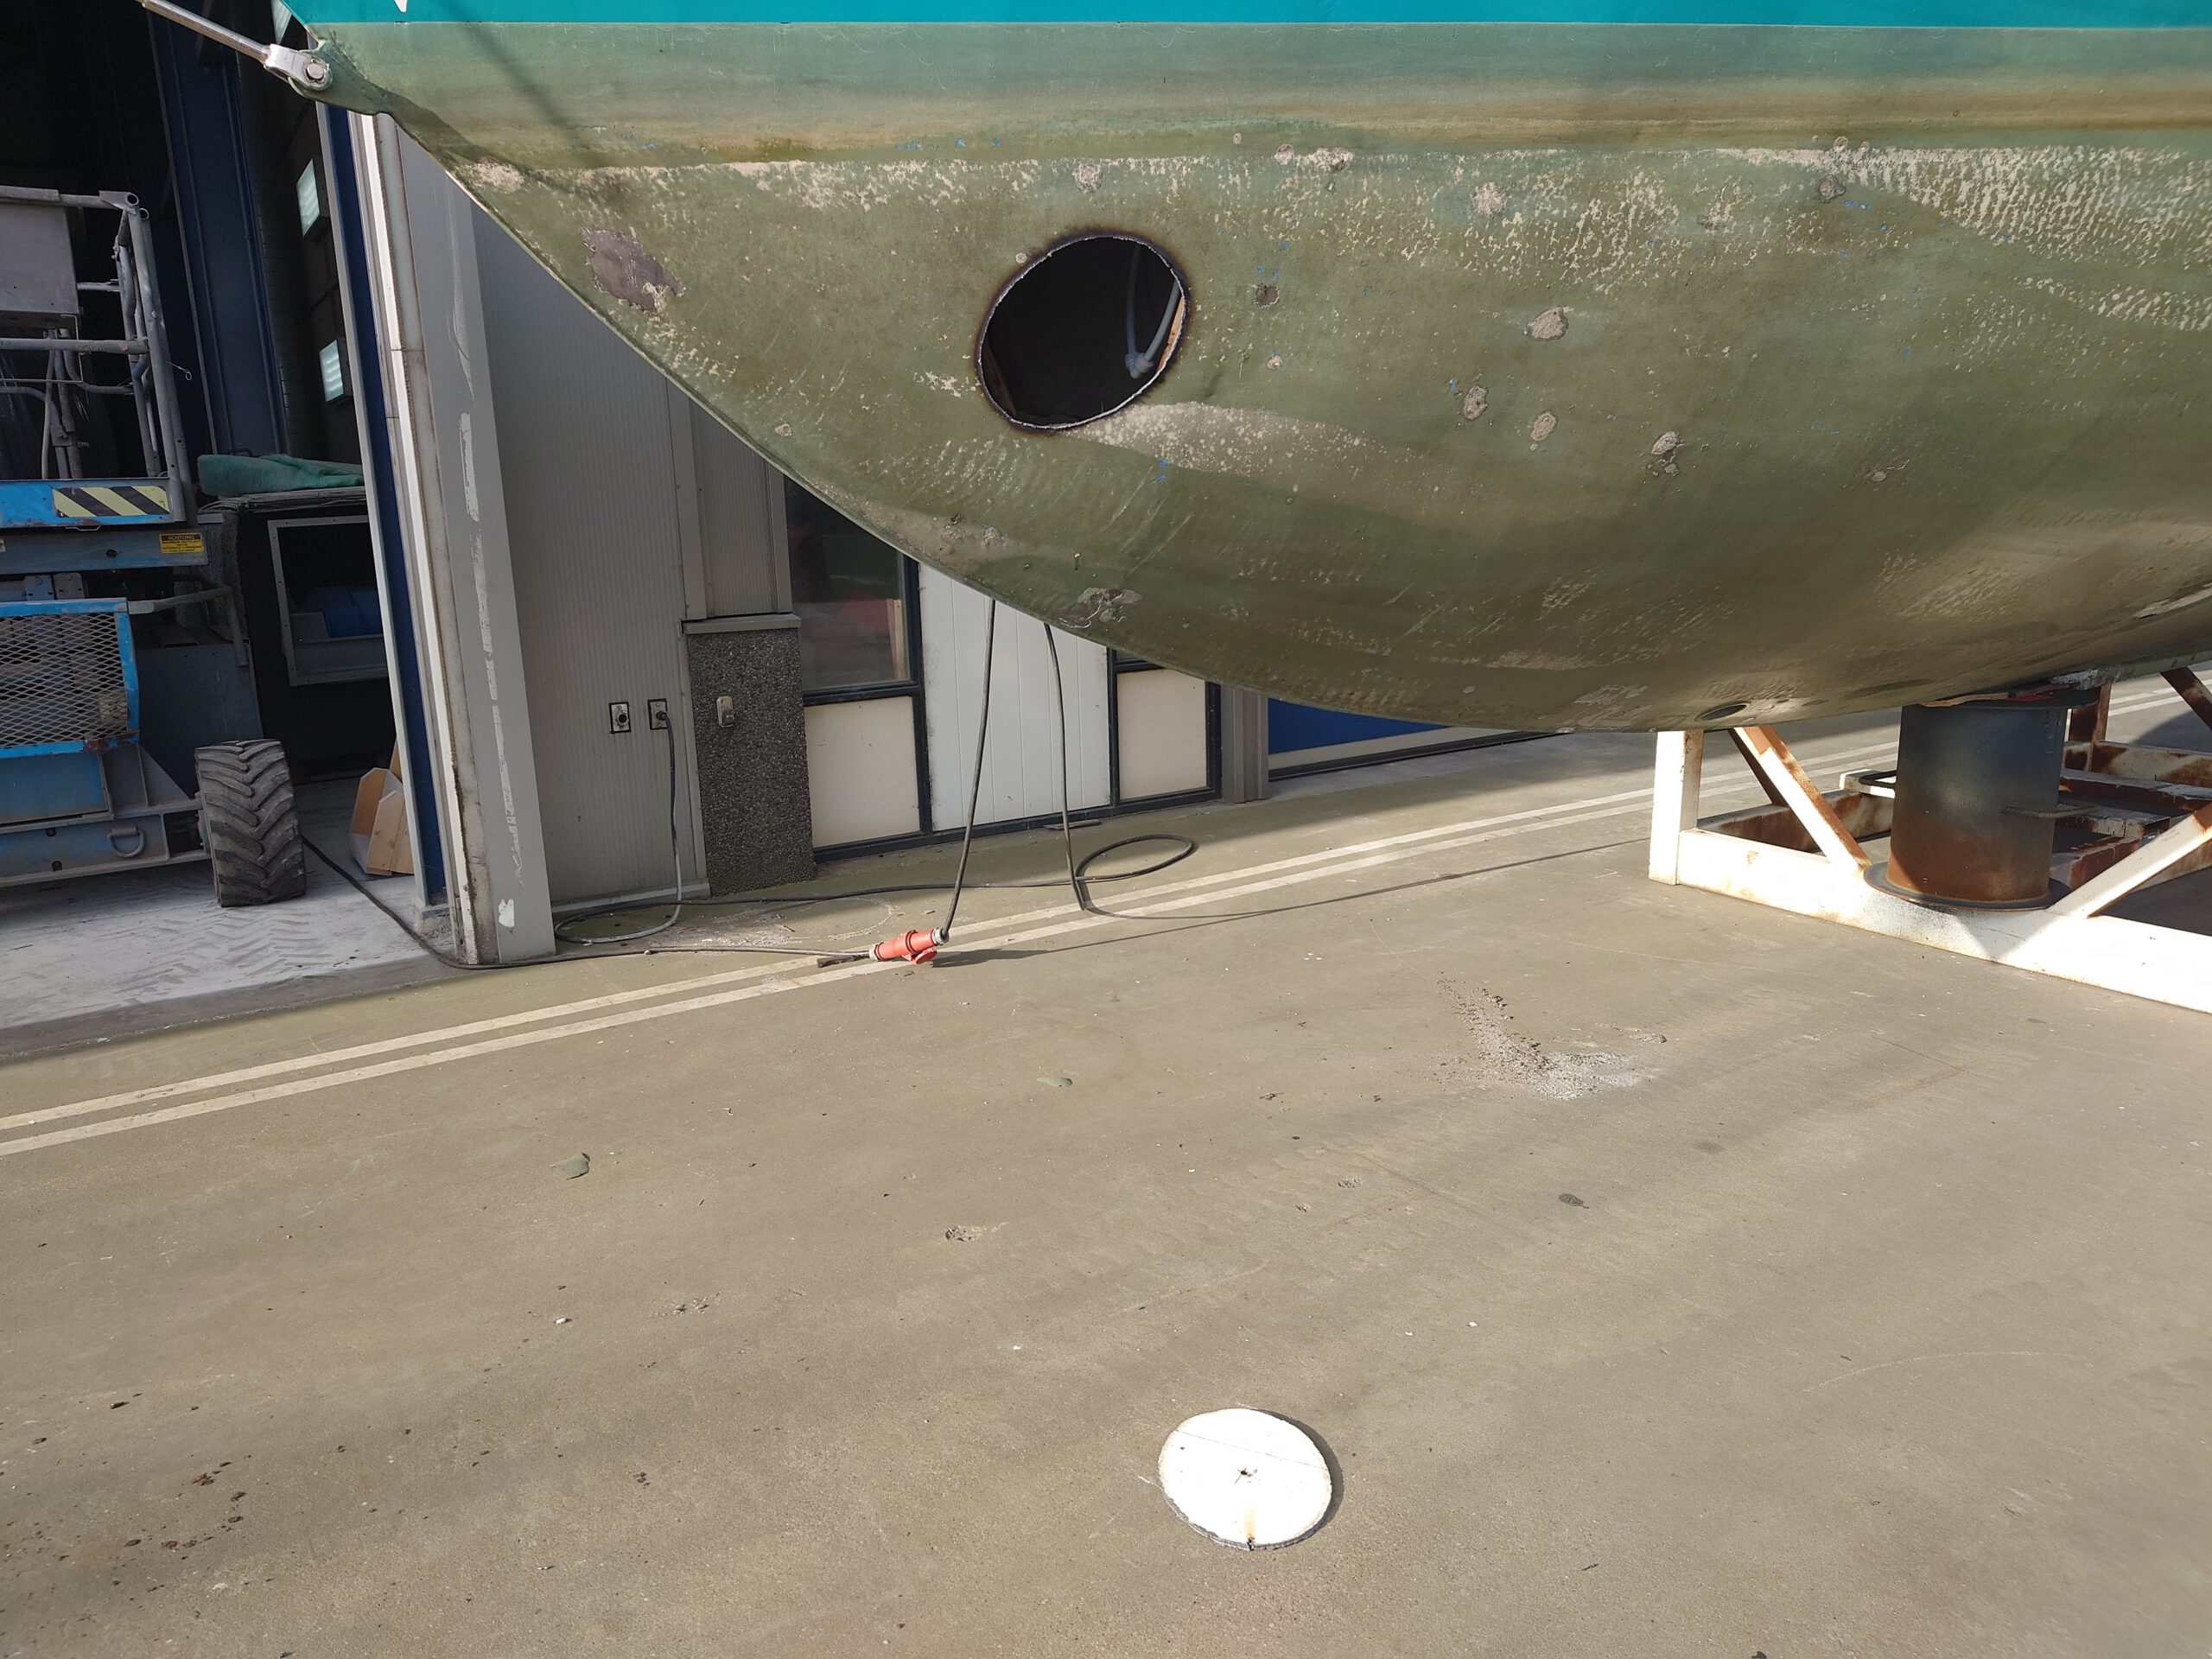
The holes are cut:


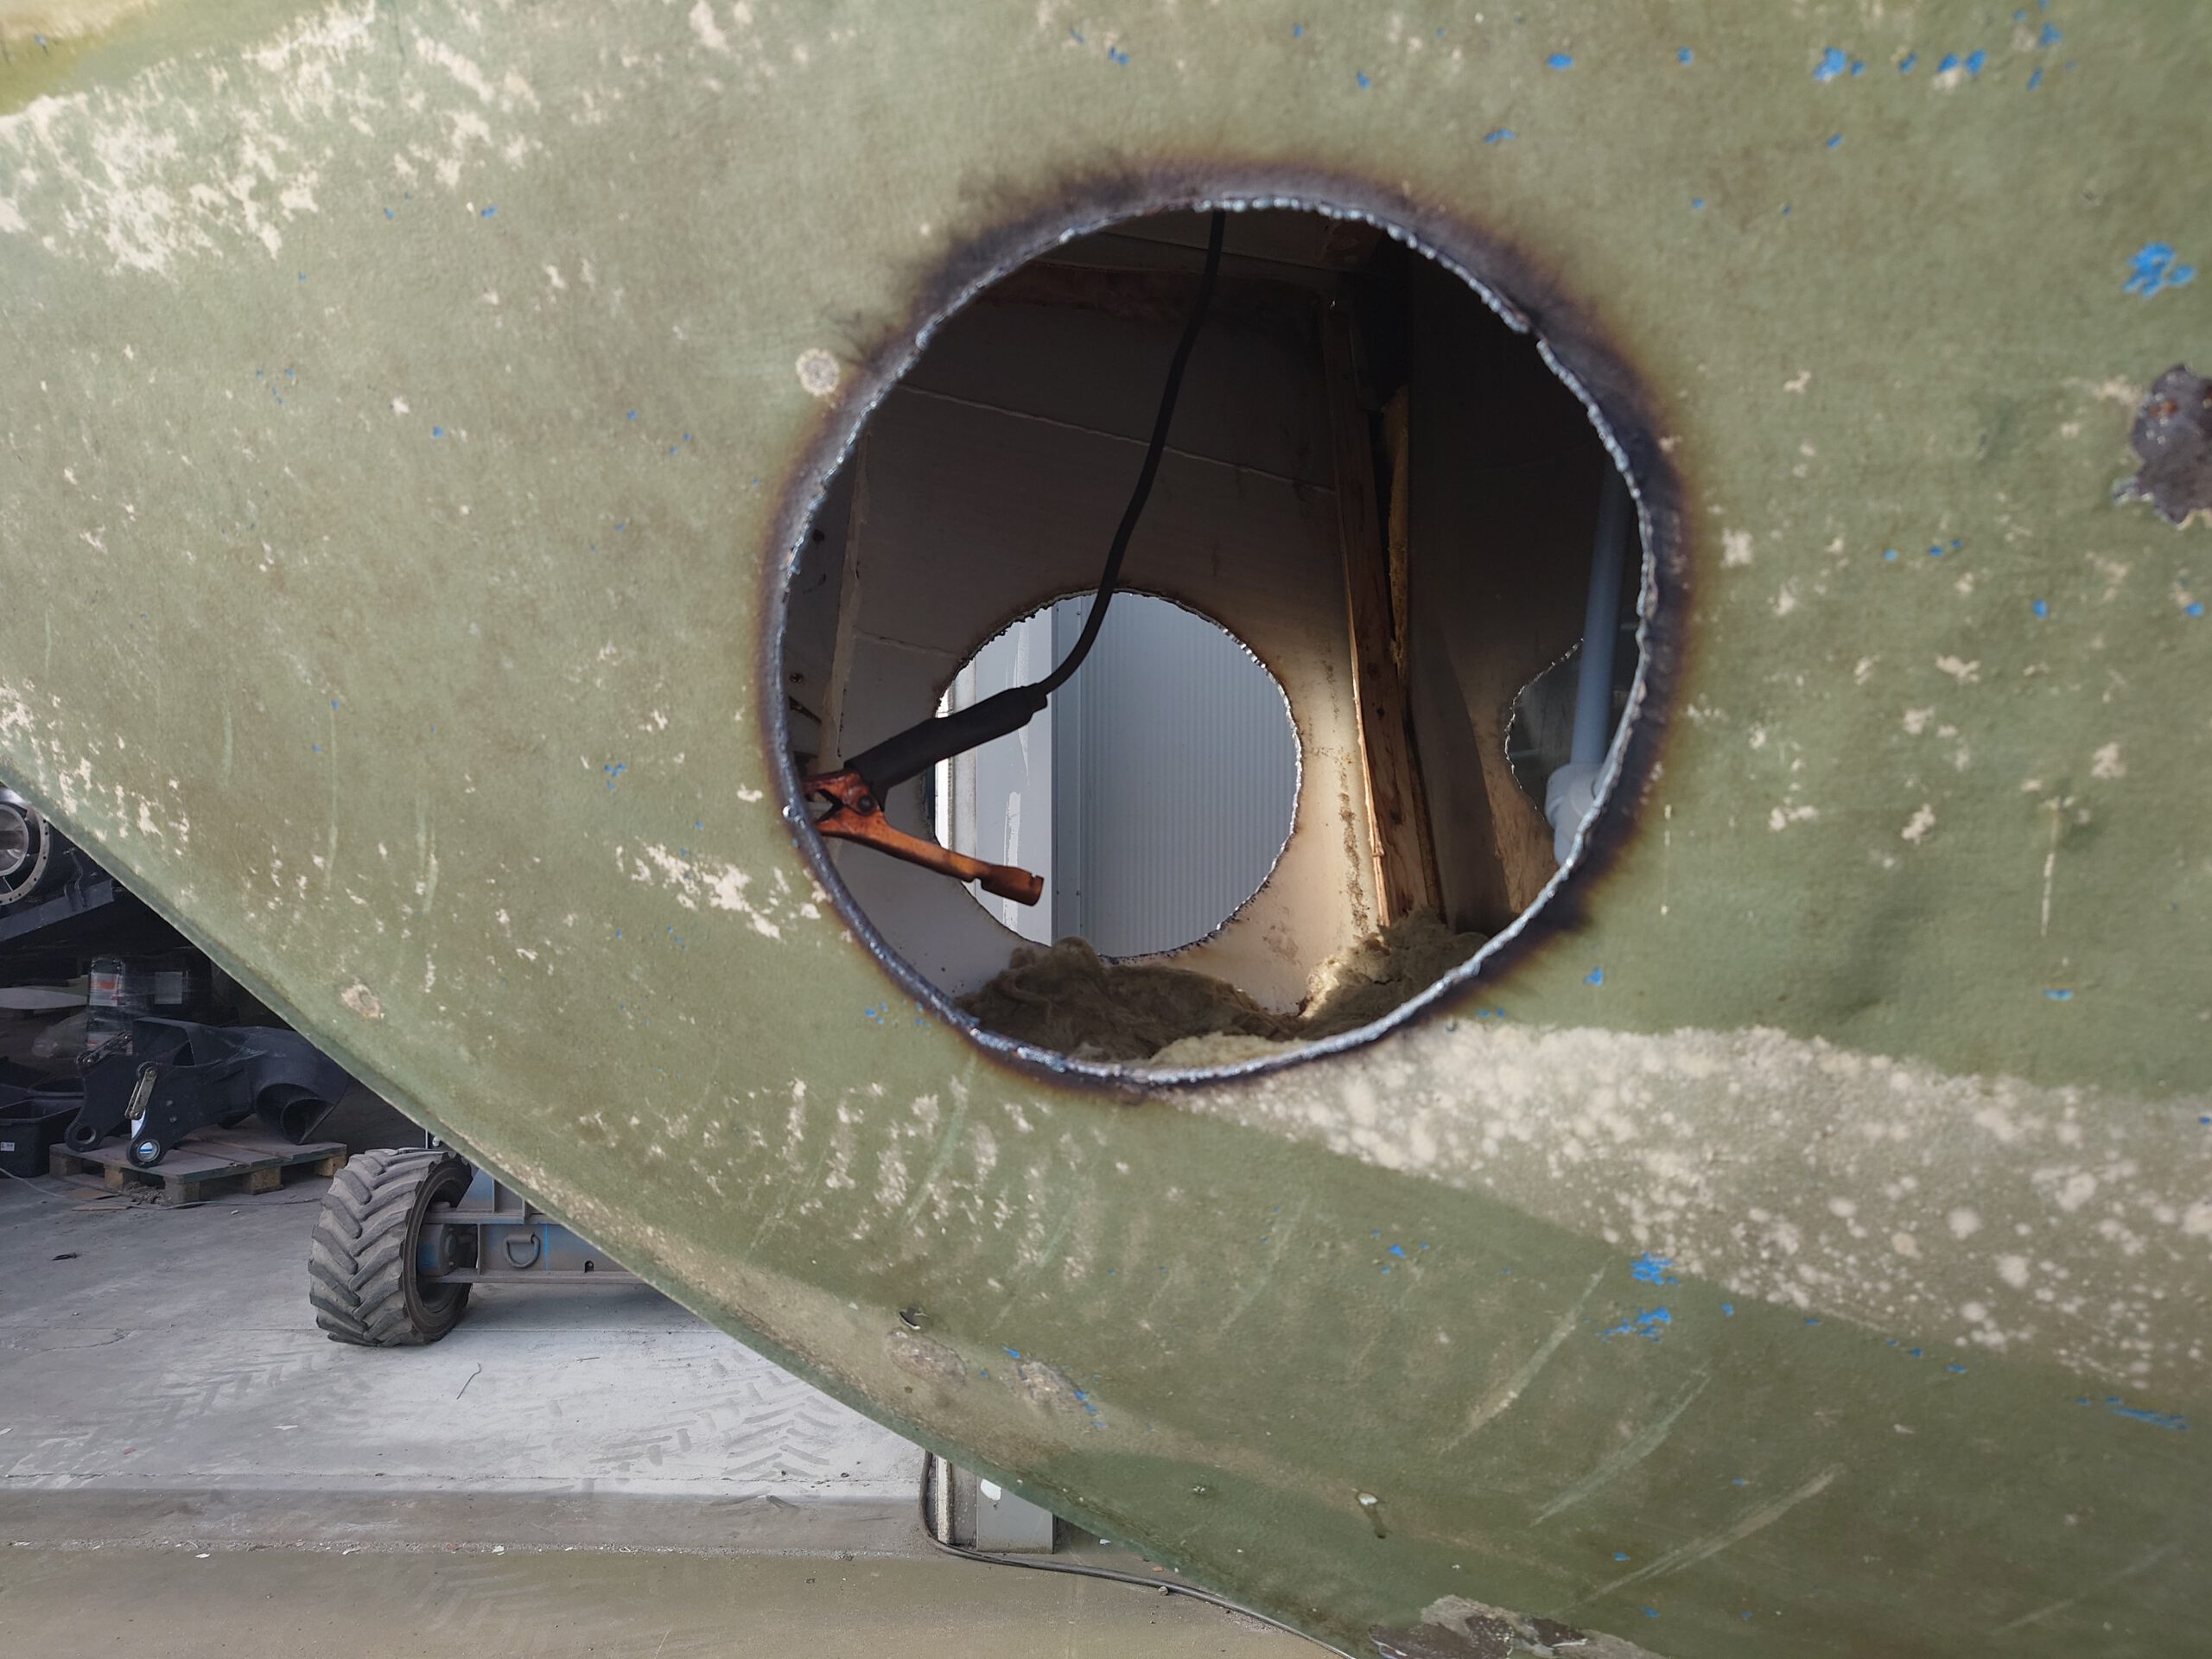
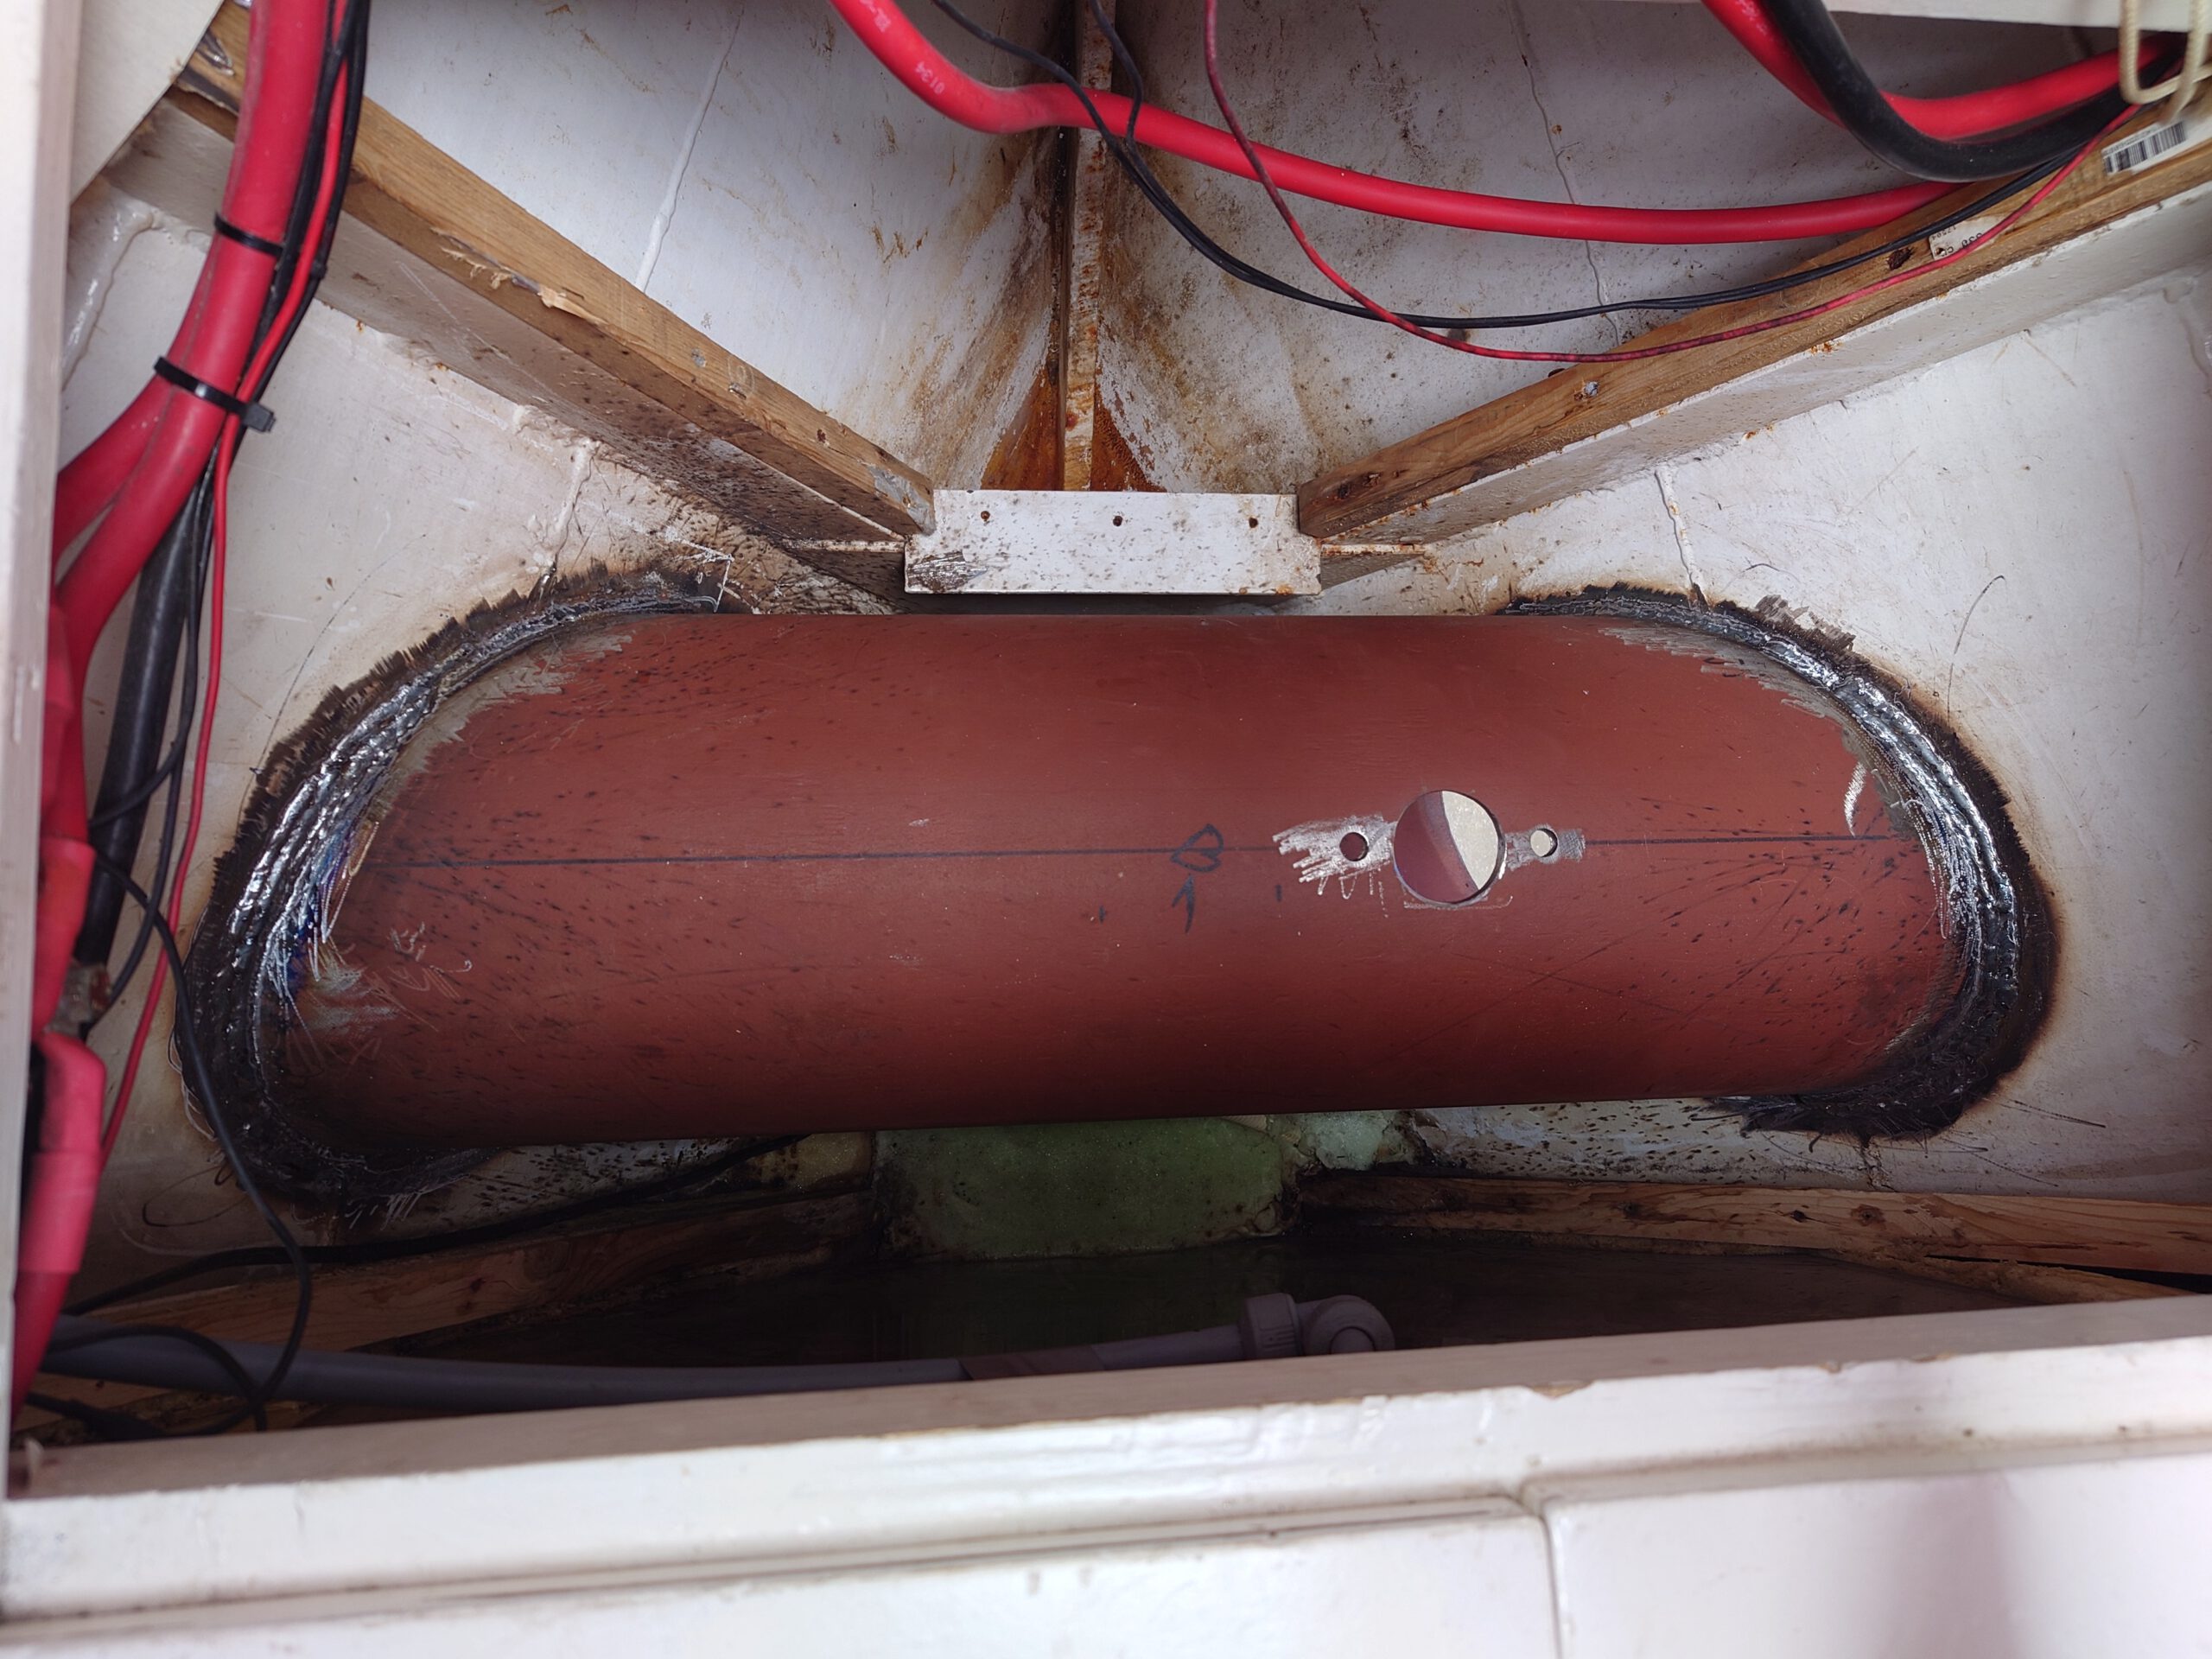
Then, the tube is moved in:
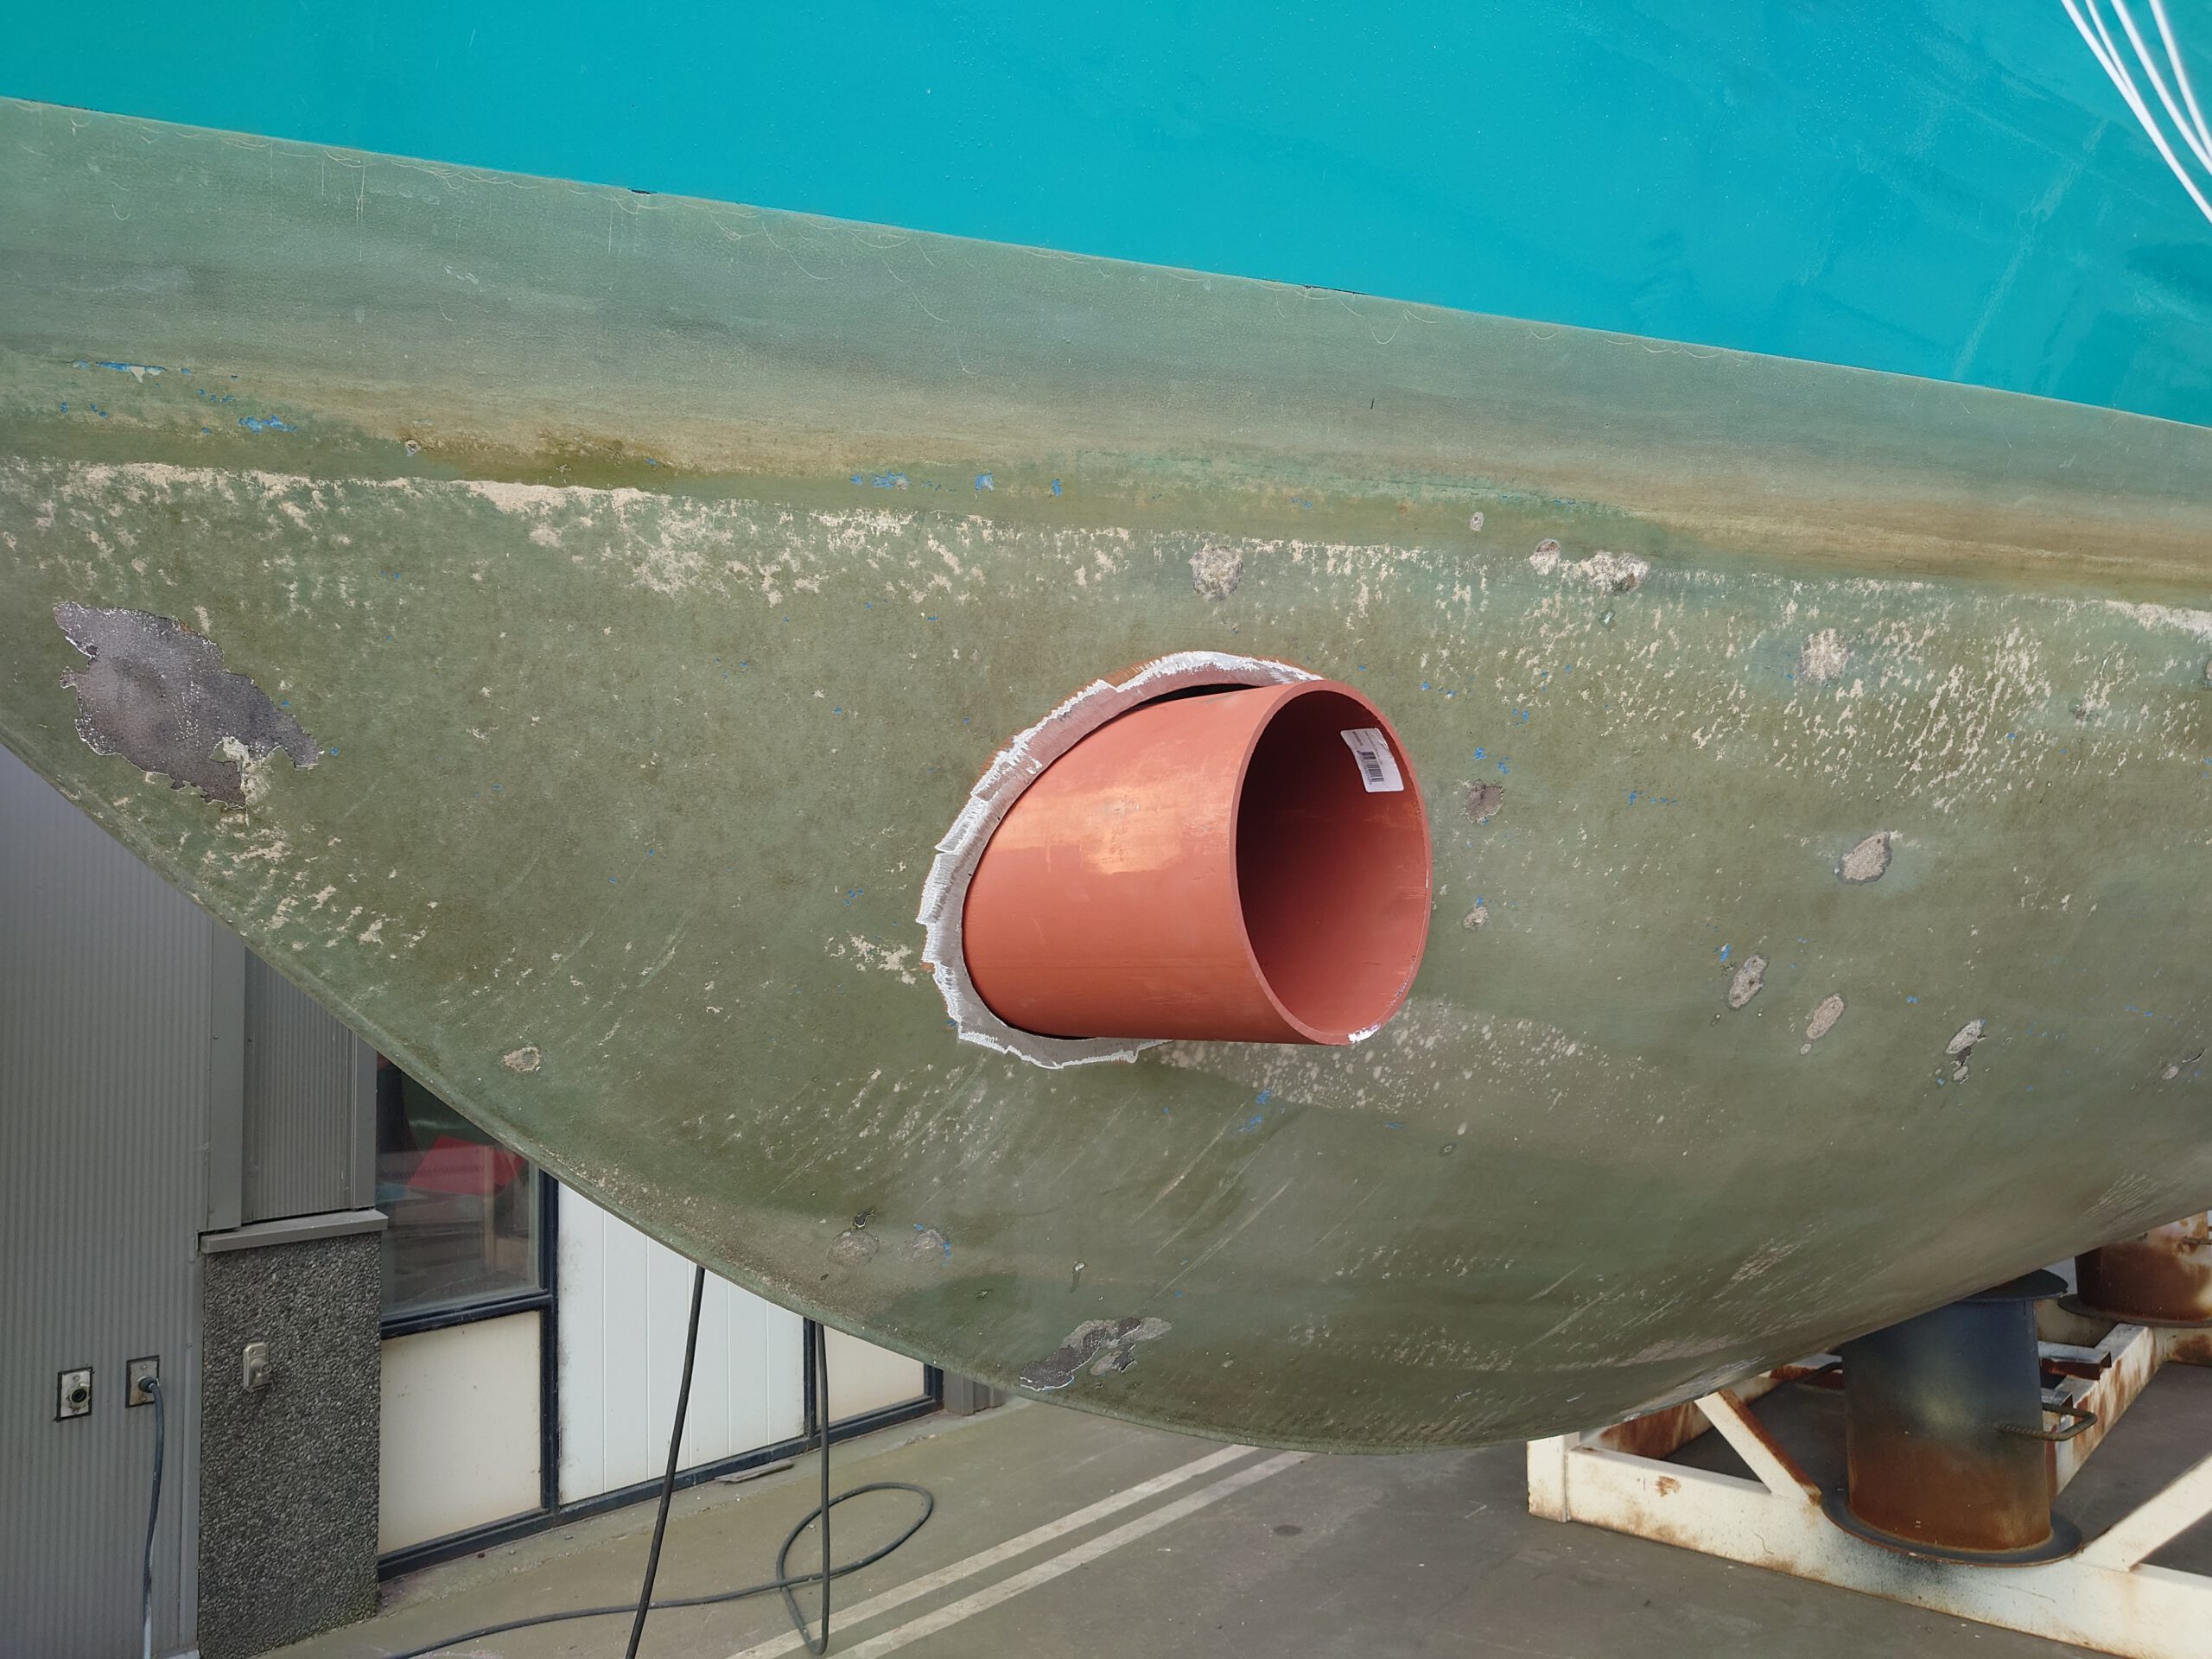
Next, the tube is cut in the right shape en the holes for the propellor are cut.

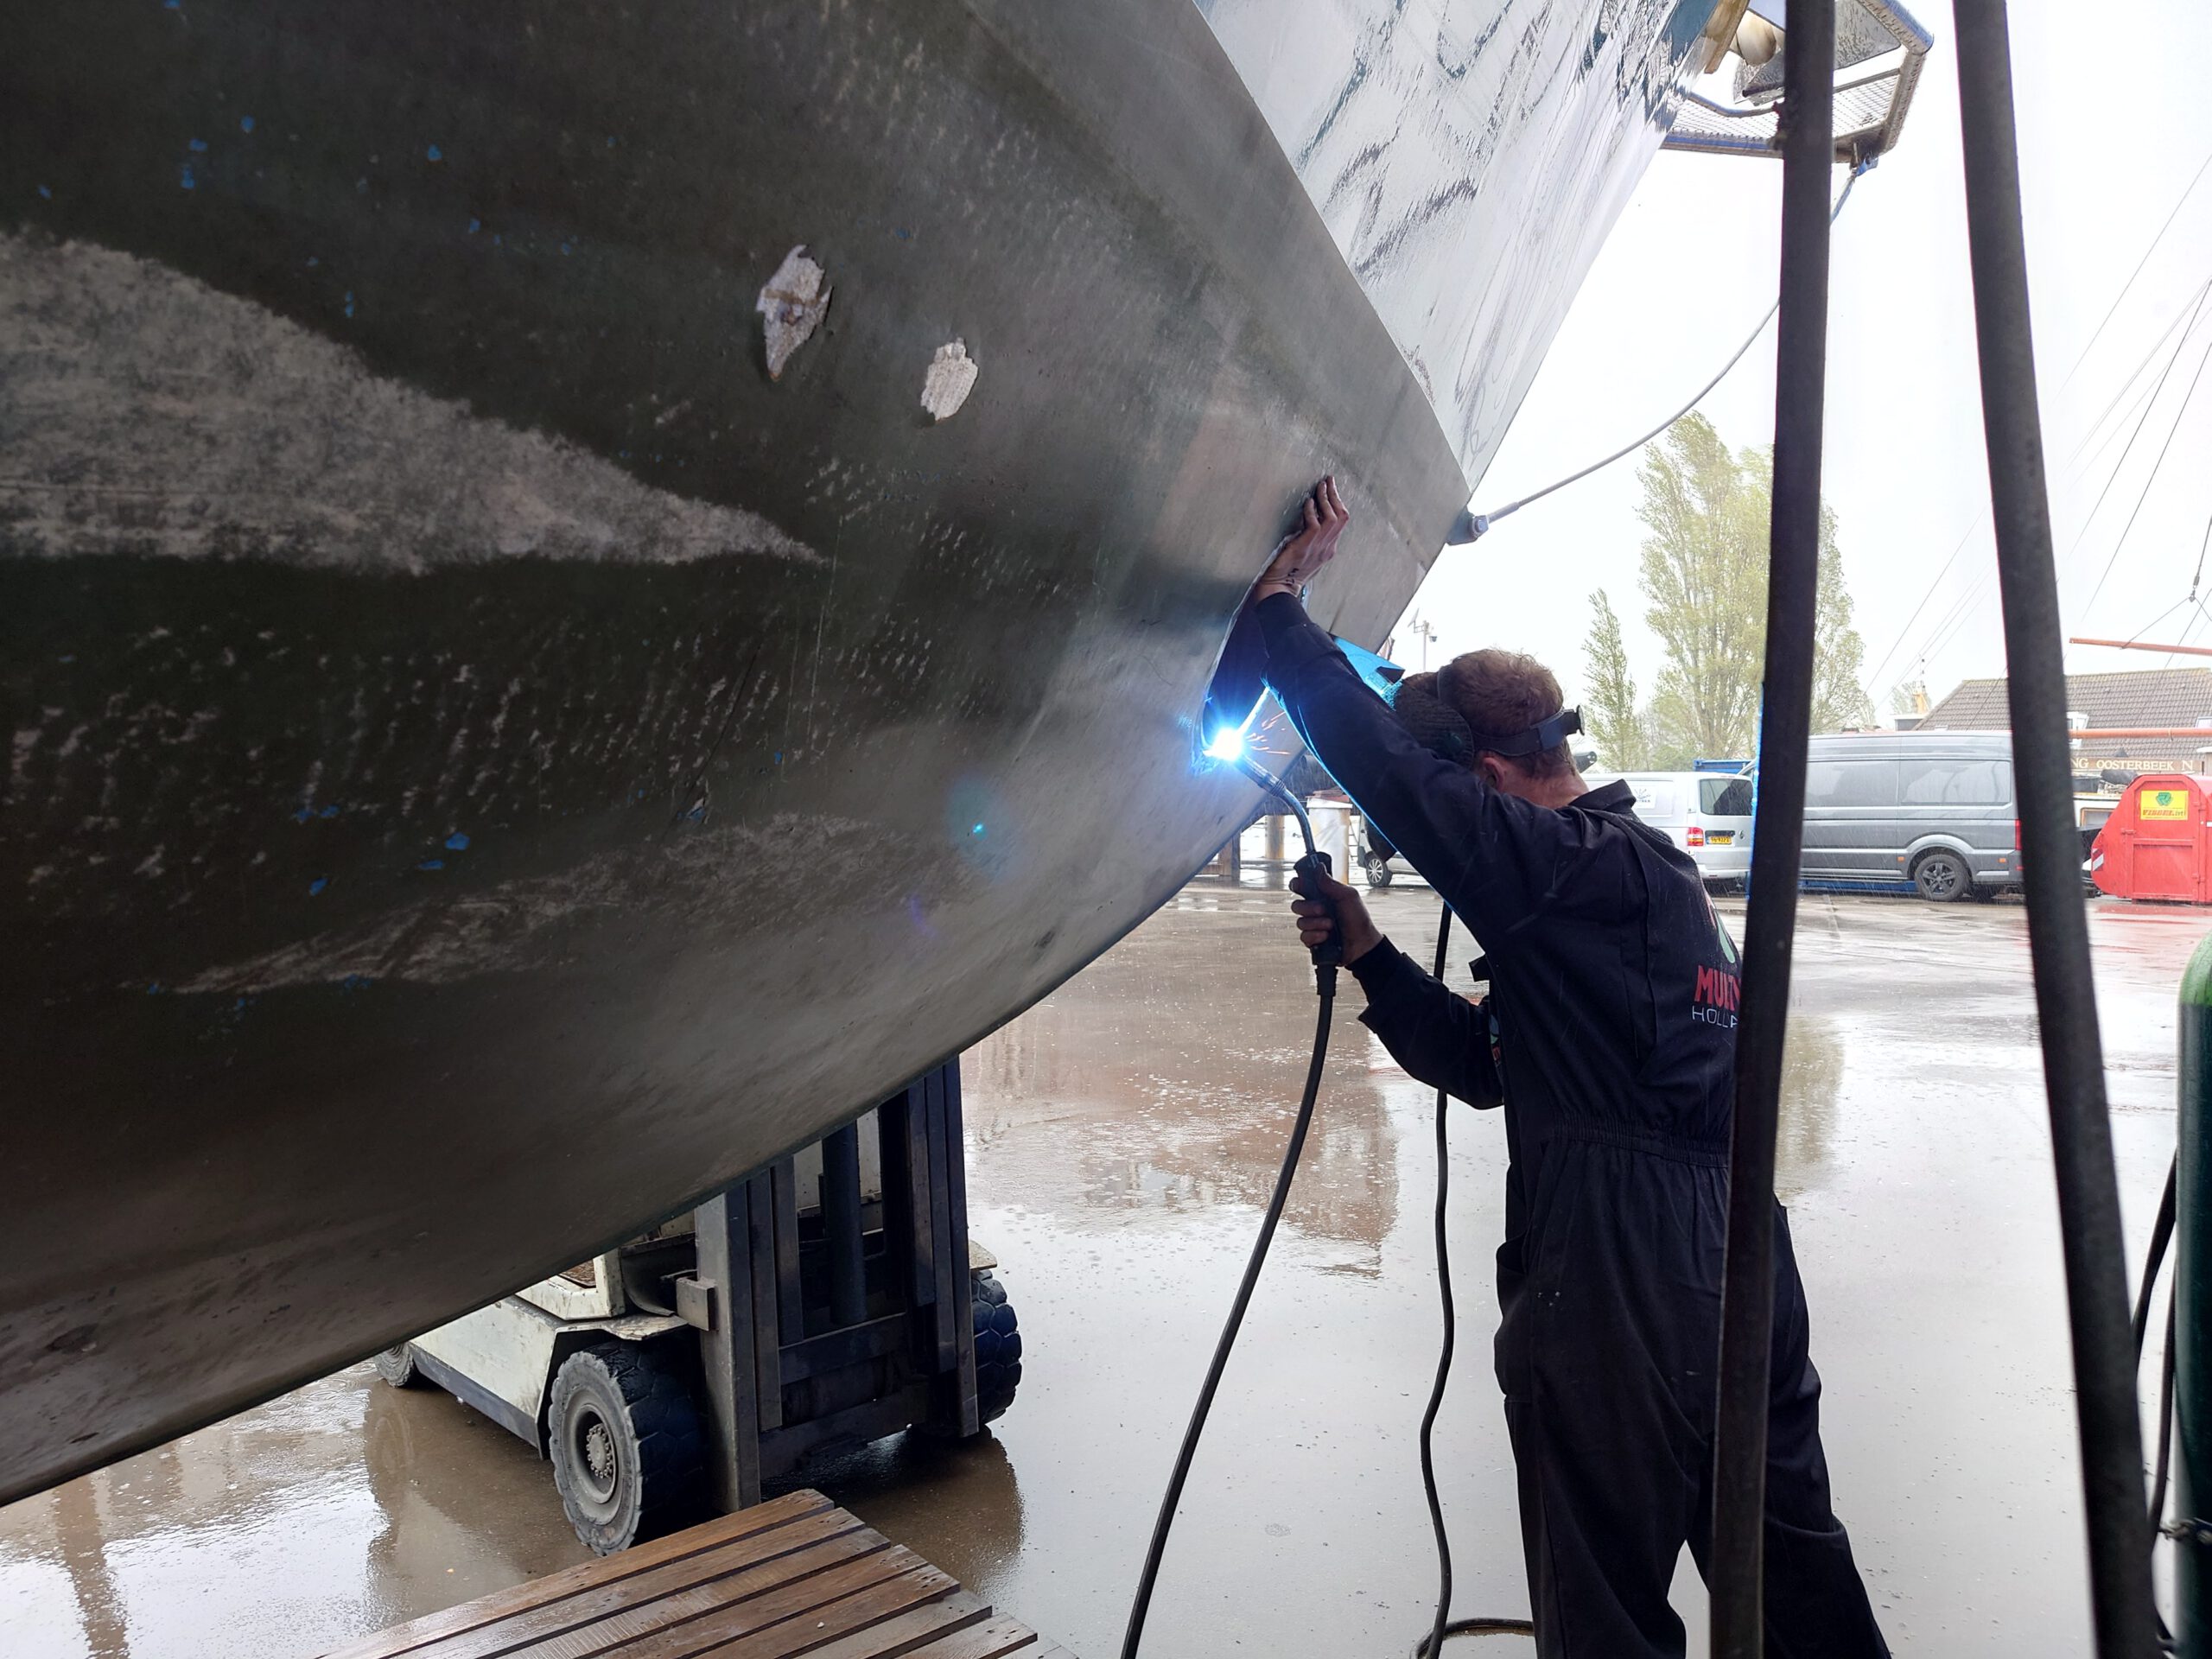
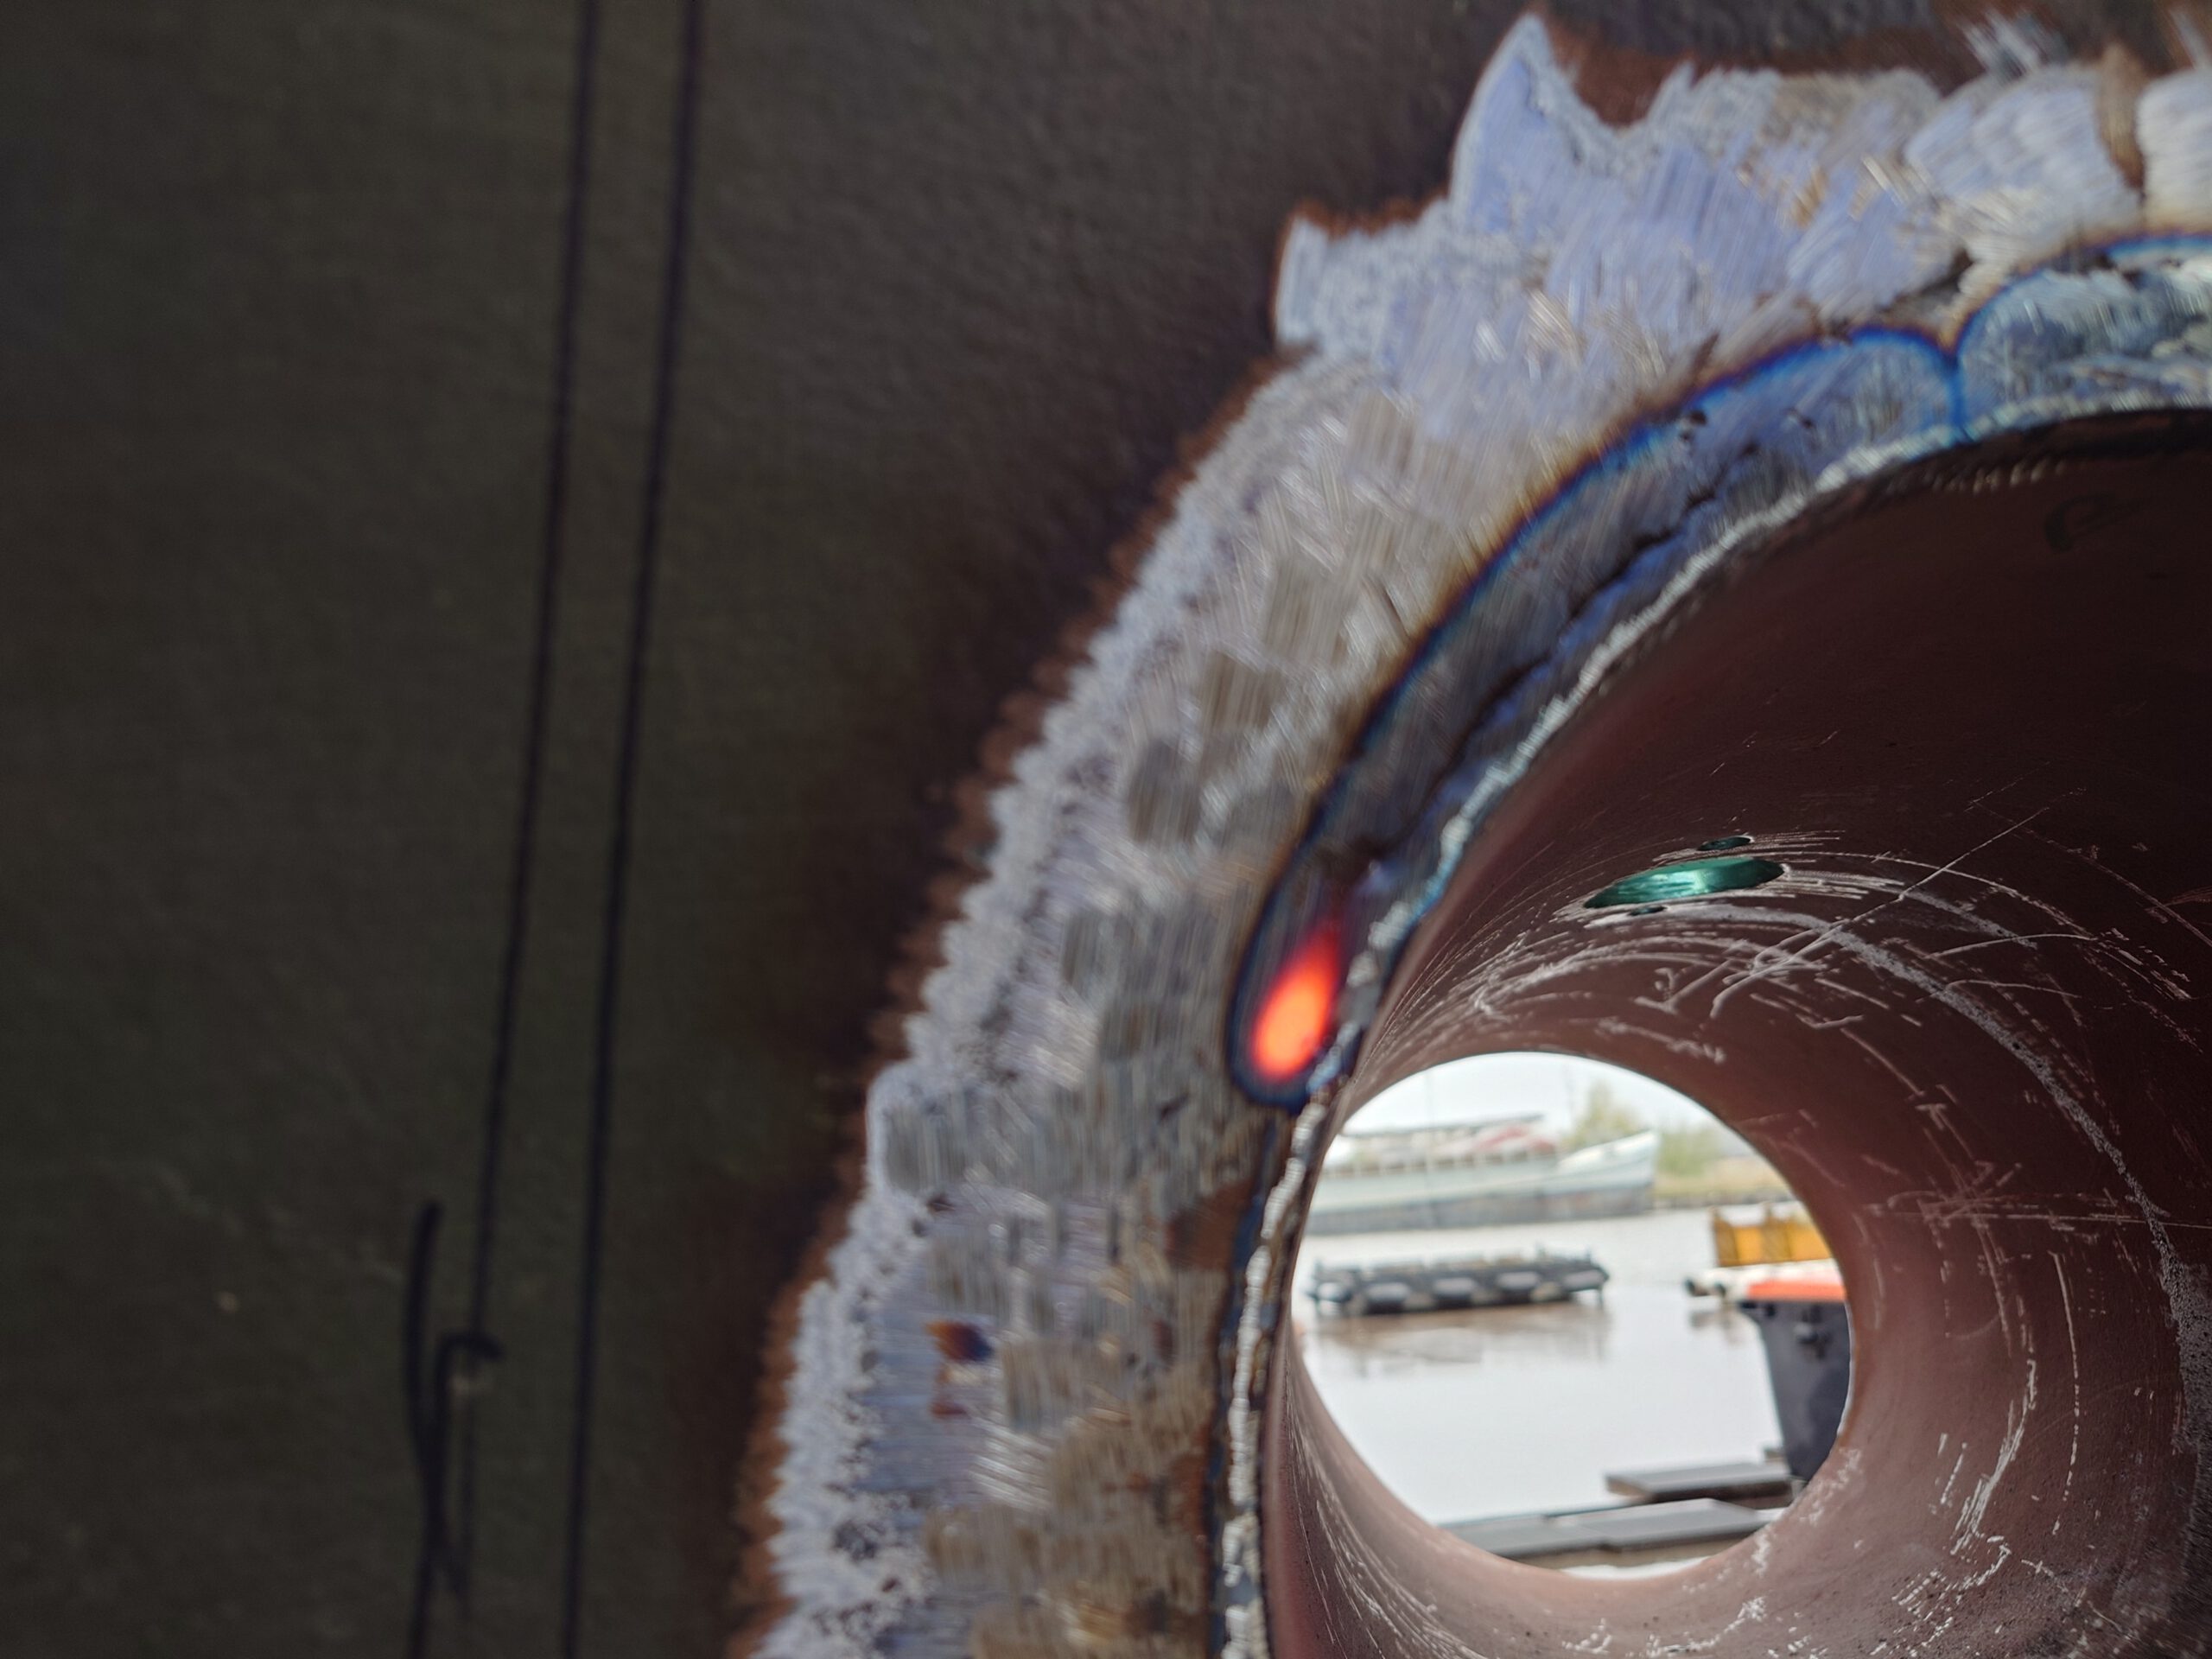
Then, the welder guy comes and he starts welding on the outside:
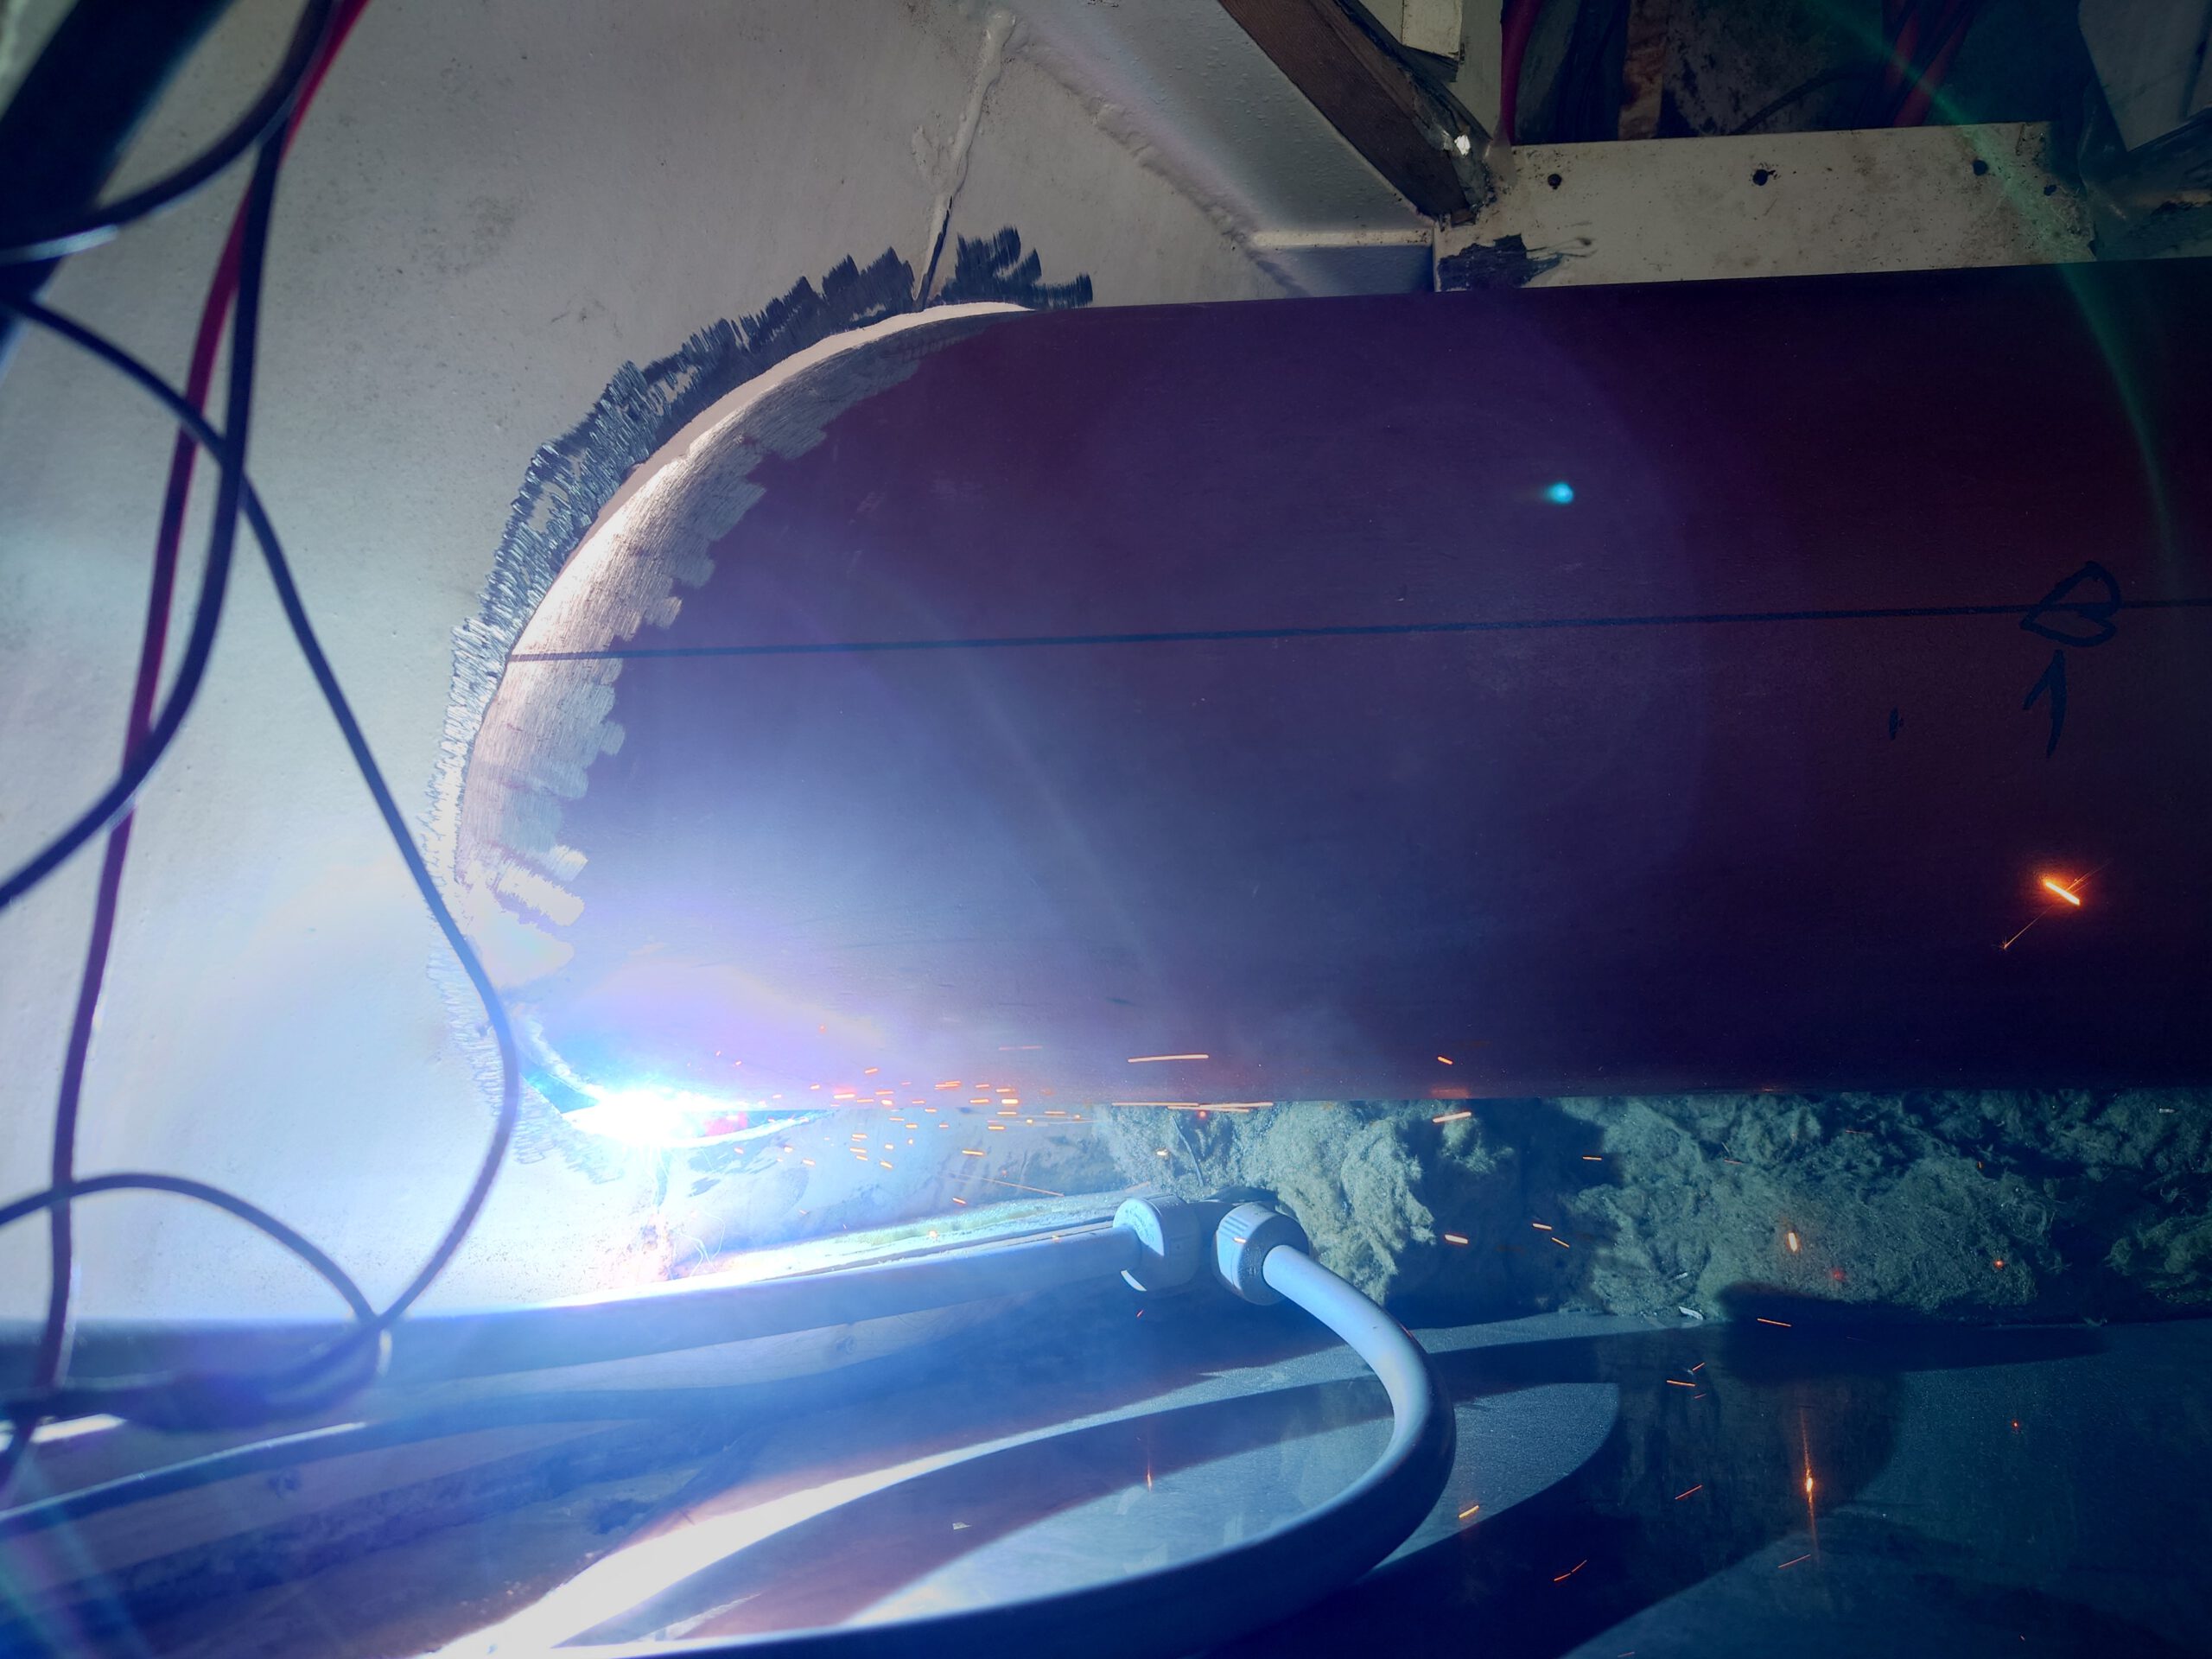
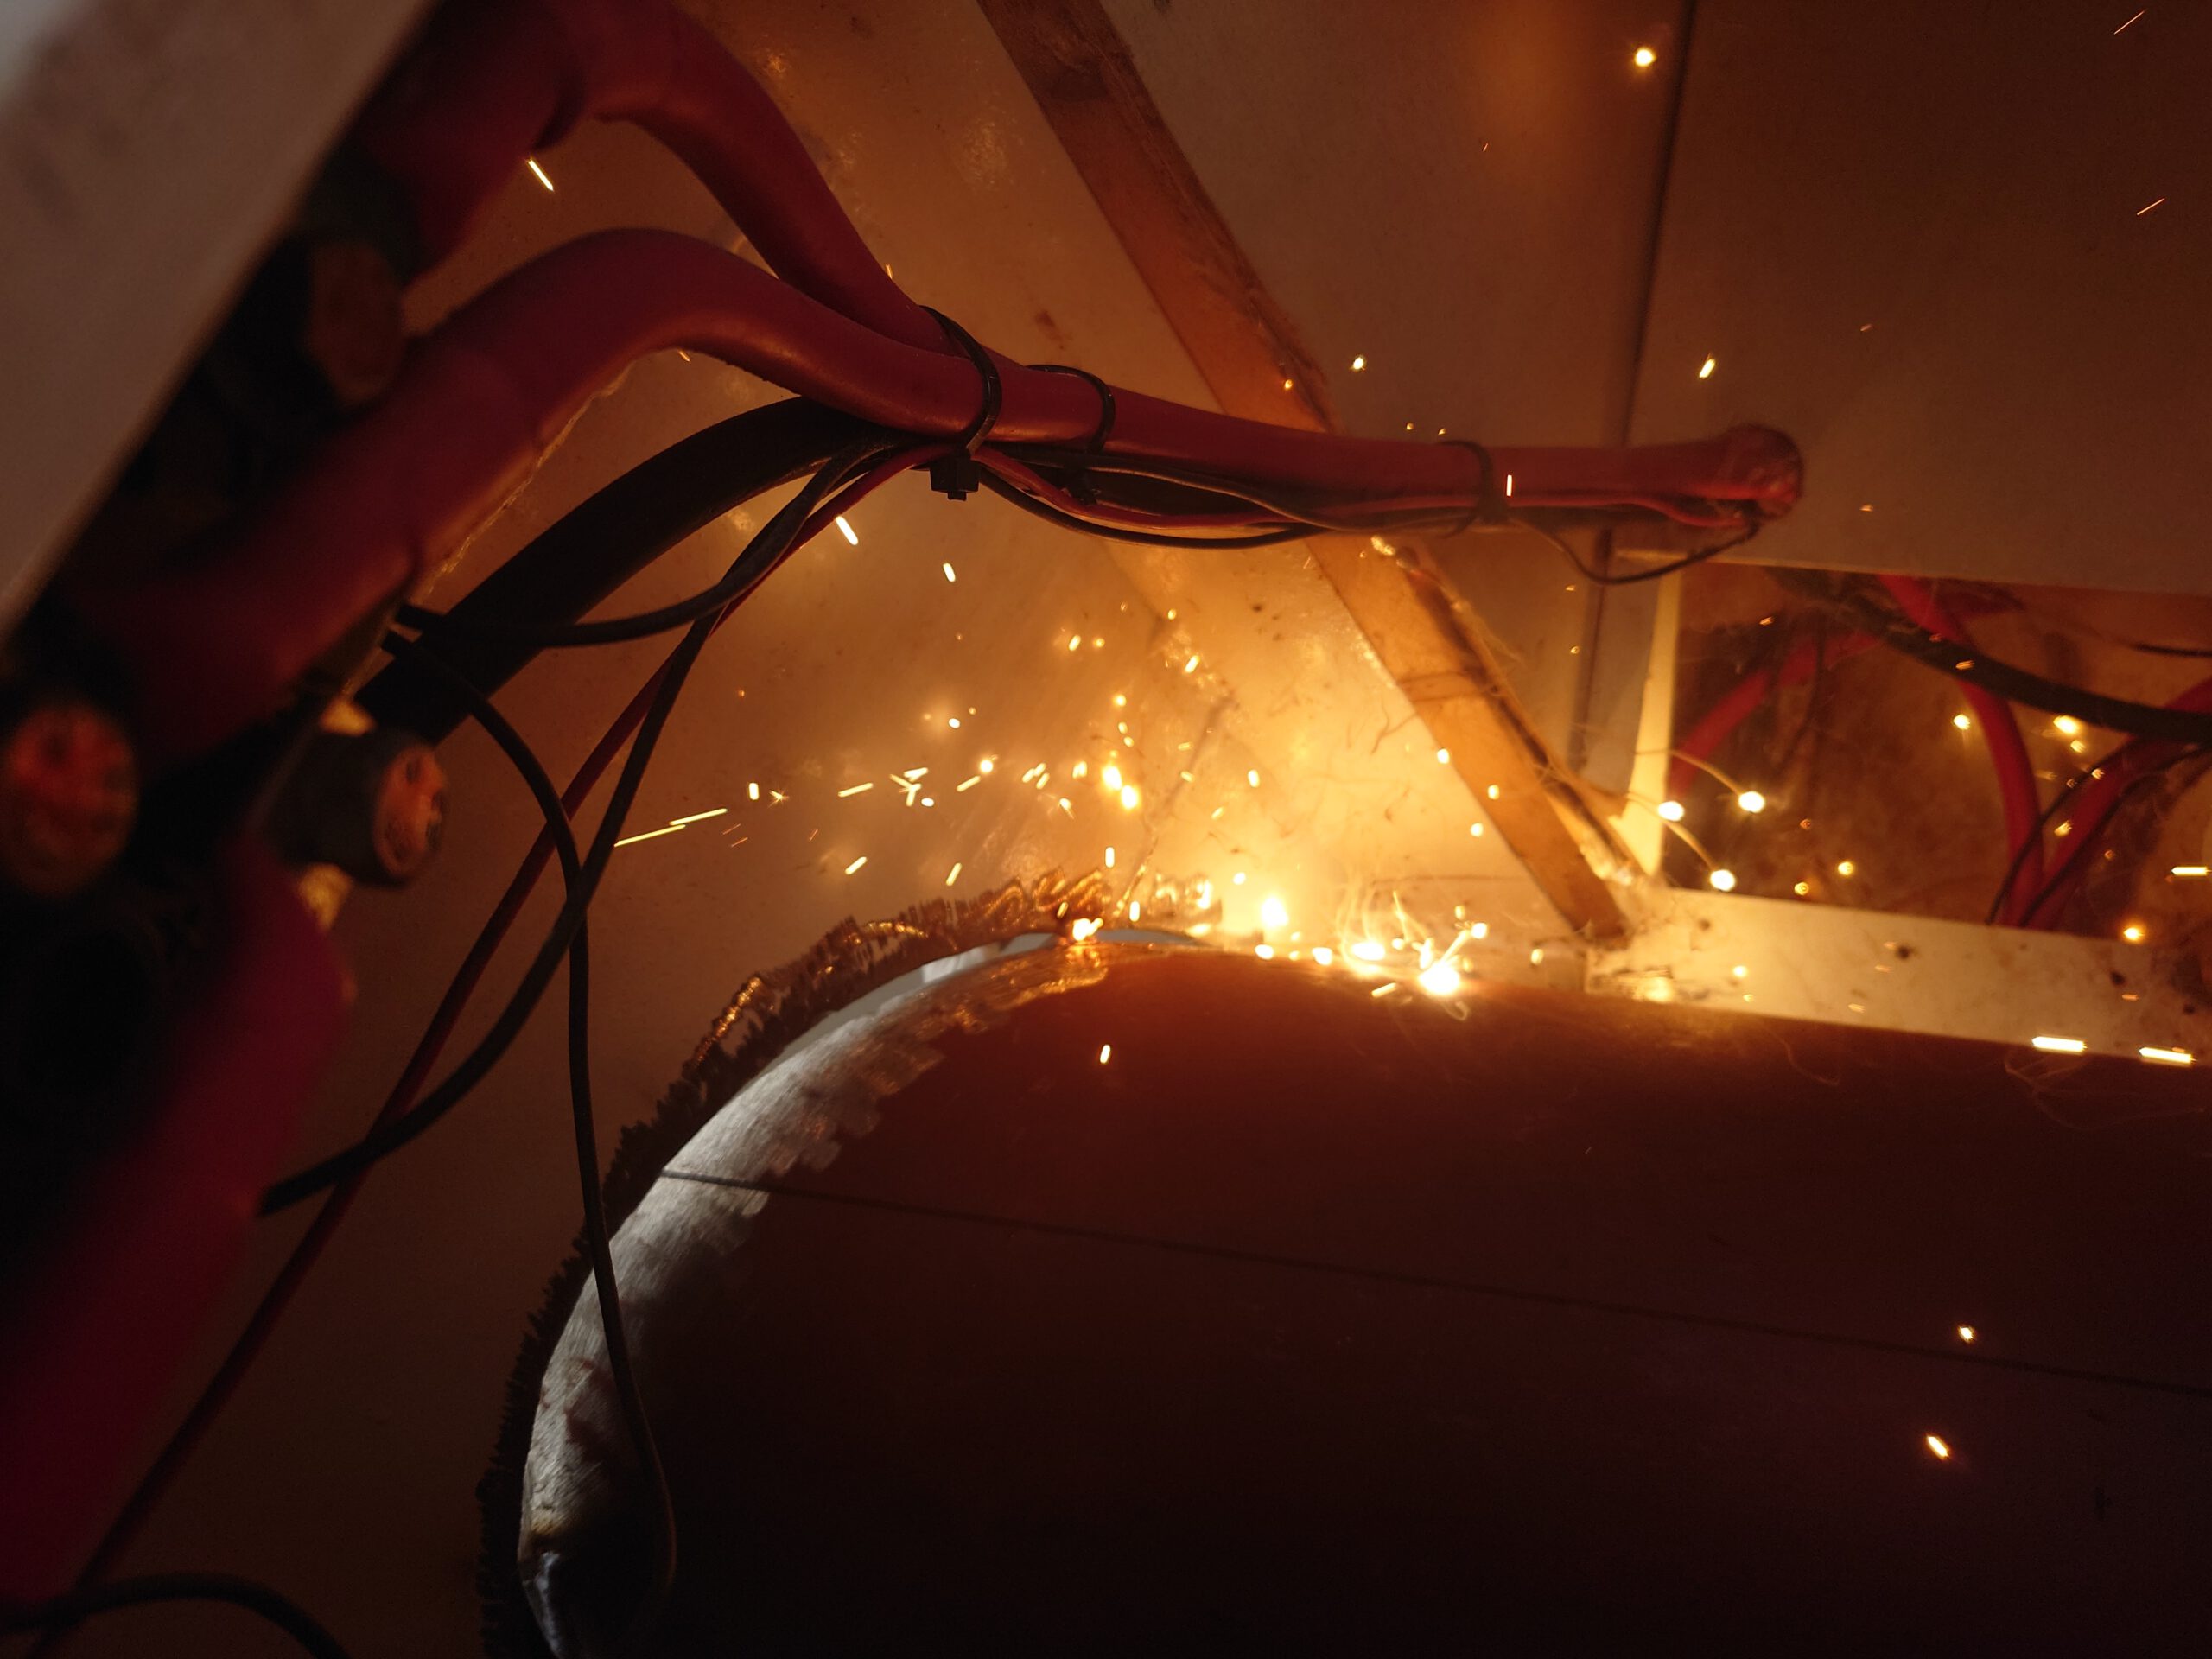


This guy is a pro. The way he he fills the (sometimes big) gaps with liquid steel shows his skills. When we ask him how he knows that the weld is going to be watertight he says: I know that from looking into the weld and seeing the quality of it. He’s even a little bit insulted by the question. He says, “I have never had a leaking weld. No once in my lifetime.” Hopefully, we won’t be the first!
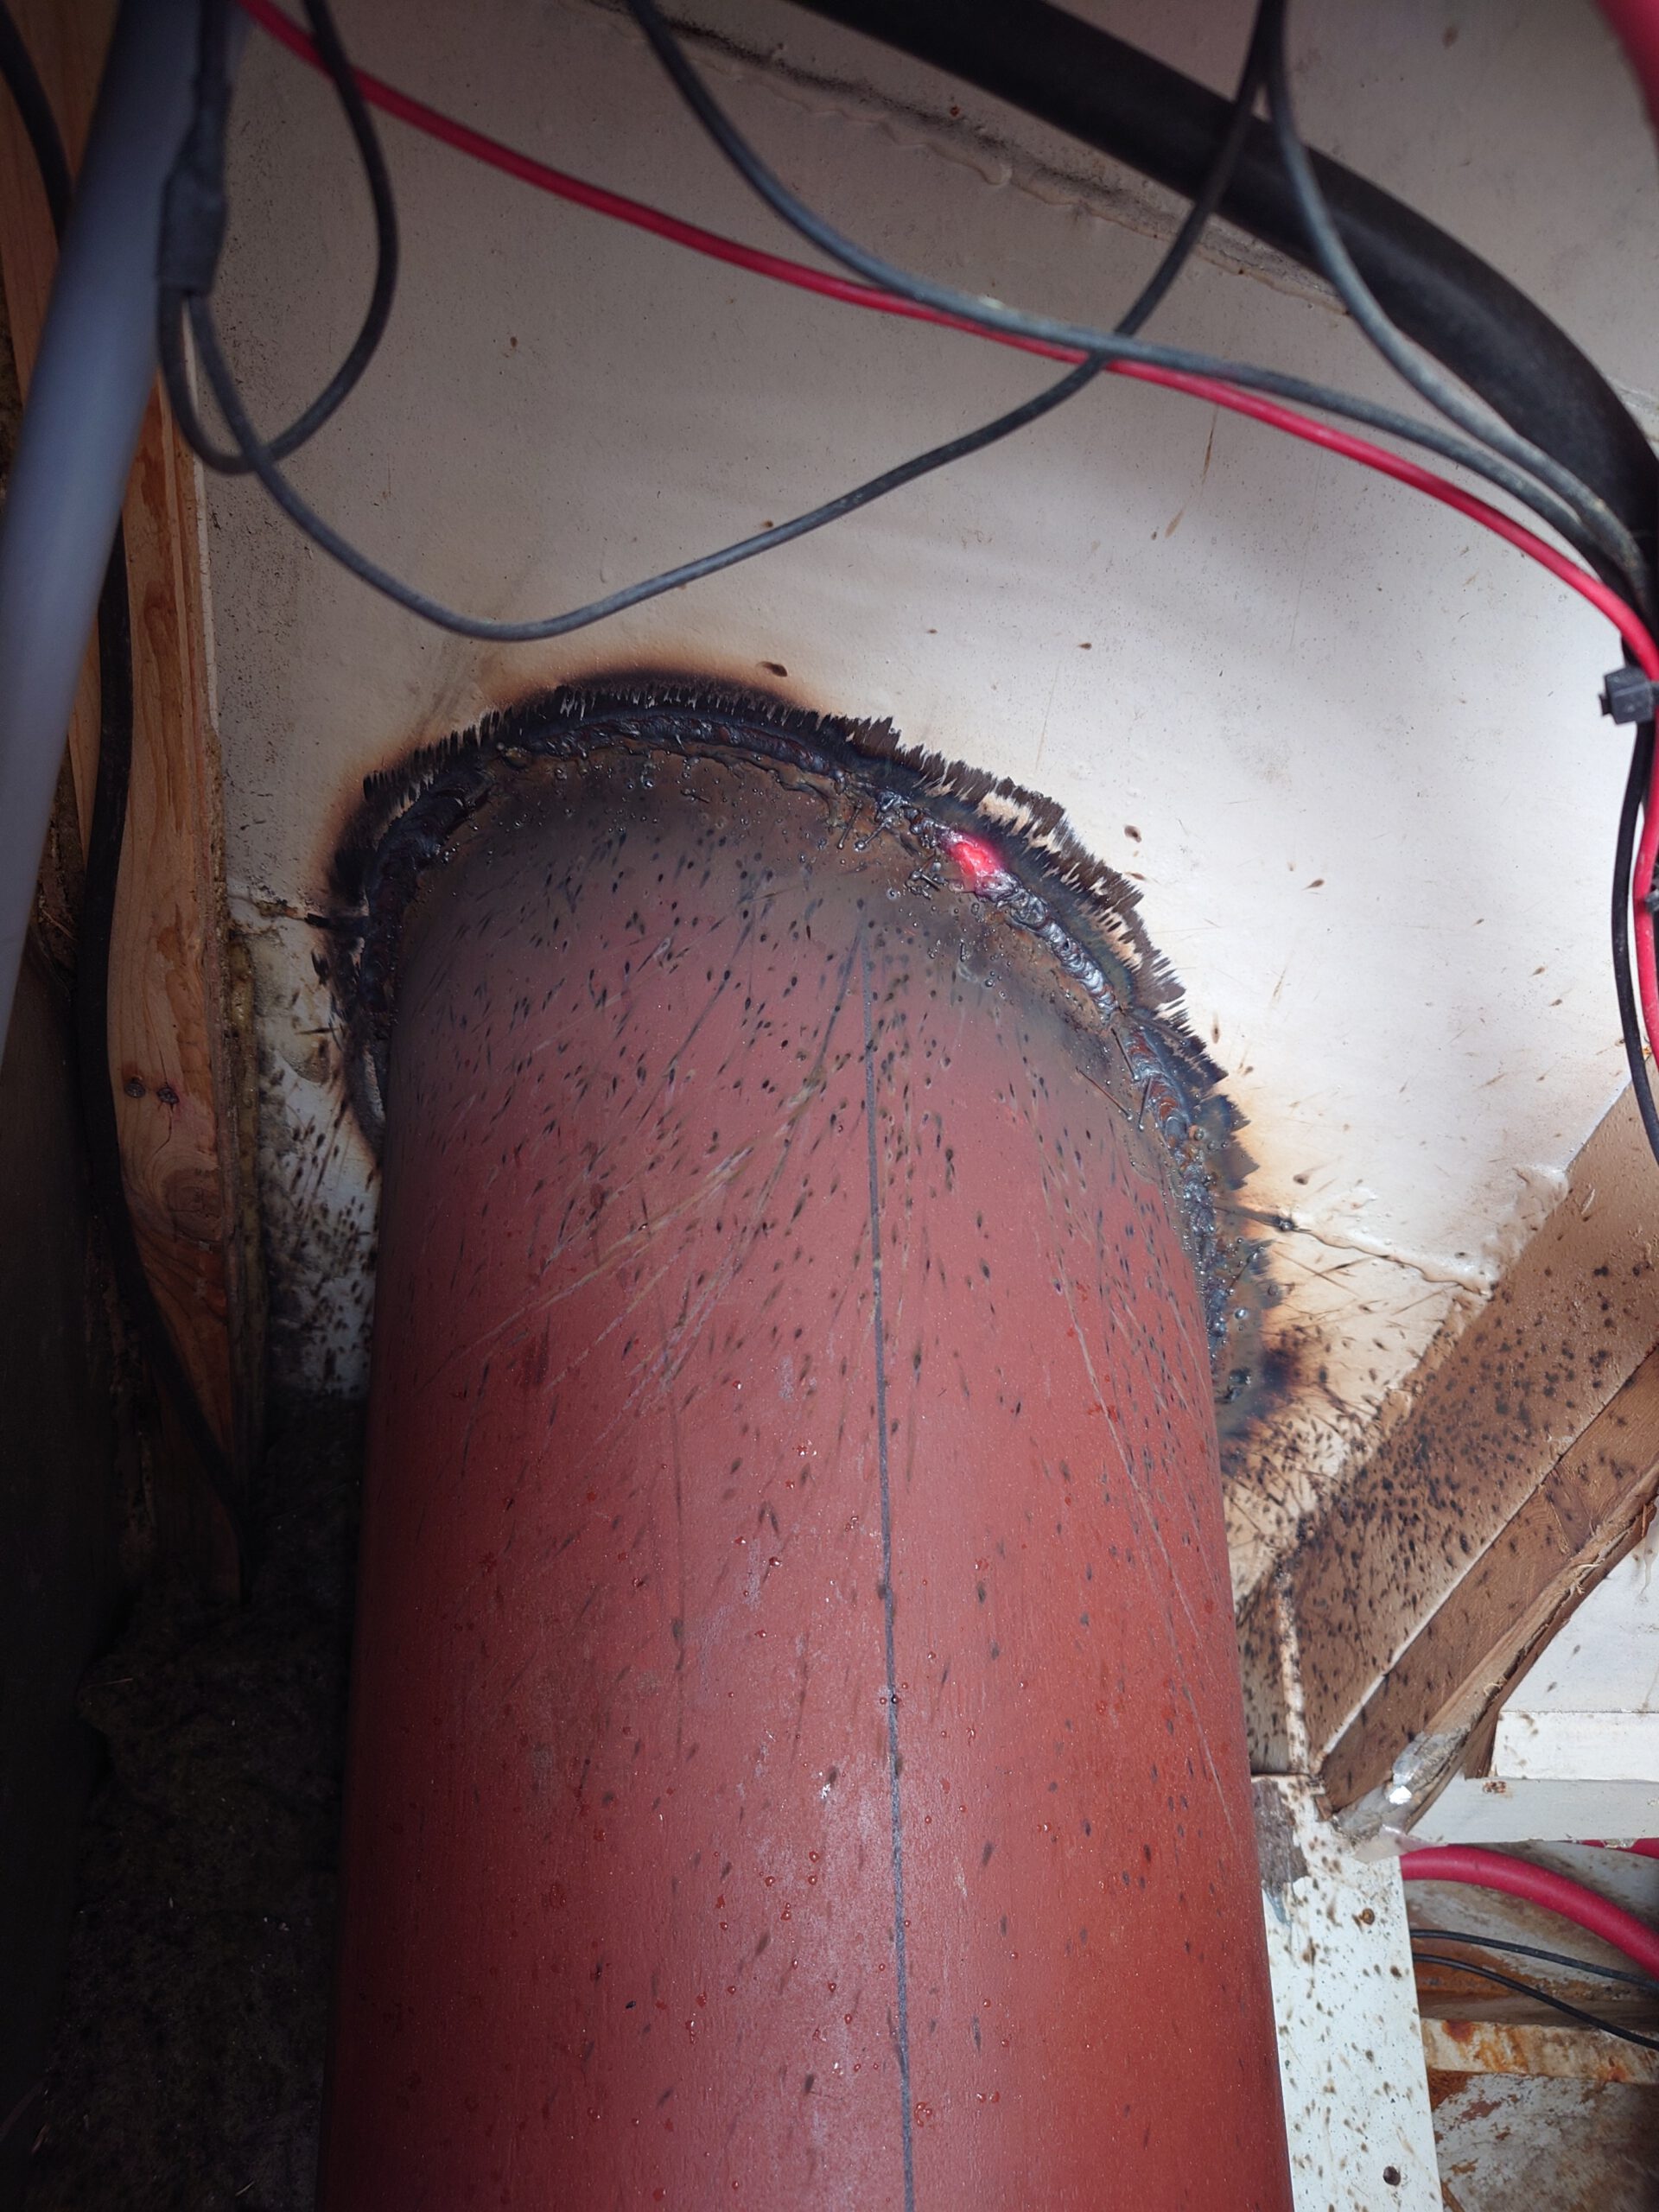
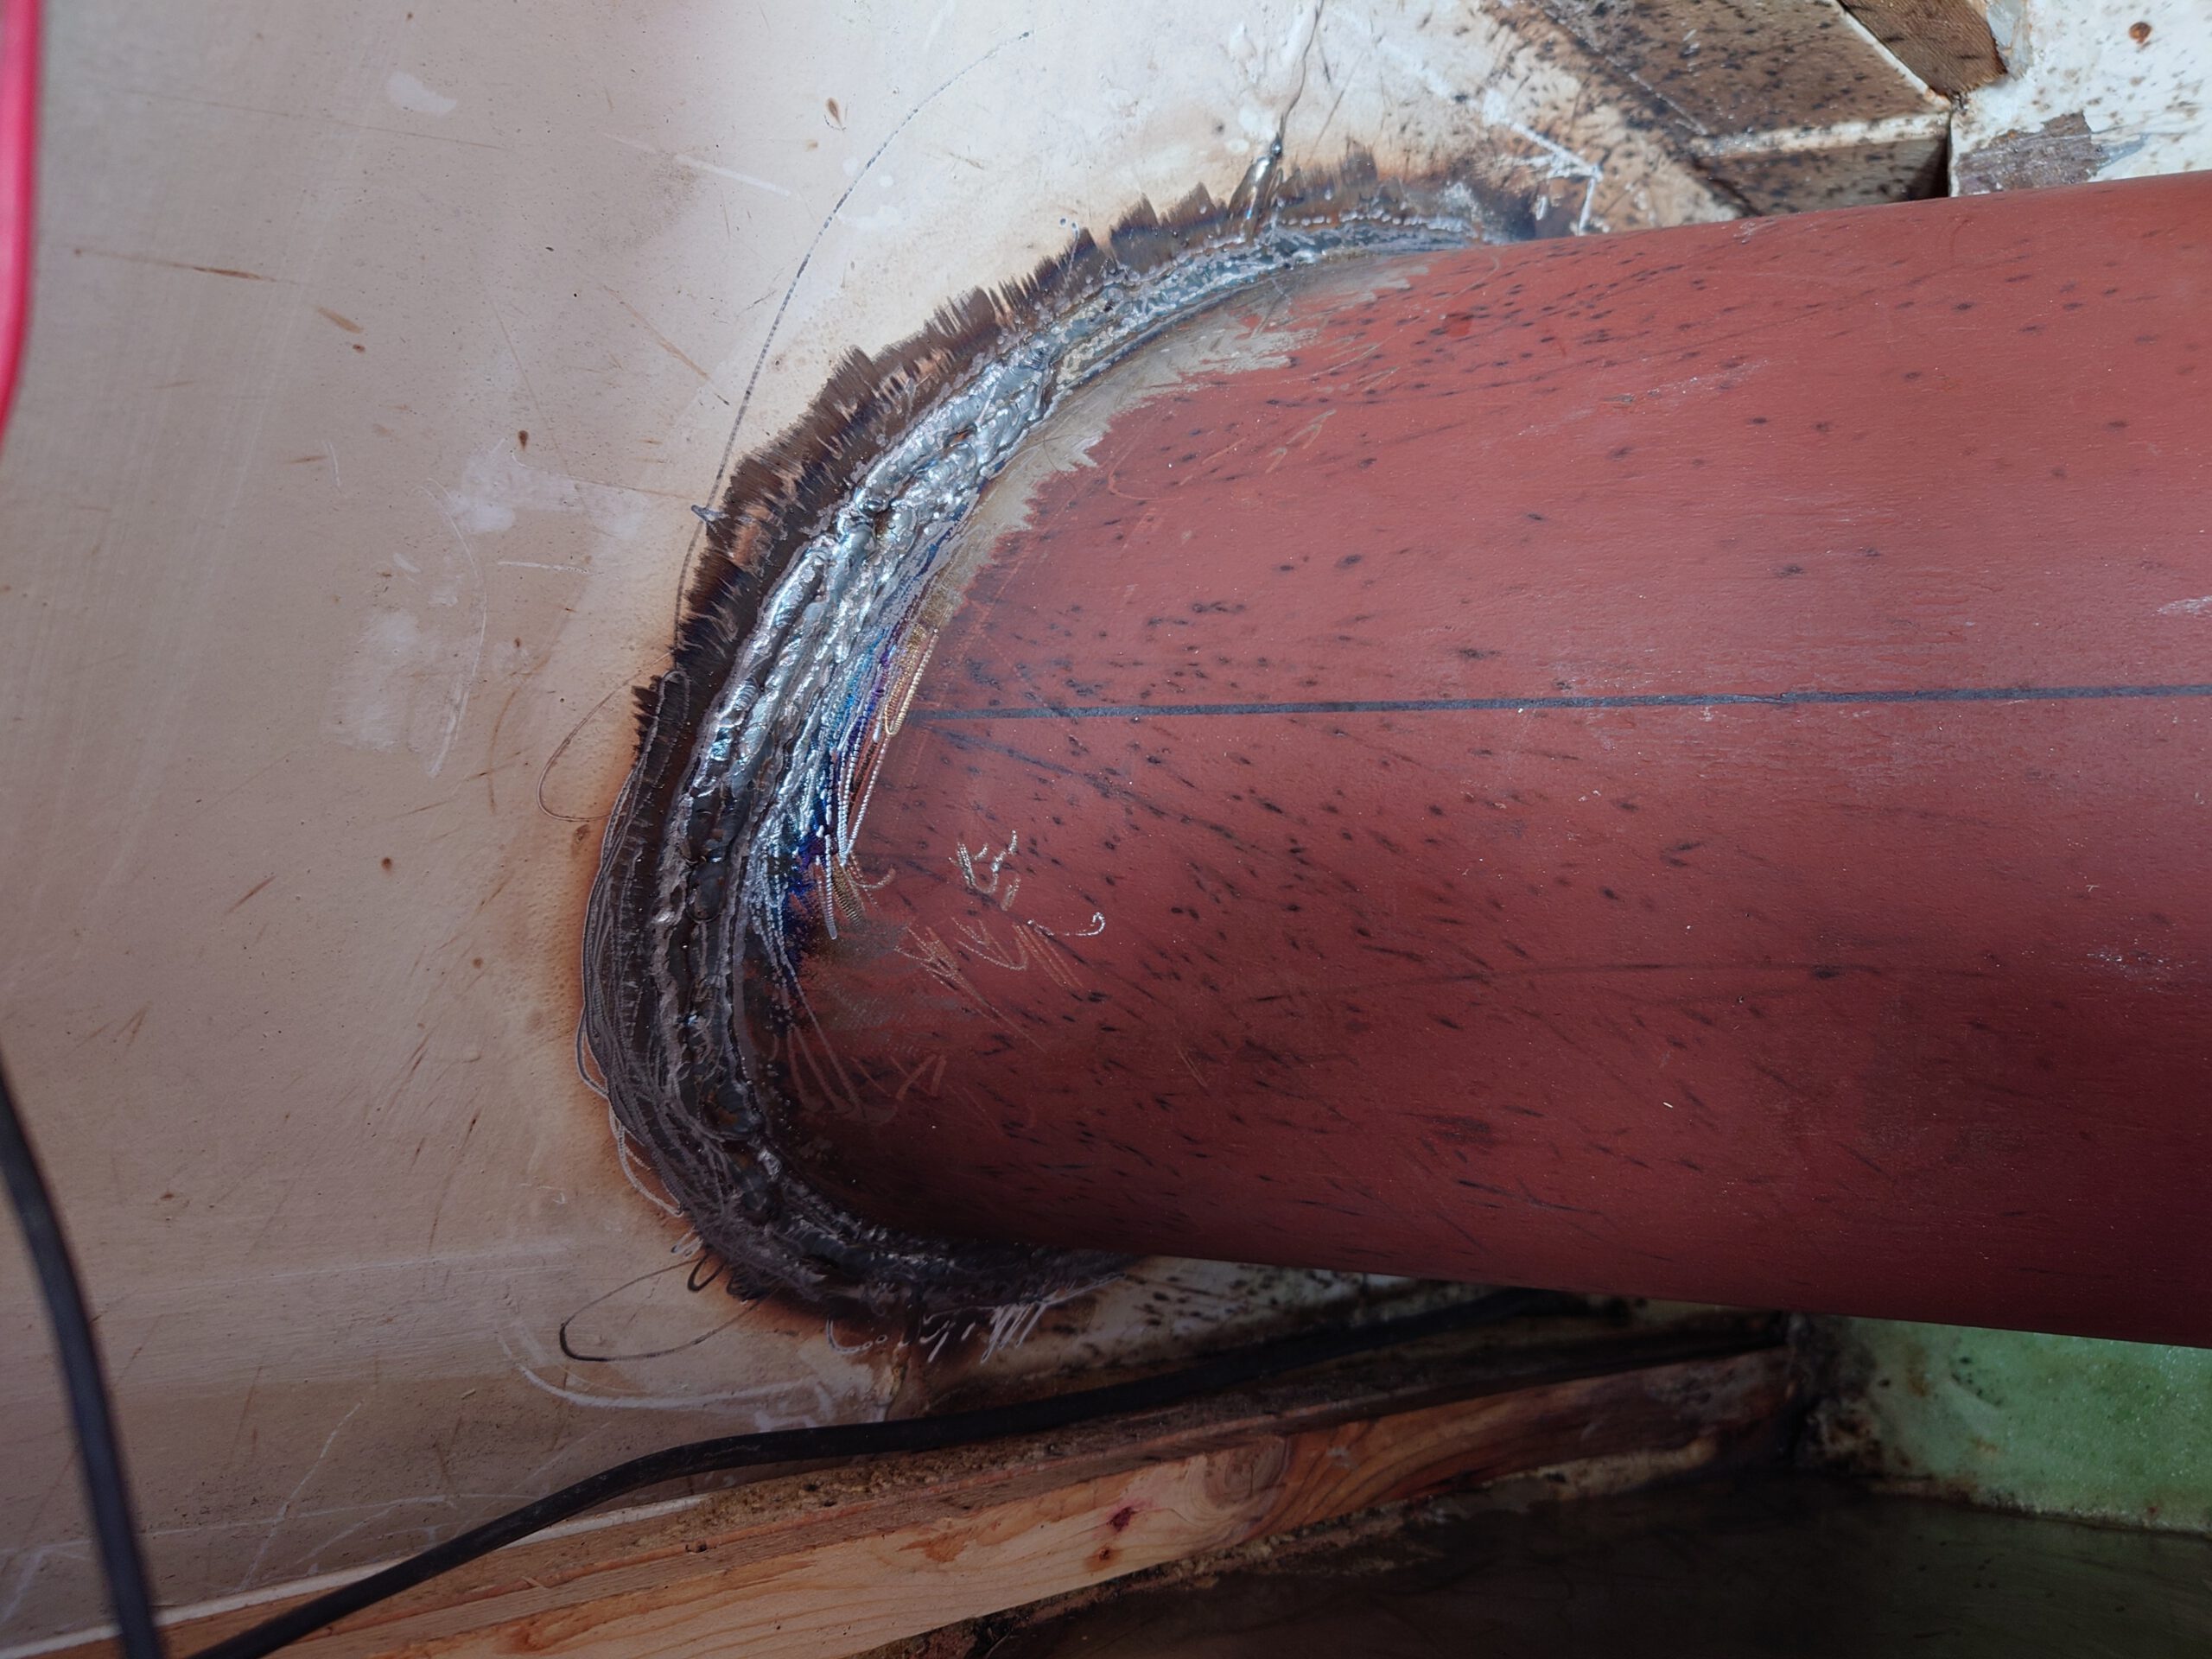
Next, he welds from the inside. He can’t reach under the tube but he explains: the fitting of the tube to the bottom of the hole is very precise. There, a V-shaped weld is made. So, that is a through-and-through weld. The play in the holes is of course at the top side, because of the weight of the tube pressing on the bottom part. Filling that play with a weld is slightly more difficult and won’t be a massive through-and-through weld. But here, we can reach from the inside to make a double weld. First the weld is grinded flat on the inside and then he adds a weld:

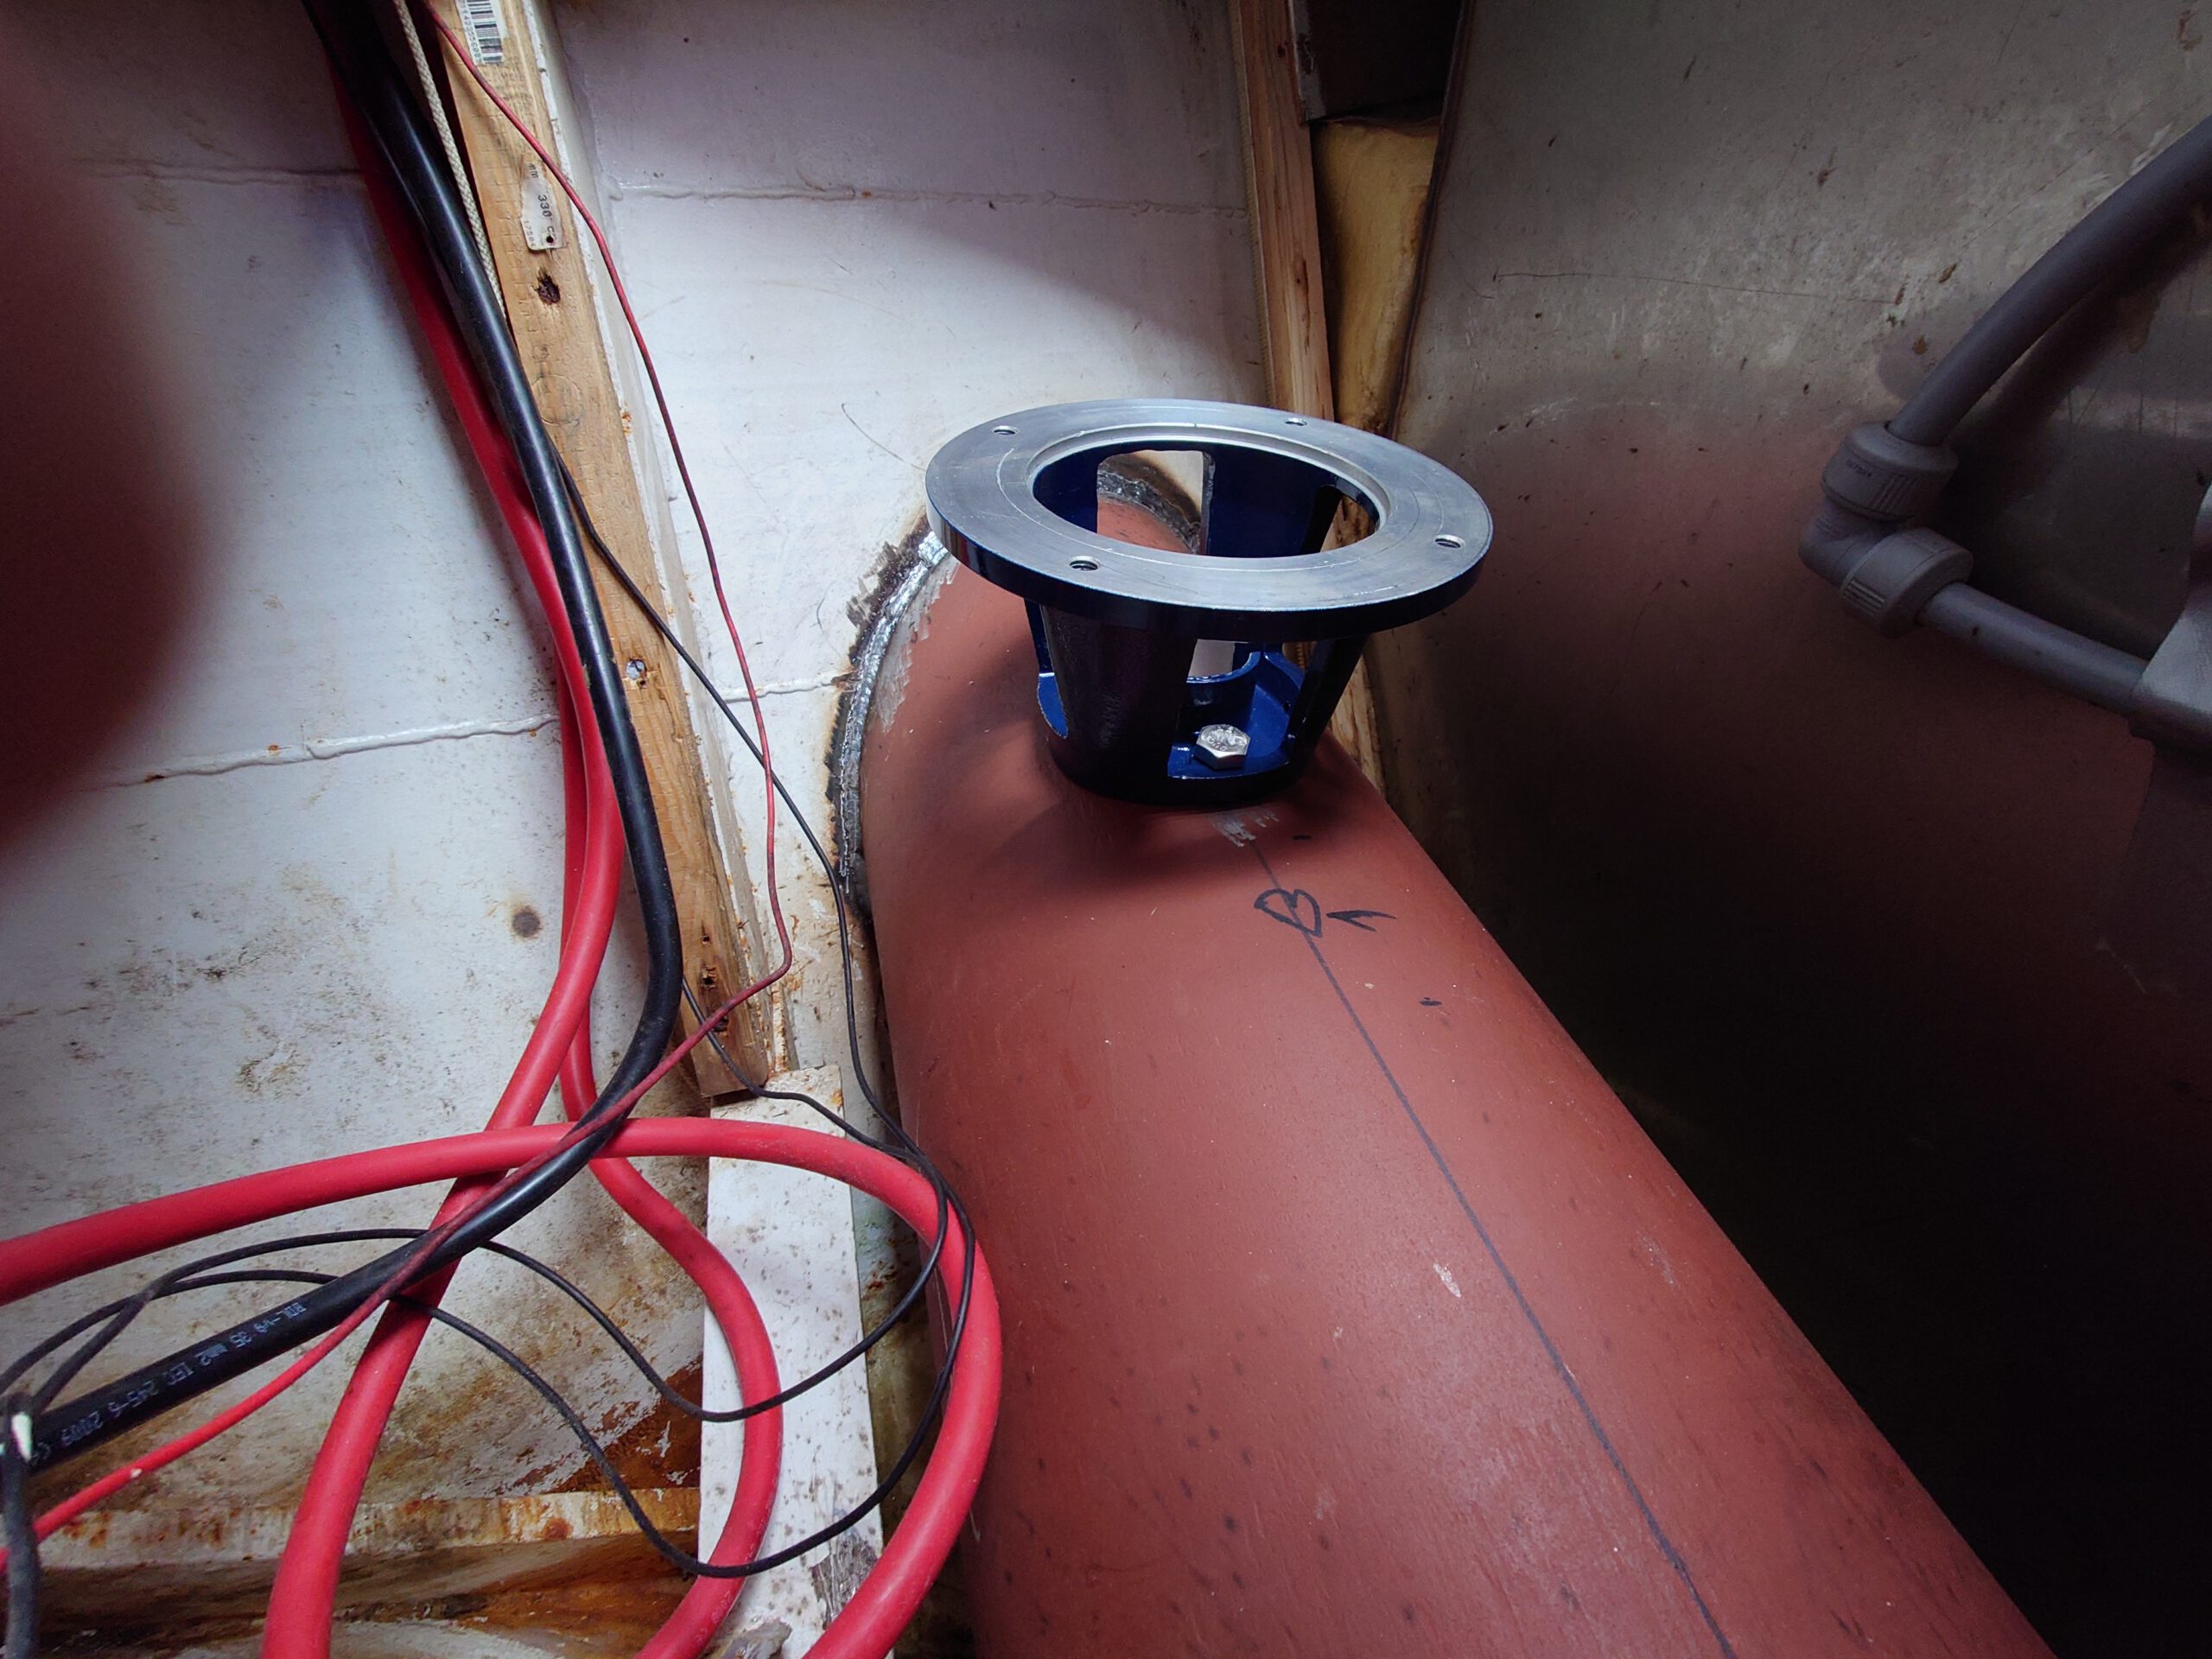
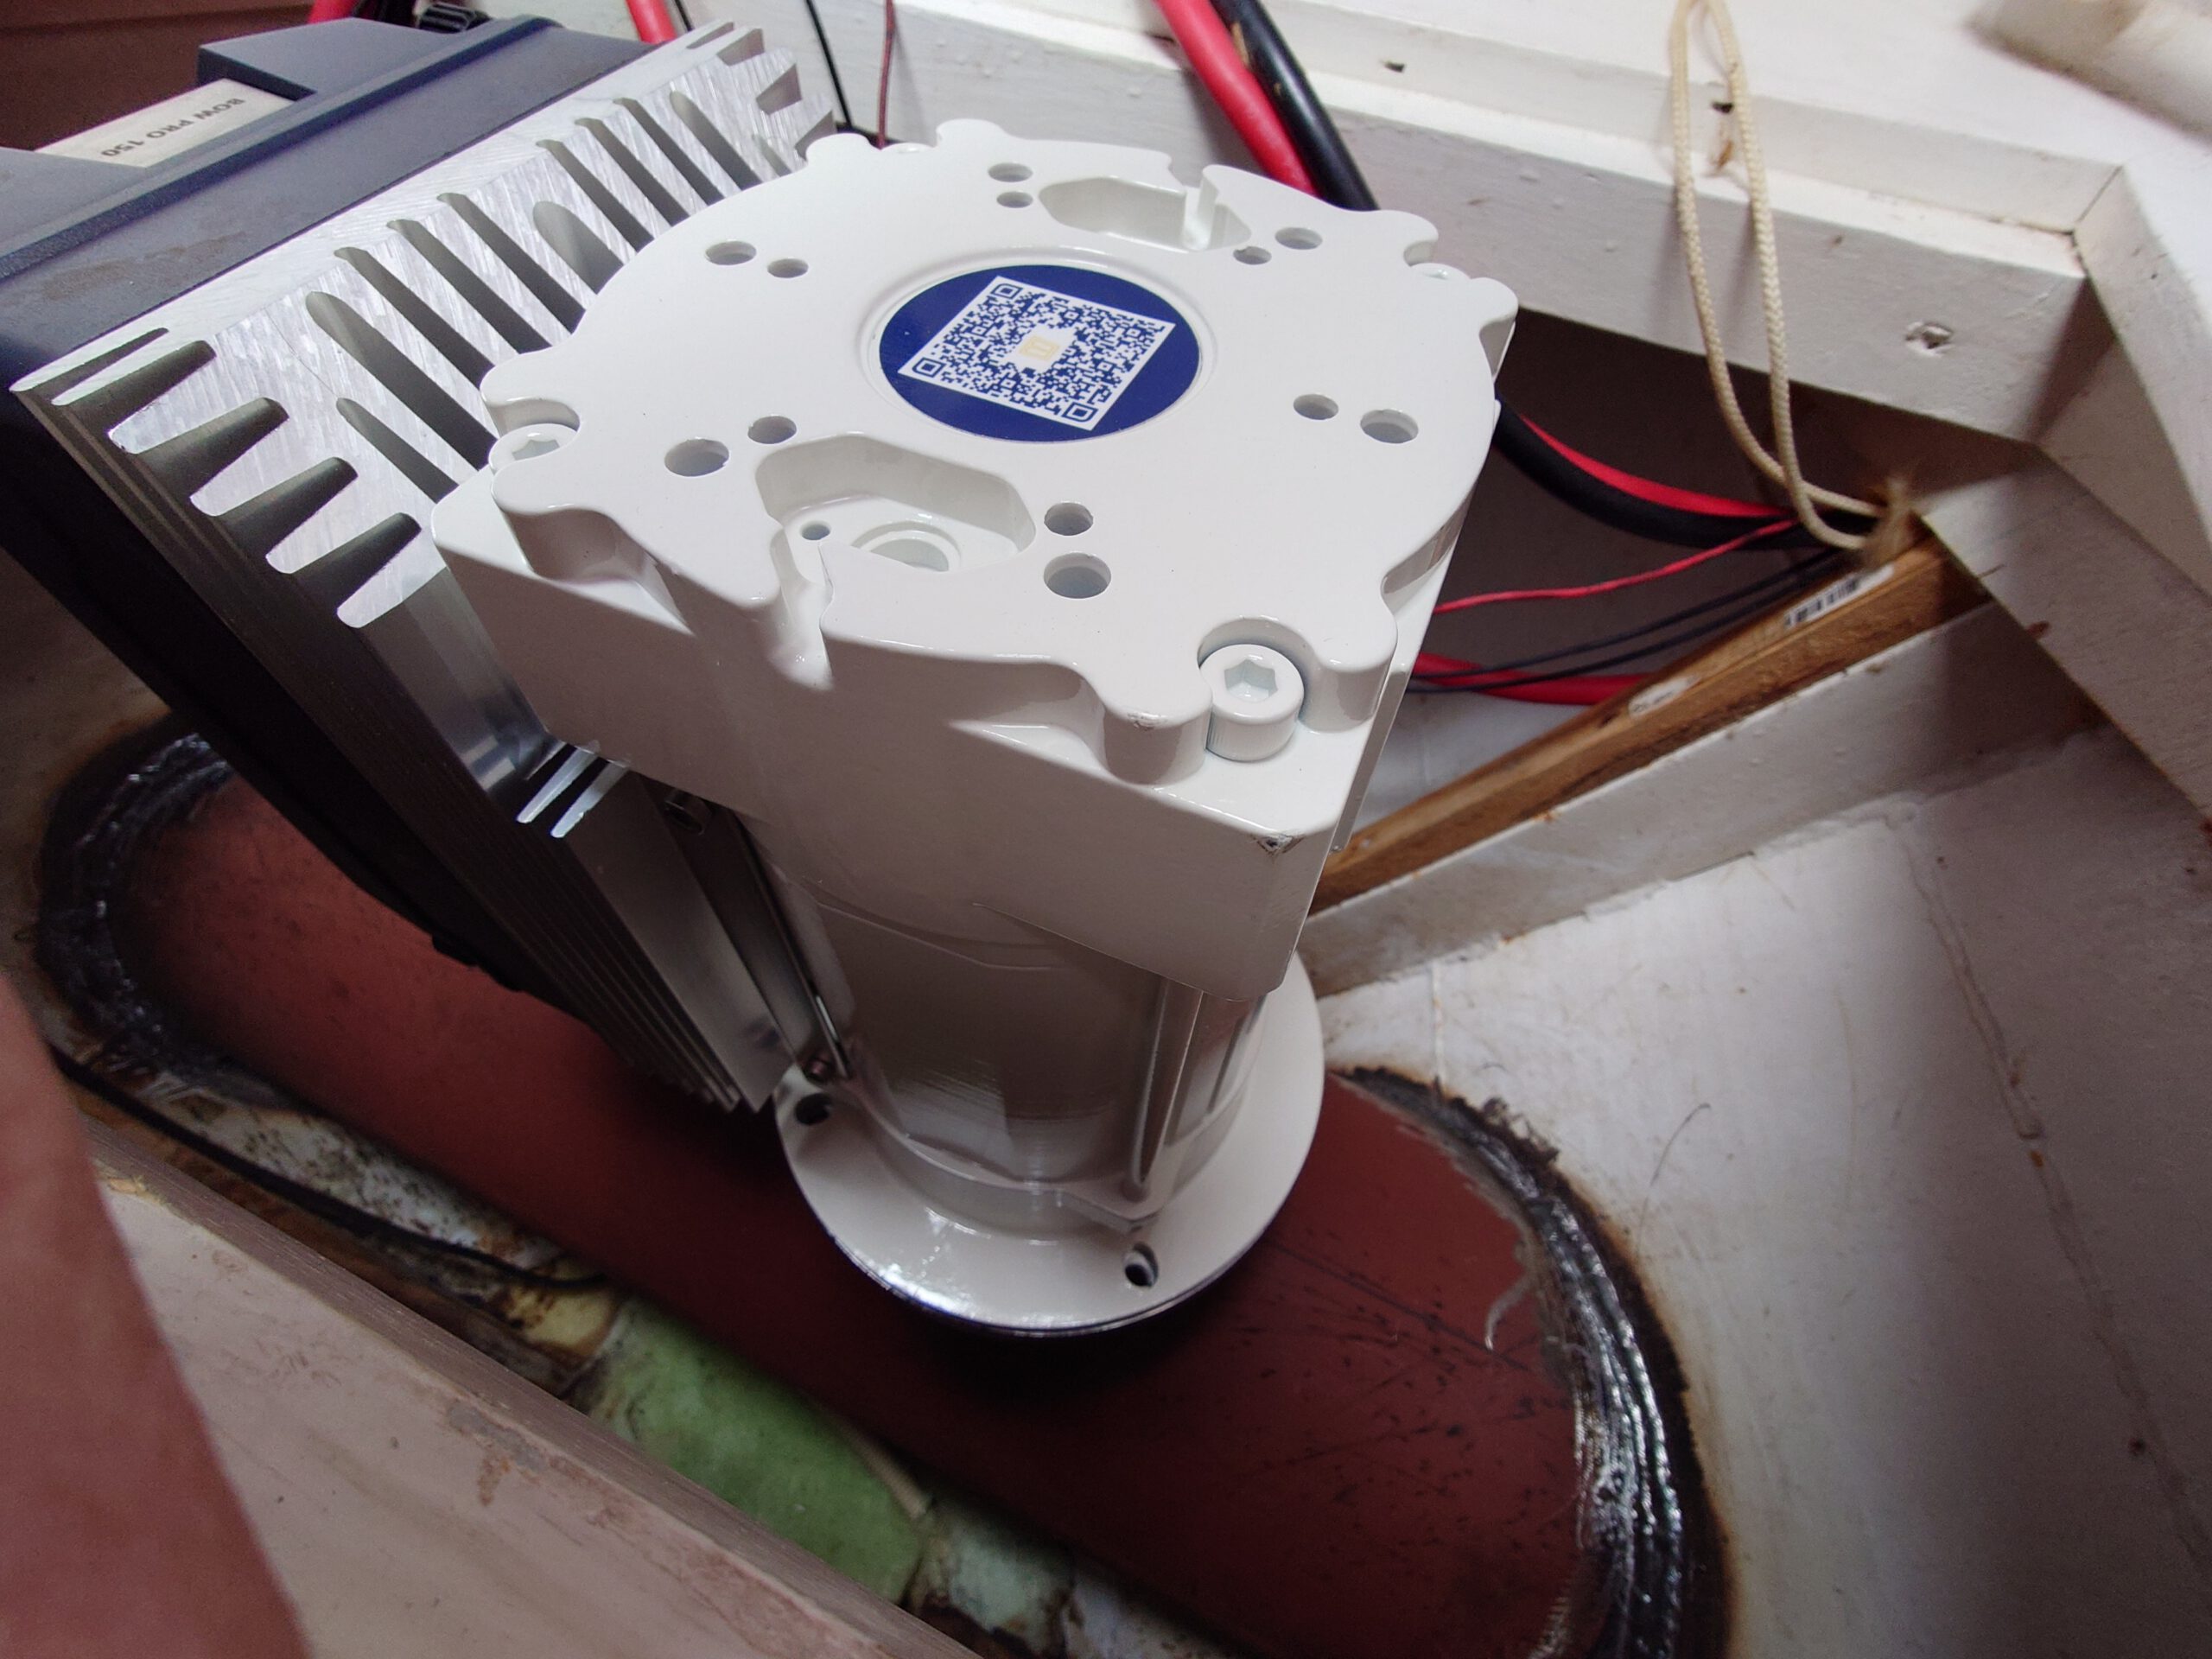
We try the position of the electric motor and it all looks good. We will have to rebuild the bottom of the bed a little bit though, as the motor is slightly higher than it.


Leave a Reply